소개
This guide will assist you in efficiently replacing the memory modules (also known as RAM) in your Dell Inspiron 15-5565. Please see this page to perform troubleshooting.
Some common identifying factors that indicate RAM replacement is needed include the Blue Screen of Death, random reboots, and overall decline in device performance.
Specifications:
- Two SODIMM slots
- Single or Dual-channel DDR4
필요한 것
-
-
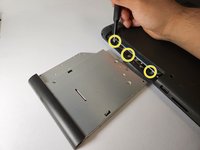
Remove the 4 mm screw that secures the optical drive bracket to the optical drive using a Phillips #00 screwdriver.
-
-
-
-
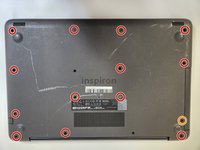
Remove 13 8 mm screws from the bottom of the device using a Phillips #00 screwdriver.
-
Remove the single 4 mm screw from the bottom of the device using a Phillips #00 screwdriver.
-
Remove the three 4 mm screws from the optical drive slot using a Phillips #00 screwdriver.
-


To reassemble your device, follow these instructions in reverse order.
To reassemble your device, follow these instructions in reverse order.

팀

University of New Orleans, Team 4-5, McDonald Spring 2023 University of New Orleans, Team 4-5, McDonald Spring 2023 회원
UNO-MCDONALD-S23S4G5
4 회원들
안내서 6개를 작성함