주요 콘텐츠로 건너뛰기

Dell Inspiron 15-7547 Hard Drive Replacement

필요한 것

  1. Dell Inspiron 15-7547 Hard Drive Replacement, Bottom Cover: 1 단계, 이미지 1/1
    • Before you begin, be sure to turn off your laptop and unplug it from the outlet.

    • Close the display and flip the laptop on its back.

    • Loosen the ten 5.0 mm-long Phillips #0 screws.

    • The four screws marked with orange will remain captive to the cover.

  2. Dell Inspiron 15-7547 Hard Drive Replacement: 2 단계, 이미지 1/1
    • Use a spudger to pry up and loosen the back cover.

    • Remove the back cover.

  3. Dell Inspiron 15-7547 Hard Drive Replacement, Hard Drive: 3 단계, 이미지 1/2 Dell Inspiron 15-7547 Hard Drive Replacement, Hard Drive: 3 단계, 이미지 2/2
    • Remove the four 5.0 mm-long Philips #0 screws connecting the hard drive to the chassis.

  4. Dell Inspiron 15-7547 Hard Drive Replacement: 4 단계, 이미지 1/2 Dell Inspiron 15-7547 Hard Drive Replacement: 4 단계, 이미지 2/2
    • Disconnect the hard drive from the motherboard by placing your fingers at the back, and pulling forward towards the front of the chassis.

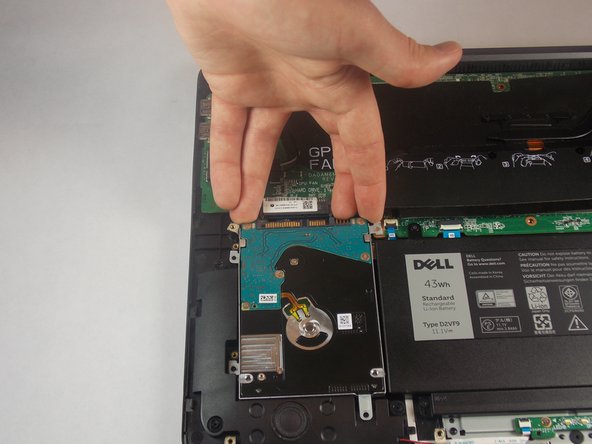
  5. Dell Inspiron 15-7547 Hard Drive Replacement: 5 단계, 이미지 1/1
    • Lift the hard drive out of the chassis.

결론

To reassemble your device, follow these instructions in reverse order.

다른 한 분이 해당 안내서를 완성하였습니다.

Isaac Brooks

회원 가입일: 09/10/18

355 평판

안내서 3개 작성하였습니다

댓글 0개

댓글 쓰기

조회 통계:

24 시간 전: 1

7일 전: 2

30일 전: 5

전체 시간: 672