소개
If your Dell Inspiron 1721 has a loud fan or is prone to overheating, use this guide to replace the internal fan.
Internal fans circulate cool air to a heat-sink, allowing the CPU to stay at a low temperature, even during stressful performance. Dusty internal fans will restrict airflow in any device.
Before using this guide, verify that the computer is completely shutdown.
필요한 것
-
-
Slide tabs outward to undo the locks.
-
Grab and pull the battery away from the device to remove.
-
-
-
Pry up on the corner of the hinge cover with an iFixit opening tool.
-
Use the iFixit opening tool along both sides and the front of the hinge cover to release it.
-
Lean the display back as far as it goes and lift up on the hinge cover to remove.
-
-
-
Remove four 3mm Phillips #1 screws from the top of the keyboard.
-
Use an iFixit opening tool to slide the keyboard upwards toward the display.
-
Slide the keyboard until it is clear of the lock tab, and lift it up to remove.
-
-
-
-
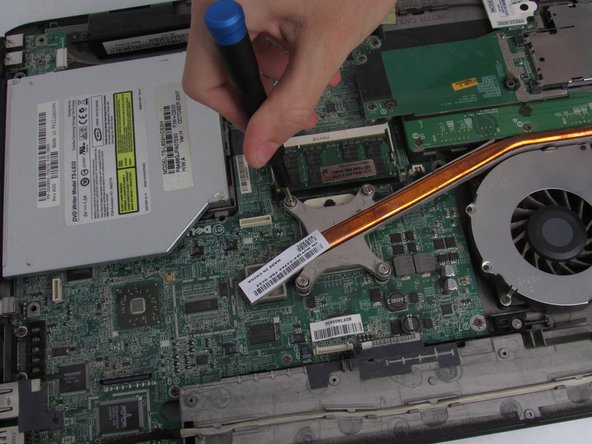
Unscrew the Phillips #0 screws attaching the heat sink to the motherboard.
-
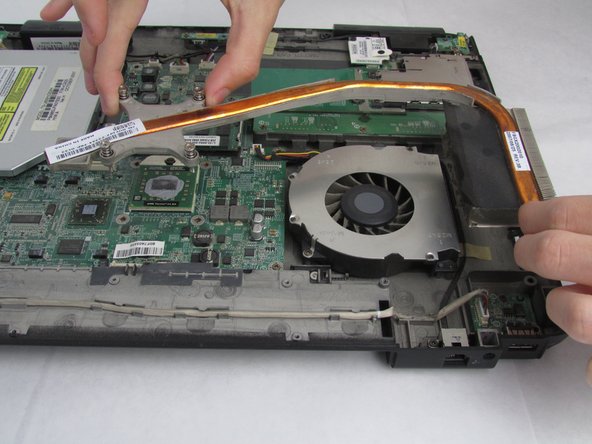
Carefully remove the heat sink from the motherboard.
-
-
-
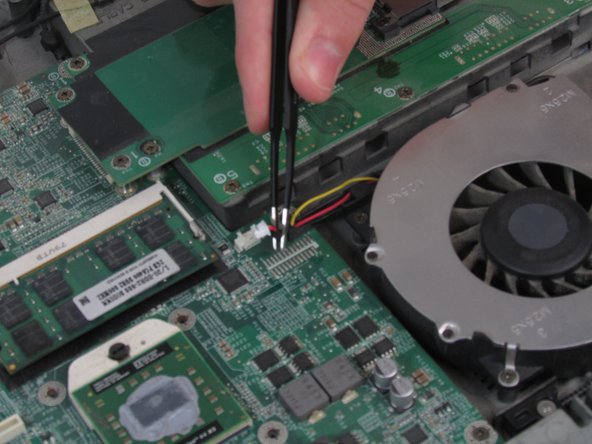
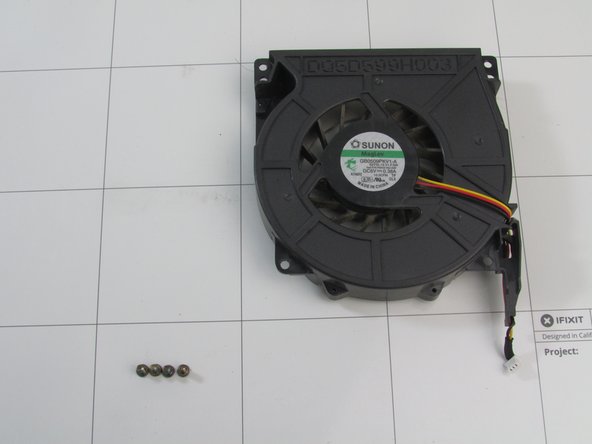
Disconnect the fan power cable from the motherboard using a pair of tweezers.
-


To reassemble your device, follow these instructions in reverse order.
To reassemble your device, follow these instructions in reverse order.
다른 한 분이 해당 안내서를 완성하였습니다.
팀

Embry-Riddle Aeronautical University, Team S8-G5, Salas Fall 2019 Embry-Riddle Aeronautical University, Team S8-G5, Salas Fall 2019 회원
ERAU-SALAS-F19S8G5
4 회원들
안내서 9개 작성하였습니다