주요 콘텐츠로 건너뛰기

Dell Inspiron 1750 Hard Drive Replacement

필요한 것

  1. Dell Inspiron 1750 Hard Drive Replacement, Battery: 1 단계, 이미지 1/2 Dell Inspiron 1750 Hard Drive Replacement, Battery: 1 단계, 이미지 2/2
    • Unplug the laptop before changing the battery to avoid electric shock.

    • Place the laptop on a flat stable surface.

    • Flip the laptop over so the underside is visible.

  2. Dell Inspiron 1750 Hard Drive Replacement: 2 단계, 이미지 1/2 Dell Inspiron 1750 Hard Drive Replacement: 2 단계, 이미지 2/2
    • Locate the battery lock switch.

    • Slide the lock switch to the left (away from the lock symbol).

    • Slide the battery out away from the laptop.

  3. Dell Inspiron 1750 Hard Drive Replacement, Hard Drive: 3 단계, 이미지 1/2 Dell Inspiron 1750 Hard Drive Replacement, Hard Drive: 3 단계, 이미지 2/2
    • Remove the two 1mm double wide Phillips #00 screws.

    • Pull the hard drive away from the laptop.

  4. Dell Inspiron 1750 Hard Drive Replacement: 4 단계, 이미지 1/2 Dell Inspiron 1750 Hard Drive Replacement: 4 단계, 이미지 2/2
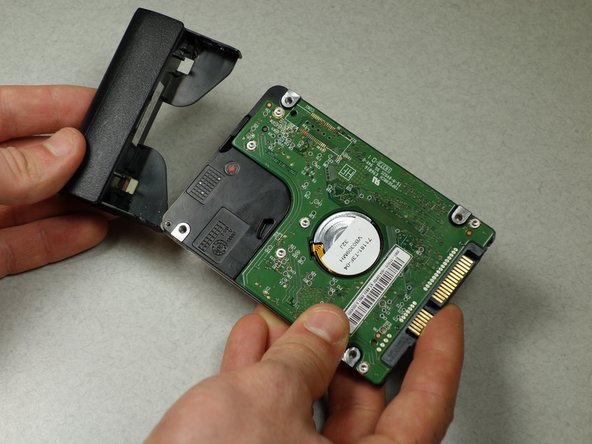
    • Keep all screws in a safe place. You may need to use them for your new hard drive.

    • Remove the two #00 1mm screws on both sides of the hard drive.

    • Pull the hard drive cover away from the hard drive and set the cover aside.

결론

To reassemble your device, follow these instructions in reverse order.

다른 3명이 해당 안내서를 완성하였습니다.

Tina Rickard

회원 가입일: 04/07/14

759 평판

안내서 5개 작성하였습니다

Cal Poly, Team 6-3, Forte Spring 2014 Cal Poly, Team 6-3, Forte Spring 2014 회원

CPSU-FORTE-S14S6G3

5 회원들

안내서 7개 작성하였습니다

댓글 0개

댓글 쓰기

조회 통계:

24 시간 전: 0

7일 전: 8

30일 전: 19

전체 시간: 9,408