주요 콘텐츠로 건너뛰기

Dell Inspiron 7590 Battery Replacement

필요한 것

  1. Dell Inspiron 7590 Battery Replacement, Battery: 1 단계, 이미지 1/2 Dell Inspiron 7590 Battery Replacement, Battery: 1 단계, 이미지 2/2
    • Use a Phillips #000 screwdriver to remove seven screws securing the base face of your device.

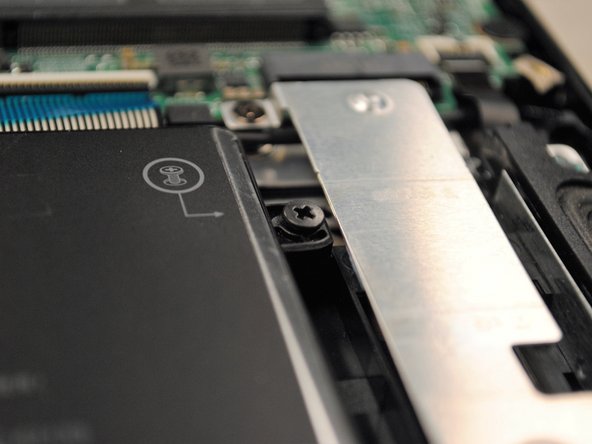
    • Unscrew the remaining two screws in the corners closest to the bottom of the base of the laptop.

  2. Dell Inspiron 7590 Battery Replacement: 2 단계, 이미지 1/3 Dell Inspiron 7590 Battery Replacement: 2 단계, 이미지 2/3 Dell Inspiron 7590 Battery Replacement: 2 단계, 이미지 3/3
    • Using a Jimmy, work your way around the edge of the back panel and the side of the laptop to remove the back panel.

    • Separate the remainder of the paneling using an Opening Pick.

    • Avoid using a metal utensil when separating the remainder of the paneling to avoid paint chipping.

  3. Dell Inspiron 7590 Battery Replacement: 3 단계, 이미지 1/3 Dell Inspiron 7590 Battery Replacement: 3 단계, 이미지 2/3 Dell Inspiron 7590 Battery Replacement: 3 단계, 이미지 3/3
    • Using a Phillips #0 screwdriver, remove the three screws securing the battery.

  4. Dell Inspiron 7590 Battery Replacement: 4 단계, 이미지 1/2 Dell Inspiron 7590 Battery Replacement: 4 단계, 이미지 2/2
    • Using a pair of tweezers, disconnect the ribbon cable connecting the battery to the motherboard.

  5. Dell Inspiron 7590 Battery Replacement: 5 단계, 이미지 1/2 Dell Inspiron 7590 Battery Replacement: 5 단계, 이미지 2/2
    • Remove the battery from the device.

결론

To reassemble your device, follow these instructions in reverse order.

다른 2명이 해당 안내서를 완성하였습니다.

Danielle Byrd

회원 가입일: 02/13/20

145 평판

안내서 1개 작성함

댓글 한 개

Hello,

I noticed in your tear down there are two ram slots. I tried to find this information online, but was unable to. Are any of those ram slots an empty slot, to possibly upgrade?

Dave Szes - 답글

댓글 쓰기

조회 통계:

24 시간 전: 1

7일 전: 2

30일 전: 21

전체 시간: 1,487