소개
The disk drive lets you install drivers from disks and many other useful things. This is a simple replacement and should only be done if there is no way the disk drive could ever operate correctly.
필요한 것
-
-
Remove the battery by flipping the two switches under the battery and pulling it out
 FixBot에 문의하기
-
-
-
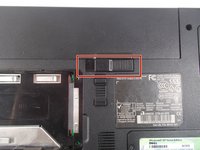
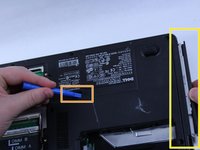
Push the tab from the battery, downwards to unlock the battery.
-
The tab should be in the position next to the unlocked indicator.
-
-
-
-
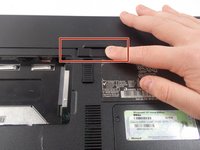
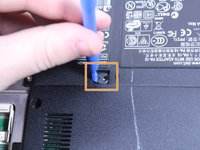
Now, push the other tab (the one right under the battery) from right to left.
-
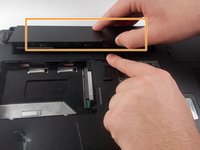
Now the battery will be loose; lift the battery up and out of the computer.
-
-
-
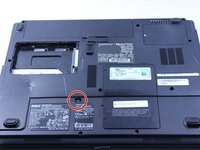
Remove the 8mm screw
-
Use the plastic opening tool to push out the disk drive.
-
Pull the disk drive out with the opposite hand.
-


To reassemble your device, follow these instructions in reverse order.
팀

UMass Dartmouth, Team 1-8, Catania Fall 2016 UMass Dartmouth, Team 1-8, Catania Fall 2016 회원
UMASSD-CATANIA-F16S1G8
3 회원들
안내서 9개를 작성함