주요 콘텐츠로 건너뛰기

이 버전에는 잘못된 편집 사항이 있을 수 있습니다. 최신 확인된 스냅샷으로 전환하십시오.

필요한 것

  1. 이 단계는 번역되지 않았습니다. 번역을 도와주십시오

    : 1 단계, 이미지 1/3 : 1 단계, 이미지 2/3 : 1 단계, 이미지 3/3
    • Place the all in one computer face down on a soft, clean surface to avoid scratching the front.

    • Press the tab on the stand cover and lift up.

  2. 이 단계는 번역되지 않았습니다. 번역을 도와주십시오

    : 2 단계, 이미지 1/3 : 2 단계, 이미지 2/3 : 2 단계, 이미지 3/3
    • Remove the four phillips screws that attach the stand to the computer.

    • Tilt the stand up and out.

  3. 이 단계는 번역되지 않았습니다. 번역을 도와주십시오

    : 3 단계, 이미지 1/3 : 3 단계, 이미지 2/3 : 3 단계, 이미지 3/3
    • Starting from the optical drive, pry the back cover up with a plastic spudger.

    • The cover is held in place by fragile plastic clips. Careful to not break them.

  4. 이 단계는 번역되지 않았습니다. 번역을 도와주십시오

    : 4 단계, 이미지 1/2 : 4 단계, 이미지 2/2
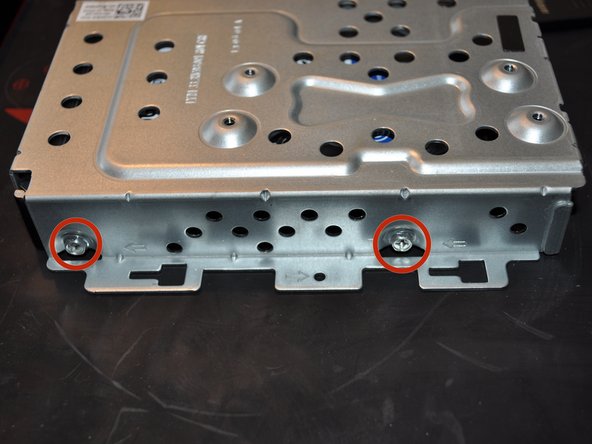
    • Remove the three screws that hold the hard drive cage to the chassis.

  5. 이 단계는 번역되지 않았습니다. 번역을 도와주십시오

    : 5 단계, 이미지 1/2 : 5 단계, 이미지 2/2
    • Slide the hard drive cage out slightly to access and remove the power and SATA cable.

    • There isn't much slack in these cables, so don't slide the hard drive cage to far.

    • The power and SATA cables are connected together. On most other computers, these connectors are separate.

    • Lift the hard drive cage out.

  6. 이 단계는 번역되지 않았습니다. 번역을 도와주십시오

    : 6 단계, 이미지 1/3 : 6 단계, 이미지 2/3 : 6 단계, 이미지 3/3
    • Remove the four screws (two on each side) that attach the hard drive cage to the hard drive.

    • Lift the hard drive cage off the hard drive.

결승점

다른 35명이 해당 안내서를 완성하였습니다.

Tyler

회원 가입일: 06/19/12

4,920 평판

안내서 16개 작성하였습니다

TechForce TechForce 회원

Business

2 회원들

안내서 25개 작성하였습니다

댓글 3개

Thanks for this info this is very useful

Thank you once again

Ketan Valsangkar - 답글

Good Job, short and sweet and easy to follow

schmidtrg - 답글

Really useful information thank you.

Jessie Colon - 답글

댓글 쓰기

조회 통계:

24 시간 전: 1

7일 전: 14

30일 전: 71

전체 시간: 35,703