주요 콘텐츠로 건너뛰기

Dell Latitude 3380 Display Assembly Replacement

필요한 것

  1. Dell Latitude 3380 Display Assembly Replacement, Back Cover: 1 단계, 이미지 1/2 Dell Latitude 3380 Display Assembly Replacement, Back Cover: 1 단계, 이미지 2/2
    • Turn the laptop over so that the back is facing up.

    • Remove the nine 3 mm screws with a Phillips #0 screwdriver.

  2. Dell Latitude 3380 Display Assembly Replacement: 2 단계, 이미지 1/2 Dell Latitude 3380 Display Assembly Replacement: 2 단계, 이미지 2/2
    • Use an opening tool to pry the back cover away from the laptop.

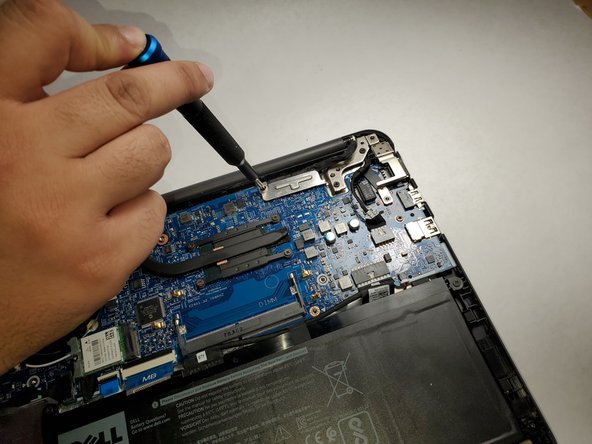
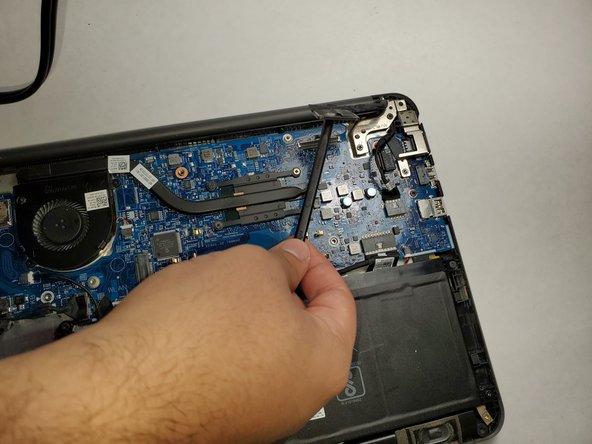
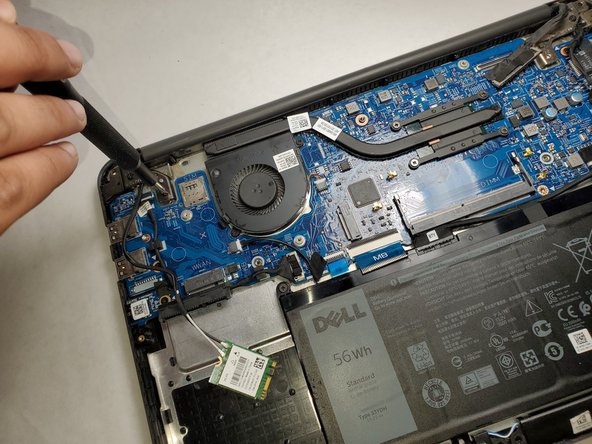
  3. Dell Latitude 3380 Display Assembly Replacement, Display Assembly: 3 단계, 이미지 1/3 Dell Latitude 3380 Display Assembly Replacement, Display Assembly: 3 단계, 이미지 2/3 Dell Latitude 3380 Display Assembly Replacement, Display Assembly: 3 단계, 이미지 3/3
    • Remove the single 3 mm screw from the metal bracket using a Phillips #0 screwdriver.

    • Remove the metal bracket.

    • Use a spudger to gently detach the connector from the motherboard.

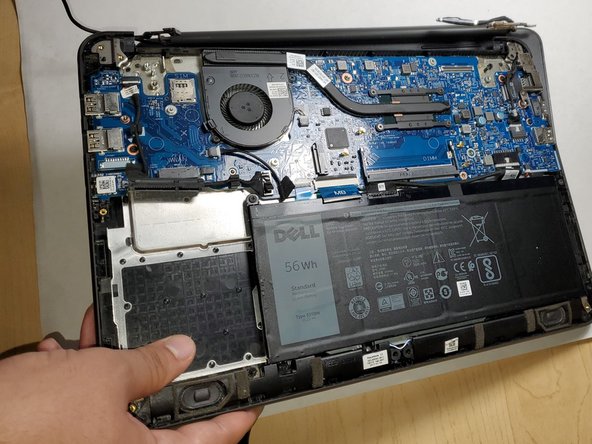
  4. Dell Latitude 3380 Display Assembly Replacement: 4 단계, 이미지 1/3 Dell Latitude 3380 Display Assembly Replacement: 4 단계, 이미지 2/3 Dell Latitude 3380 Display Assembly Replacement: 4 단계, 이미지 3/3
    • Remove the two 3 mm screws (four total) from both sides of the laptop using a Phillips #0 screwdriver.

    • Lift up the bottom part of the laptop to separate the display assembly from the rest of the laptop.

결론

To reassemble your device, follow these instructions in reverse order.

Michael Wood

회원 가입일: 09/02/21

377 평판

안내서 3개 작성하였습니다

Gateway, Team 1-3, Pee Fall 2021 Gateway, Team 1-3, Pee Fall 2021 회원

GCC-PEE-F21S1G3

3 회원들

안내서 6개 작성하였습니다

댓글 0개

댓글 쓰기

조회 통계:

24 시간 전: 1

7일 전: 1

30일 전: 20

전체 시간: 463