주요 콘텐츠로 건너뛰기

Dell Latitude 7490 Back Cover Replacement

필요한 것

  1. Dell Latitude 7490 Back Cover Replacement, Flip your laptop over: 1 단계, 이미지 1/1
    • Flip your laptop over so the rubber feet strips are facing up.

  2. Dell Latitude 7490 Back Cover Replacement, Loosen the captive screws: 2 단계, 이미지 1/2 Dell Latitude 7490 Back Cover Replacement, Loosen the captive screws: 2 단계, 이미지 2/2
    • Use a Phillips screwdriver to fully loosen the eight captive screws securing the back cover.

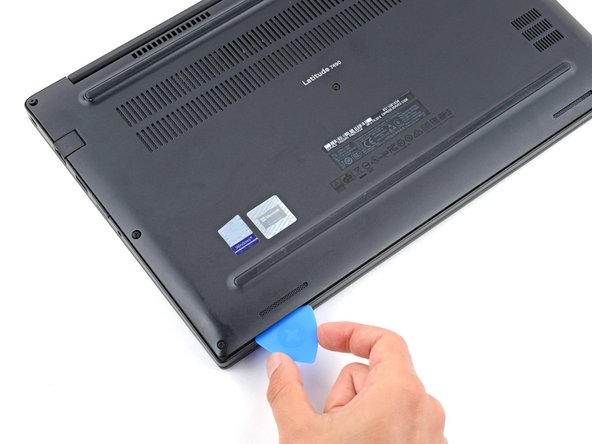
  3. Dell Latitude 7490 Back Cover Replacement, Insert an opening pick: 3 단계, 이미지 1/3 Dell Latitude 7490 Back Cover Replacement, Insert an opening pick: 3 단계, 이미지 2/3 Dell Latitude 7490 Back Cover Replacement, Insert an opening pick: 3 단계, 이미지 3/3
    • Plastic clips secure the back cover to the frame. You'll hear and feel them release as you work.

    • Insert the long side of an opening pick between the top right corner of the back cover and frame.

    • Pry the back cover up to release the clips securing the top right corner.

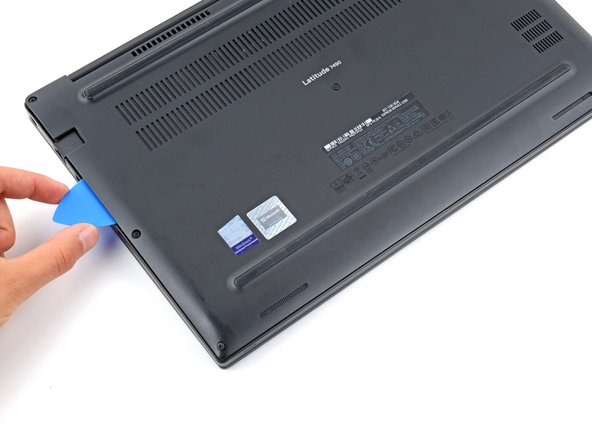
  4. Dell Latitude 7490 Back Cover Replacement, Release the clips: 4 단계, 이미지 1/3 Dell Latitude 7490 Back Cover Replacement, Release the clips: 4 단계, 이미지 2/3 Dell Latitude 7490 Back Cover Replacement, Release the clips: 4 단계, 이미지 3/3
    • Slide the opening pick down the right edge and around the bottom right corner to release the clips.

  5. Dell Latitude 7490 Back Cover Replacement: 5 단계, 이미지 1/3 Dell Latitude 7490 Back Cover Replacement: 5 단계, 이미지 2/3 Dell Latitude 7490 Back Cover Replacement: 5 단계, 이미지 3/3
    • Slide the opening pick along the front edge and up to the top left corner to release the remaining clips securing the back cover.

  6. Dell Latitude 7490 Back Cover Replacement, Remove the back cover: 6 단계, 이미지 1/3 Dell Latitude 7490 Back Cover Replacement, Remove the back cover: 6 단계, 이미지 2/3 Dell Latitude 7490 Back Cover Replacement, Remove the back cover: 6 단계, 이미지 3/3
    • Remove the back cover.

    • During reassembly, lay the back cover on the frame and press down firmly around the perimeter to engage all the clips.

결론

To reassemble your device, follow these instructions in reverse order.

Repair didn’t go as planned? Try some basic troubleshooting, or ask our Answers community for help.

Spencer Day

회원 가입일: 09/14/22

55,212 평판

안내서 408개 작성하였습니다

iFixit iFixit 회원

Staff

136 회원들

안내서 17,442개 작성하였습니다

댓글 0개

댓글 쓰기

조회 통계:

24 시간 전: 0

7일 전: 14

30일 전: 44

전체 시간: 363