주요 콘텐츠로 건너뛰기

Dell Latitude D430 Keyboard Replacement

필요한 것

  1. Dell Latitude D430 Keyboard Replacement, Keyboard: 1 단계, 이미지 1/1
    • Lay the laptop flat with the screen facing upward. This will allow you to have the most room while performing the keyboard replacement.

  2. Dell Latitude D430 Keyboard Replacement: 2 단계, 이미지 1/2 Dell Latitude D430 Keyboard Replacement: 2 단계, 이미지 2/2
    • Identify the plastic cover located directly below the screen.

    • Carefully remove the plastic cover by lifting both ends of the cover.

    • This piece is very fragile, so be sure not to break this piece. It requires minimal force to remove this piece.

  3. Dell Latitude D430 Keyboard Replacement: 3 단계, 이미지 1/3 Dell Latitude D430 Keyboard Replacement: 3 단계, 이미지 2/3 Dell Latitude D430 Keyboard Replacement: 3 단계, 이미지 3/3
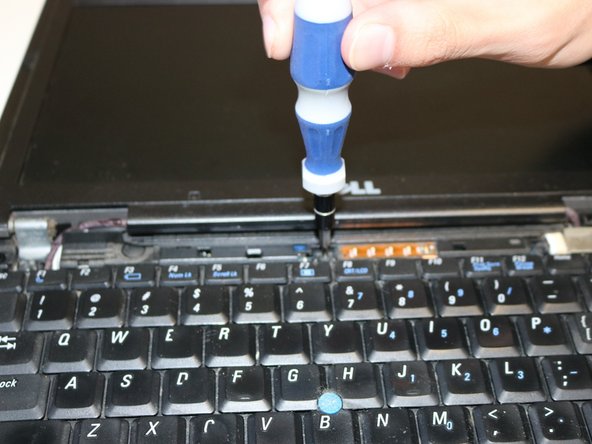
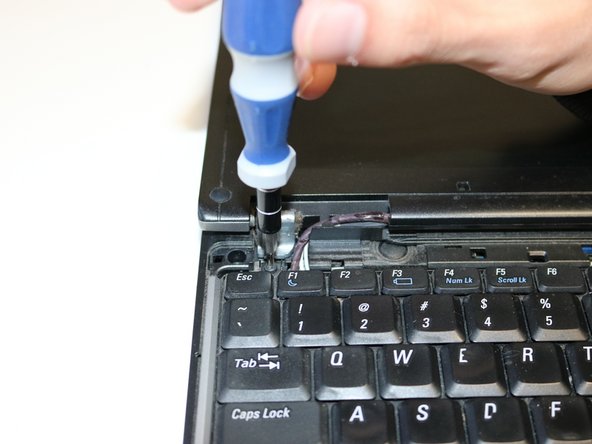
    • There are 3 screws that should be exposed now.

    • Use a Phillips 00 screwdriver to remove all 3 of the screws shown in the pictures.

  4. Dell Latitude D430 Keyboard Replacement: 4 단계, 이미지 1/3 Dell Latitude D430 Keyboard Replacement: 4 단계, 이미지 2/3 Dell Latitude D430 Keyboard Replacement: 4 단계, 이미지 3/3
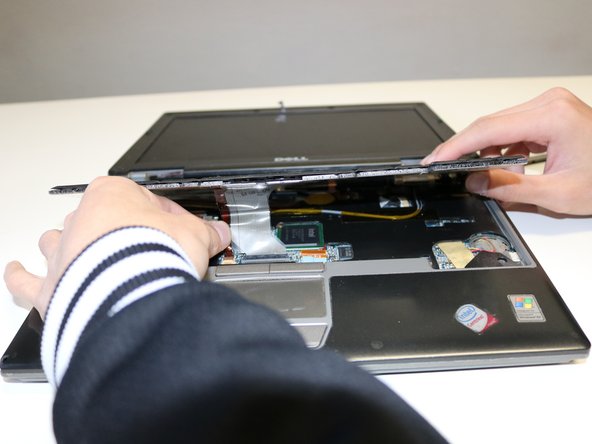
    • Gently lift the keyboard from the top.

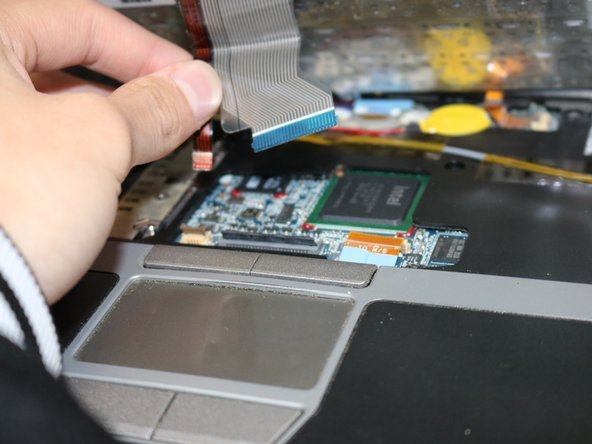
    • At the bottom of the keyboard, there will be ribbons connecting it to the motherboard. Be sure not to tear the ribbons.

    • Lift the clamps that are holding the ribbons in place in order to remove them. You should be able to remove the keyboard at this point.

결론

To reassemble your device, follow these instructions in reverse order.

다른 한 분이 해당 안내서를 완성하였습니다.

Jacob Pham

회원 가입일: 09/21/18

109 평판

안내서 1개 작성함

댓글 0개

댓글 쓰기

조회 통계:

24 시간 전: 0

7일 전: 1

30일 전: 6

전체 시간: 392