주요 콘텐츠로 건너뛰기

Dell Latitude E5540 Disassembly

필요한 것

  1. Dell Latitude E5540 Disassembly, Removing the Battery: 1 단계, 이미지 1/3 Dell Latitude E5540 Disassembly, Removing the Battery: 1 단계, 이미지 2/3 Dell Latitude E5540 Disassembly, Removing the Battery: 1 단계, 이미지 3/3
    • Turn the laptop upside down

    • Slide the two switches to the outside until an orange marker appears.

    • Remove the battery by sliding it out

  2. Dell Latitude E5540 Disassembly, Removing the Bottom Plate Screws and Bottom Plate: 2 단계, 이미지 1/3 Dell Latitude E5540 Disassembly, Removing the Bottom Plate Screws and Bottom Plate: 2 단계, 이미지 2/3 Dell Latitude E5540 Disassembly, Removing the Bottom Plate Screws and Bottom Plate: 2 단계, 이미지 3/3
    • Remove the four M2x5 and 2 M2x8 screws with a Phillips PH0 screwdriver

    • Remove the bottom plate by gently lifting it from the empty battery space

  3. Dell Latitude E5540 Disassembly, Removing the RAM: 3 단계, 이미지 1/3 Dell Latitude E5540 Disassembly, Removing the RAM: 3 단계, 이미지 2/3 Dell Latitude E5540 Disassembly, Removing the RAM: 3 단계, 이미지 3/3
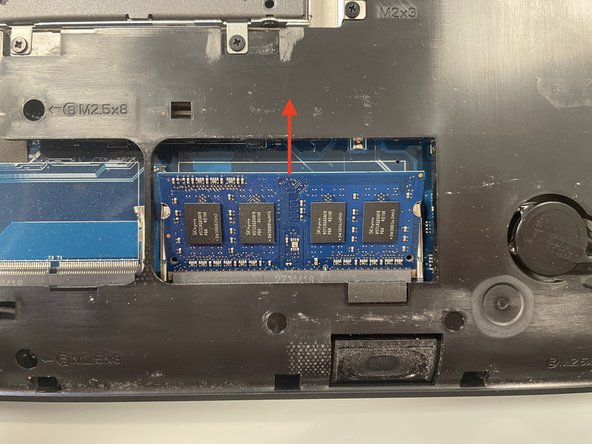
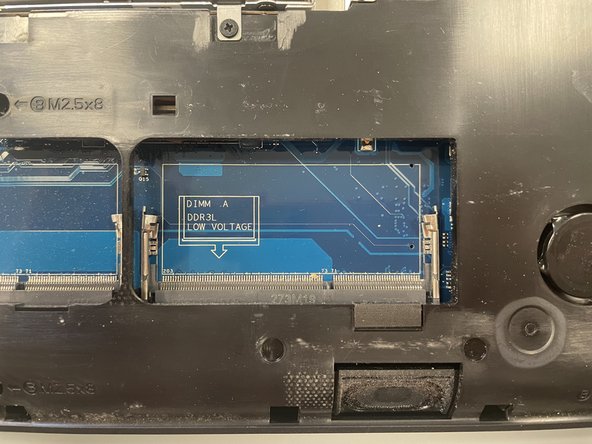
    • Remove the RAM by pushing the metal parts slightly outward

    • The RAM will pop up and you can carefully slide it out

  4. Dell Latitude E5540 Disassembly, Removing the Hard Drive: 4 단계, 이미지 1/3 Dell Latitude E5540 Disassembly, Removing the Hard Drive: 4 단계, 이미지 2/3 Dell Latitude E5540 Disassembly, Removing the Hard Drive: 4 단계, 이미지 3/3
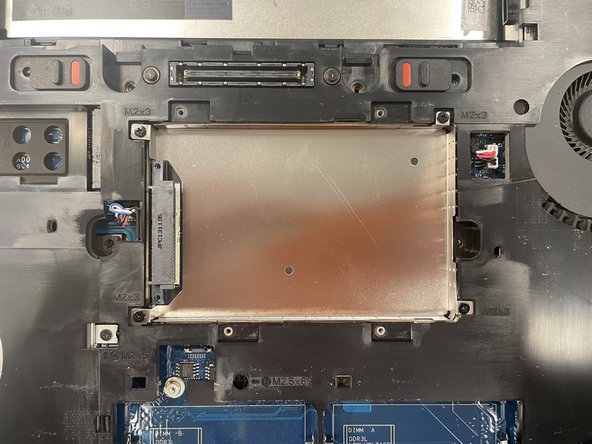
    • Remove the four M2x3 screws with a Phillips PH0 screwdriver

    • Slide the hard drive cradle out by pulling the plastic tab

  5. Dell Latitude E5540 Disassembly, Remove the Optical Drive: 5 단계, 이미지 1/3 Dell Latitude E5540 Disassembly, Remove the Optical Drive: 5 단계, 이미지 2/3 Dell Latitude E5540 Disassembly, Remove the Optical Drive: 5 단계, 이미지 3/3
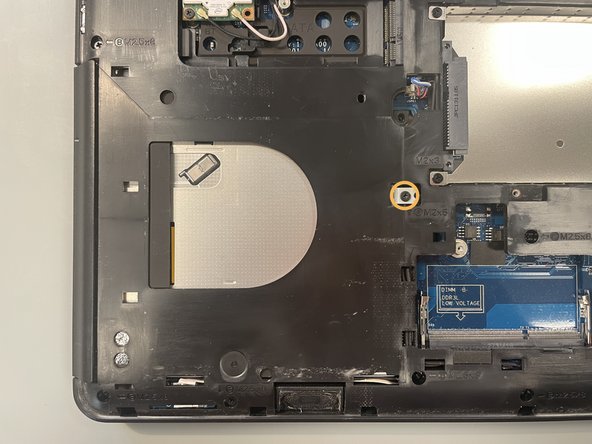
    • Remove one M2x5 screw with a Phillips PH0 screwdriver

    • Use a blackstick to push out the optical drive and pull it further out by hand

  6. Dell Latitude E5540 Disassembly, Remove the CMOS Battery: 6 단계, 이미지 1/3 Dell Latitude E5540 Disassembly, Remove the CMOS Battery: 6 단계, 이미지 2/3 Dell Latitude E5540 Disassembly, Remove the CMOS Battery: 6 단계, 이미지 3/3
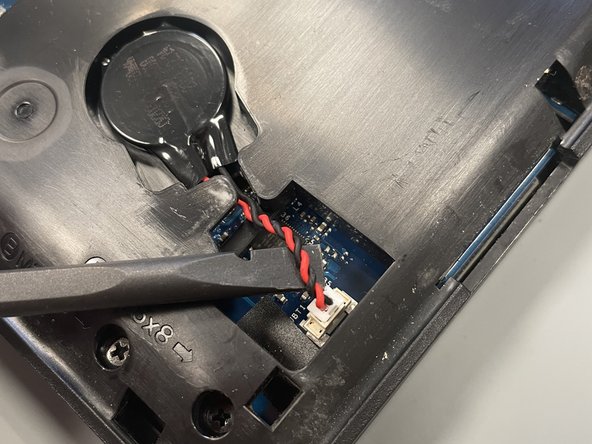
    • Use a blackstick to carefully disconnect the battery connector

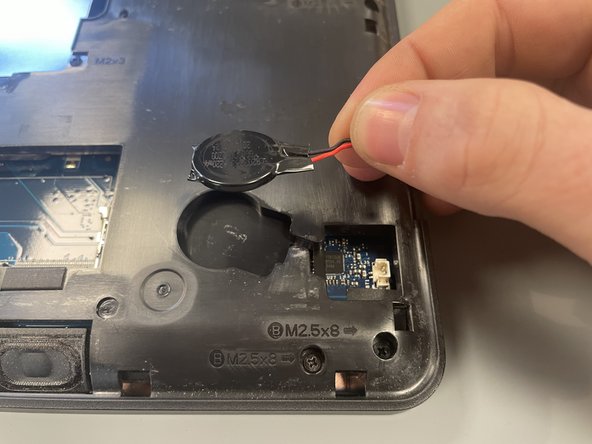
    • Gently guide the cable through the narrowed part and remove the battery that is held in place with double sided tape

  7. Dell Latitude E5540 Disassembly, Disconnect and Remove the Bluetooth and Wifi Module: 7 단계, 이미지 1/3 Dell Latitude E5540 Disassembly, Disconnect and Remove the Bluetooth and Wifi Module: 7 단계, 이미지 2/3 Dell Latitude E5540 Disassembly, Disconnect and Remove the Bluetooth and Wifi Module: 7 단계, 이미지 3/3
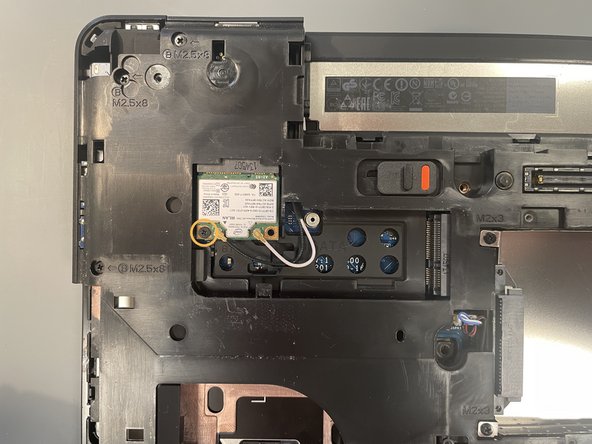
    • Gently disconnect the white and black cable from the module with a blackstick

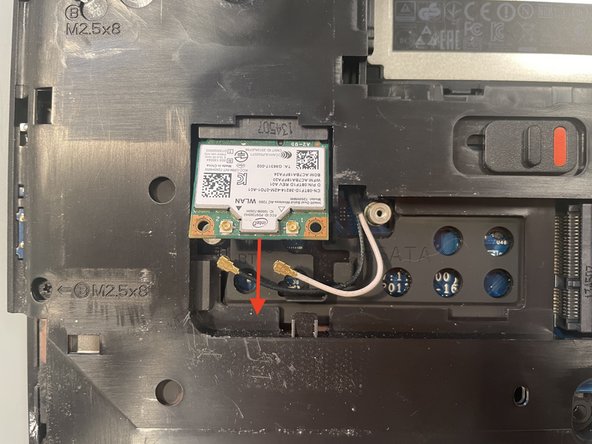
    • Remove one M2x3 screw with a Phillips PH0 screwdriver. The module will push up

    • Remove the module by sliding it out

  8. Dell Latitude E5540 Disassembly, Remove the Top Panel: 8 단계, 이미지 1/3 Dell Latitude E5540 Disassembly, Remove the Top Panel: 8 단계, 이미지 2/3 Dell Latitude E5540 Disassembly, Remove the Top Panel: 8 단계, 이미지 3/3
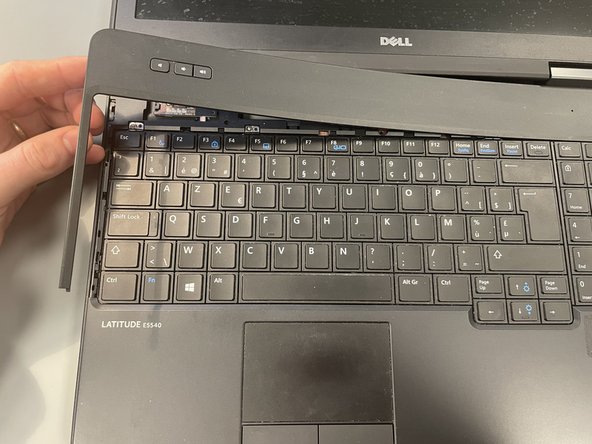
    • Turn the laptop over and open the screen, carefully place the spudger under the top panel near the bottom left Ctrl key and push up

    • Gently remove the rest of the panel

  9. Dell Latitude E5540 Disassembly, Remove the Keyboard: 9 단계, 이미지 1/3 Dell Latitude E5540 Disassembly, Remove the Keyboard: 9 단계, 이미지 2/3 Dell Latitude E5540 Disassembly, Remove the Keyboard: 9 단계, 이미지 3/3
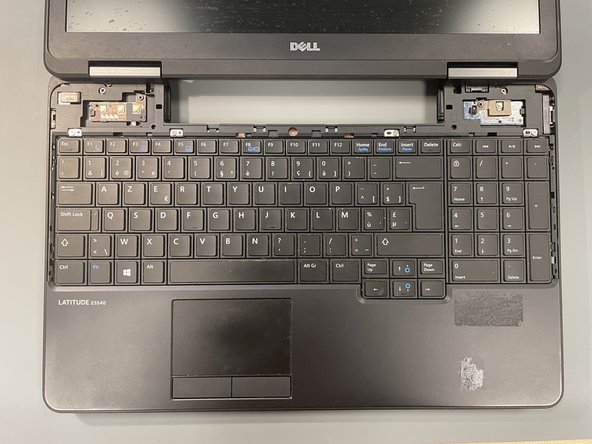
    • Remove four silver screws with a Phillips PH0 screwdriver, slide the keyboard up a couple of millimetres then lift it up away from you to expose the ribbon cable

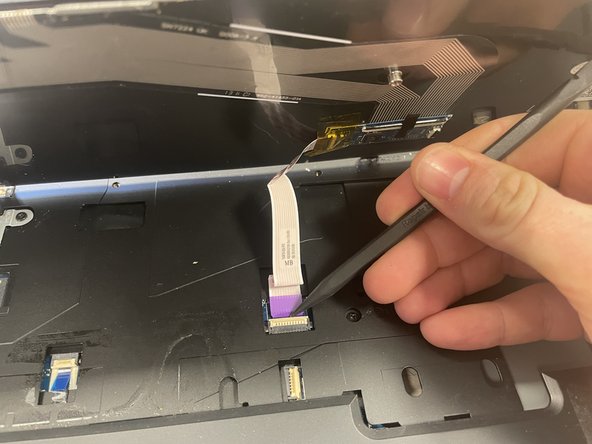
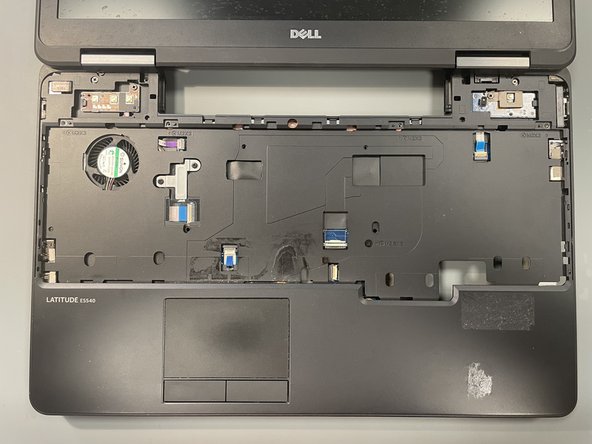
    • Disconnect the ribbon cable with the help of a spudger and remove the keyboard

  10. Dell Latitude E5540 Disassembly, Remove the Display Cowlings: 10 단계, 이미지 1/3 Dell Latitude E5540 Disassembly, Remove the Display Cowlings: 10 단계, 이미지 2/3 Dell Latitude E5540 Disassembly, Remove the Display Cowlings: 10 단계, 이미지 3/3
    • Remove the M2x3 screw from the rear of the cowling using a Phillips #0 screwdriver

    • Remove the M2x8 screw from the inside of the cowling using a Phillips #0 screwdriver. Gently remove the cowling minding the catch on the bottom

    • Repeat the same steps on the opposite side to remove the second cowling

결론

To reassemble your device, follow these instructions in reverse order.

다른 한 분이 해당 안내서를 완성하였습니다.

Ian Bauters

391 평판

안내서 1개 작성함

댓글 0개

댓글 쓰기

조회 통계:

24 시간 전: 0

7일 전: 3

30일 전: 21

전체 시간: 2,281