소개
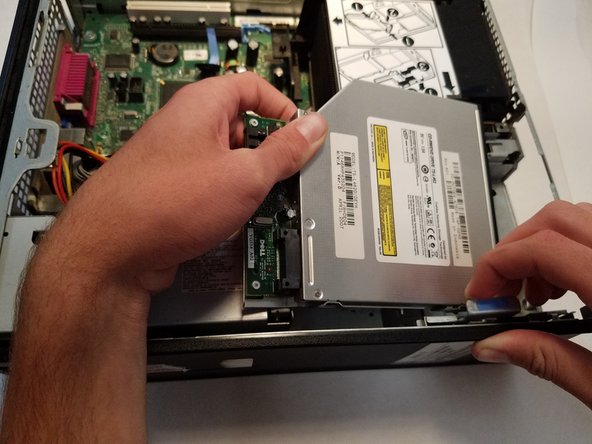
This guide will walk you through step by step how to replace the Motherboard of a Dell Optiplex 745 Desktop. In order to do so, we will have to remove the casing as well as all the core components of the computer to access the Motherboard.
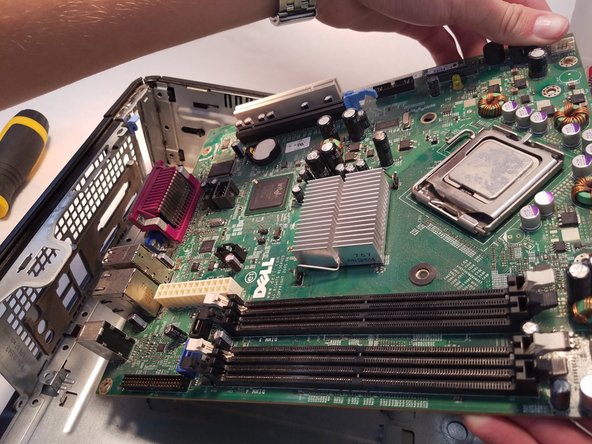
The Motherboard of a computer is the most vital part of the computer. It's essentially the "brain" of the computer. It tells all the components what to do and when to do it to ensure everything operates together efficiently.
필요한 것
-
-
Orientate the computer so the case lock is on the left corner, like so.
-
Pull the tab that locks the casing in place.
-
While the tab is pulled, lift the casing off the computer.
-
-


To reassemble your device, follow these instructions in reverse order.
To reassemble your device, follow these instructions in reverse order.
다른 4명이 해당 안내서를 완성하였습니다.

팀

Central Coast New Tech High, Team 6-11, Rushing Spring 2016 Central Coast New Tech High, Team 6-11, Rushing Spring 2016 회원
CCNTH-RUSHING-S16S6G11
2 회원들
안내서 1개 작성하였습니다
댓글 한 개
Thank you and your contributors for providing this guide. I did not replace motherboard but three 2200 u capacitors on it. The thing works again!