소개
If you are having problems with the quality of printed documents and photos, such as streaks of lines or faded colors, or if your printer is printing blank pages, then it is time to replace the ink cartridges. The Dell Photo Printer 720 contains one black ink cartridge and one color ink cartridge. It is recommended to purchase ink cartridges through the Dell website to ensure quality and efficiency. This guide will take you through the steps to replace the ink cartridges in your Dell Photo Printer 720.
-
-
Begin by making sure the printer is connected to a power source and is turned on.
-
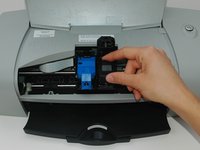
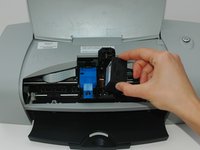
Lift the front cover of the printer.
-
-


To reassemble your device, follow these instructions in reverse order.
팀

USF Sarasota-Manatee, Team 1-3, Stewart Winter 2015 USF Sarasota-Manatee, Team 1-3, Stewart Winter 2015 회원
USFSM-STEWART-W15S1G3
4 회원들
안내서 18개를 작성함