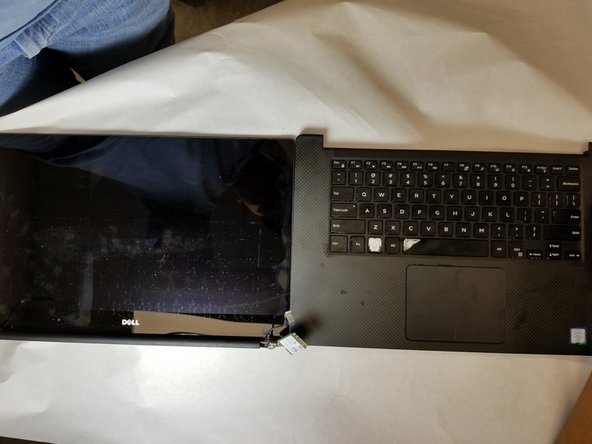
주요 콘텐츠로 건너뛰기

Dell Precision 5510 Screen Replacement

필요한 것

  1. Dell Precision 5510 Screen Replacement, Base Cover: 1 단계, 이미지 1/1
    • Open the system badge flap over to reveal the screws underneath (marked 1 on the image).

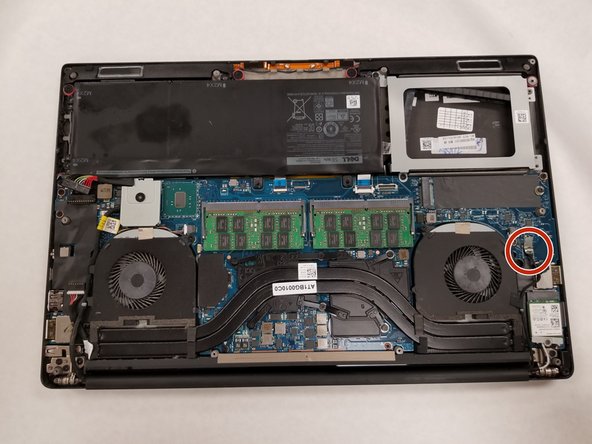
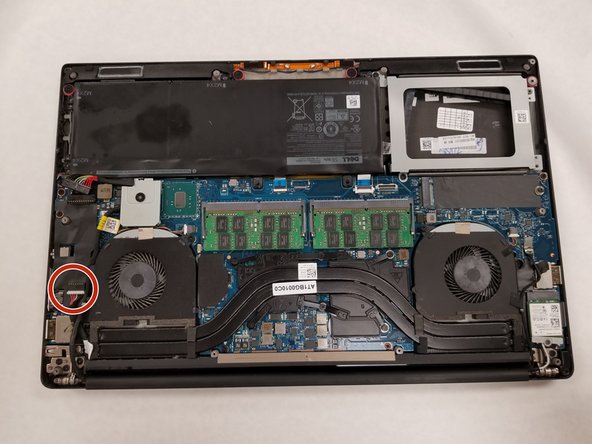
    • Remove the 12 screws that secure the base cover to the computer.

  2. Dell Precision 5510 Screen Replacement: 2 단계, 이미지 1/1
    • Pry the edges base cover and lift it to remove it from computer.

  3. Dell Precision 5510 Screen Replacement, Battery: 3 단계, 이미지 1/2 Dell Precision 5510 Screen Replacement, Battery: 3 단계, 이미지 2/2
    • Unplug the connection that links the battery to the computer.

  4. Dell Precision 5510 Screen Replacement: 4 단계, 이미지 1/2 Dell Precision 5510 Screen Replacement: 4 단계, 이미지 2/2
    • Remove the four 4.0 mm JIS #0 screws surrounding the battery.

  5. Dell Precision 5510 Screen Replacement: 5 단계, 이미지 1/2 Dell Precision 5510 Screen Replacement: 5 단계, 이미지 2/2
    • Carefully remove the battery from the computer.

  6. Dell Precision 5510 Screen Replacement, Screen: 6 단계, 이미지 1/2 Dell Precision 5510 Screen Replacement, Screen: 6 단계, 이미지 2/2
    • Remove the six 4.0 mm Phillips #1 screws.

  7. Dell Precision 5510 Screen Replacement: 7 단계, 이미지 1/2 Dell Precision 5510 Screen Replacement: 7 단계, 이미지 2/2
    • Unscrew the one 4.0 mm Phillips #1 screw from the WiFi chip, then remove it.

  8. Dell Precision 5510 Screen Replacement: 8 단계, 이미지 1/2 Dell Precision 5510 Screen Replacement: 8 단계, 이미지 2/2
    • Disconnect the black wire. Use tweezers to help.

  9. Dell Precision 5510 Screen Replacement: 9 단계, 이미지 1/2 Dell Precision 5510 Screen Replacement: 9 단계, 이미지 2/2
    • Disconnect the multi wire. Use tweezers to help.

  10. Dell Precision 5510 Screen Replacement: 10 단계, 이미지 1/2 Dell Precision 5510 Screen Replacement: 10 단계, 이미지 2/2
    • Remove the 1.0 mm Phillips #1 screw.

  11. Dell Precision 5510 Screen Replacement: 11 단계, 이미지 1/2 Dell Precision 5510 Screen Replacement: 11 단계, 이미지 2/2
    • Flip the laptop over, so it is sitting in the normal upright position. Hold onto the screen, and pull the keyboard up and away from the screen.

결론

To reassemble your device, follow these instructions in reverse order.

다른 한 분이 해당 안내서를 완성하였습니다.

Atlanta Phelps

회원 가입일: 08/28/18

400 평판

안내서 3개 작성하였습니다

IUPUI, Team S1-G5, Arle Fall 2018 IUPUI, Team S1-G5, Arle Fall 2018 회원

IUPUI-ARLE-F18S1G5

3 회원들

안내서 6개 작성하였습니다

댓글 한 개

Can I just change the LCD? Or is changing the entire display assembly the only option?

John Gaines - 답글

댓글 쓰기

조회 통계:

24 시간 전: 1

7일 전: 2

30일 전: 27

전체 시간: 3,933