소개
If the Dell Precision M3800 touchpad is unresponsive or not working, use this guide to replace the touchpad.
The touchpad works as the “mouse” for the laptop, and an unresponsive touchpad would stop the user from using the laptop, unless the user uses an external mouse.
Before beginning, be sure to power down the laptop, and unplug from the external power source(s).
필요한 것
-
-
Use a T5 Torx screwdriver to unscrew the ten 3mm screws on the laptop back cover.
-
Lift up the silver cover from the back panel to reveal two screws.
-
Use a Phillips screwdriver to remove the two screws underneath the silver cover.
-
-
-
-
Disconnect the battery cable from the system board [1].
-
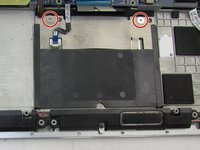
Use a Phillips screwdriver to remove the four screws securing the battery to the laptop.
-
Lift the battery off the computer [2].
-
-
-
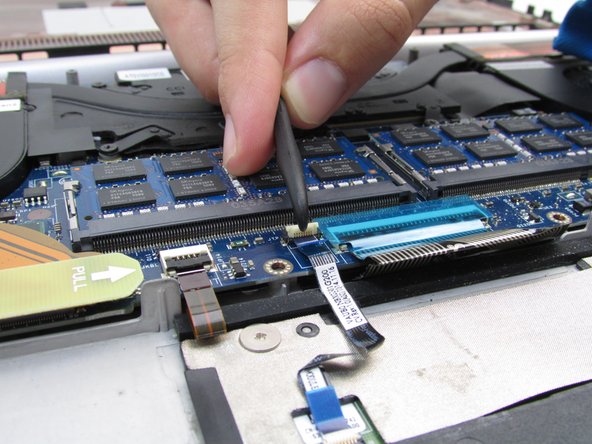
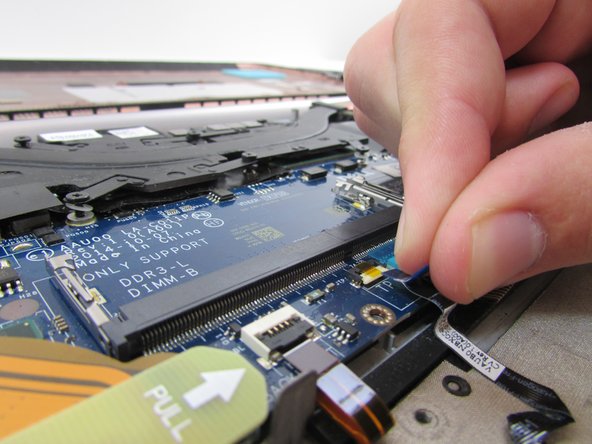
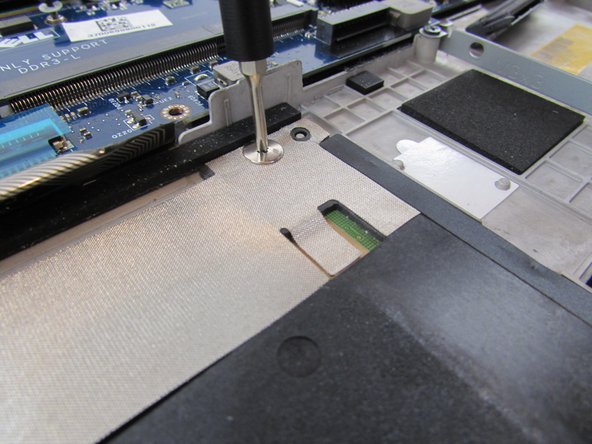
Remove the wire that connects the touch pad with the motherboard with a hooked pry tool (Spudger 3) and by pulling the pull tab to safely remove the wire.
-


To reassemble your device, follow these instructions in reverse order.
To reassemble your device, follow these instructions in reverse order.
다른 한 분이 해당 안내서를 완성하였습니다.

팀

Embry-Riddle Aeronautical University, Team S12-G2, Lamothe Fall 2019 Embry-Riddle Aeronautical University, Team S12-G2, Lamothe Fall 2019 회원
ERAU-LAMOTHE-F19S12G2
4 회원들
안내서 7개를 작성함