주요 콘텐츠로 건너뛰기

Dell Streak 10 Pro SD Card Breakout Board Replacement

필요한 것

  1. Dell Streak 10 Pro SD Card Breakout Board Replacement, Battery: 1 단계, 이미지 1/3 Dell Streak 10 Pro SD Card Breakout Board Replacement, Battery: 1 단계, 이미지 2/3 Dell Streak 10 Pro SD Card Breakout Board Replacement, Battery: 1 단계, 이미지 3/3
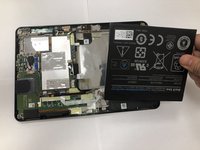
    • Place the device flat on its screen.

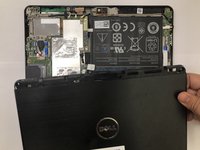
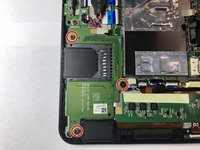
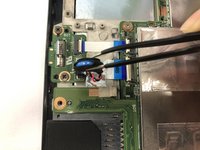
    • Using the plastic opening tools, pry open the top segment of the tablet where the camera is located.

    • Take the segment off and place it to the side.

  2. Dell Streak 10 Pro SD Card Breakout Board Replacement: 2 단계, 이미지 1/2 Dell Streak 10 Pro SD Card Breakout Board Replacement: 2 단계, 이미지 2/2
    • Remove four 4mm Phillips #0 screws.

  3. Dell Streak 10 Pro SD Card Breakout Board Replacement: 3 단계, 이미지 1/2 Dell Streak 10 Pro SD Card Breakout Board Replacement: 3 단계, 이미지 2/2
    • Using the plastic opening tool, lift off the entire back screen of the tablet.

  4. Dell Streak 10 Pro SD Card Breakout Board Replacement: 4 단계, 이미지 1/3 Dell Streak 10 Pro SD Card Breakout Board Replacement: 4 단계, 이미지 2/3 Dell Streak 10 Pro SD Card Breakout Board Replacement: 4 단계, 이미지 3/3
    이 단계에 사용된 도구:
    Tweezers
    $4.99
    구매
    • Disconnect the no-fuss ribbon cable connector.

    • The best way is to safely pull the white connector straight out of the socket. Using the tweezers, pull out the white connector that contains the red, green, blue, and black cords connected to it.

    • Remove the battery by gently lifting it out of the device.

  5. Dell Streak 10 Pro SD Card Breakout Board Replacement, SD Card Breakout Board: 5 단계, 이미지 1/2 Dell Streak 10 Pro SD Card Breakout Board Replacement, SD Card Breakout Board: 5 단계, 이미지 2/2
    • Remove three 4mm Phillips #0 screws.

  6. Dell Streak 10 Pro SD Card Breakout Board Replacement: 6 단계, 이미지 1/2 Dell Streak 10 Pro SD Card Breakout Board Replacement: 6 단계, 이미지 2/2
    • Gently lift up the black covered wire and place it on the side, so that it is not in the way of the procedure.

  7. Dell Streak 10 Pro SD Card Breakout Board Replacement: 7 단계, 이미지 1/3 Dell Streak 10 Pro SD Card Breakout Board Replacement: 7 단계, 이미지 2/3 Dell Streak 10 Pro SD Card Breakout Board Replacement: 7 단계, 이미지 3/3
    이 단계에 사용된 도구:
    Tweezers
    $4.99
    구매
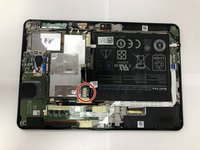
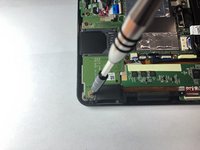
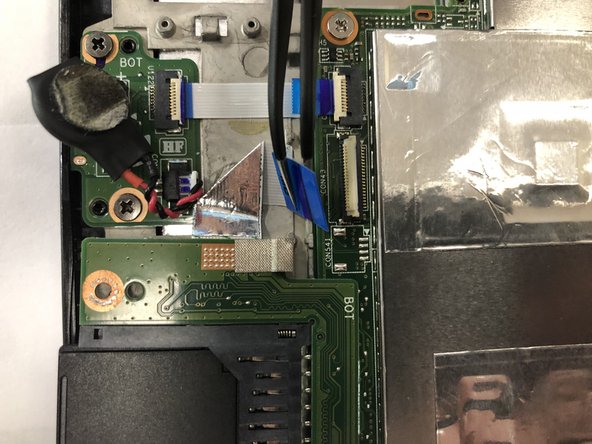
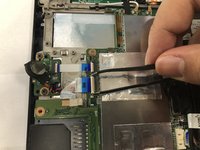
    • When encountering a zero insertion force connector, the best way it to carefully use tweezers to flip up the white locking flap securing the blue-tipped ribbon cable.

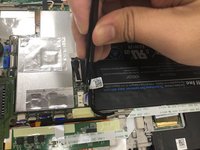
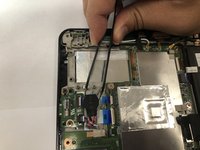
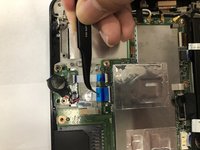
    • Then, gently use the tweezers to pull out the blue-tipped ribbon cable from the unlatched connector.

  8. Dell Streak 10 Pro SD Card Breakout Board Replacement: 8 단계, 이미지 1/1
    • Use two fingers and gently pull the SD card breakout board from its space.

결론

To reassemble your device, follow these instructions in reverse order.

Kayji Arai

회원 가입일: 02/05/19

211 평판

안내서 2개 작성하였습니다

UC Davis, Team S20-G7, Lore Winter 2019 UC Davis, Team S20-G7, Lore Winter 2019 회원

UCD-LORE-W19S20G7

2 회원들

안내서 4개 작성하였습니다

댓글 0개

댓글 쓰기

조회 통계:

24 시간 전: 0

7일 전: 1

30일 전: 1

전체 시간: 84