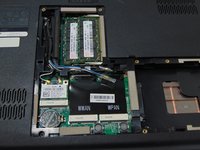
주요 콘텐츠로 건너뛰기

Dell Studio 1555 RAM Replacement

필요한 것

  1. Dell Studio 1555 RAM Replacement, Battery: 1 단계, 이미지 1/1
    • Turn off and unplug the laptop.

    • Failure to properly turn off device before handling the battery could result in electrical shock.

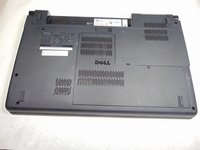
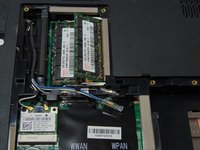
    • Flip the laptop so the underside is facing up with the battery closest to you.

  2. Dell Studio 1555 RAM Replacement: 2 단계, 이미지 1/3 Dell Studio 1555 RAM Replacement: 2 단계, 이미지 2/3 Dell Studio 1555 RAM Replacement: 2 단계, 이미지 3/3
    • Slide the locking switch to the left to release the battery.

  3. Dell Studio 1555 RAM Replacement: 3 단계, 이미지 1/1
    • Gently pull the battery away from the device.

  4. Dell Studio 1555 RAM Replacement, Back Panel: 4 단계, 이미지 1/3 Dell Studio 1555 RAM Replacement, Back Panel: 4 단계, 이미지 2/3 Dell Studio 1555 RAM Replacement, Back Panel: 4 단계, 이미지 3/3
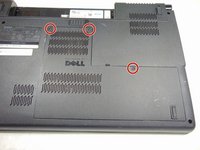
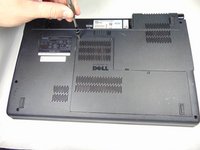
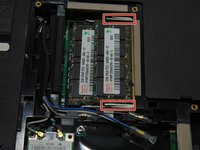
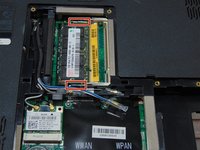
    • Loosen the three 5mm screws from the back panel using the # 1 Philips screwdriver.

    • The three 5mm screws will stay in place on the back panel.

  5. Dell Studio 1555 RAM Replacement: 5 단계, 이미지 1/1
    • Carefully remove the separated back panel.

    • If the back panel is difficult to remove and feels like it is going to break, DO NOT force it. Check to confirm that all the screws are unscrewed all the way before attempting again.

  6. Dell Studio 1555 RAM Replacement, RAM: 6 단계, 이미지 1/3 Dell Studio 1555 RAM Replacement, RAM: 6 단계, 이미지 2/3 Dell Studio 1555 RAM Replacement, RAM: 6 단계, 이미지 3/3
    • Press the tabs outwards to release the tabs. The memory stick is spring loaded and will be released at an angle.

  7. Dell Studio 1555 RAM Replacement: 7 단계, 이미지 1/1
    • Gently remove the memory stick from the slot.

  8. Dell Studio 1555 RAM Replacement: 8 단계, 이미지 1/2 Dell Studio 1555 RAM Replacement: 8 단계, 이미지 2/2
    • Once the first memory stick is removed, press the tabs outwards to release the tabs. The memory stick is spring loaded and will be released at an angle.

  9. Dell Studio 1555 RAM Replacement: 9 단계, 이미지 1/2 Dell Studio 1555 RAM Replacement: 9 단계, 이미지 2/2
    • Gently remove the memory stick from the slot.

결론

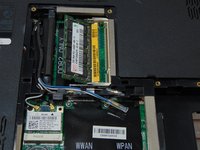
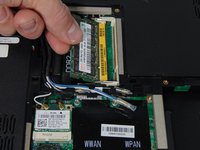
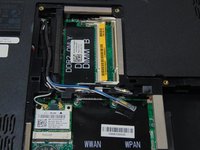
To reassemble your device, follow these instructions in reverse order.

다른 3명이 해당 안내서를 완성하였습니다.

Josh Boone

회원 가입일: 10/10/16

586 평판

안내서 4개 작성하였습니다

Sam Houston State, Team 12-3, Blackburne Fall 2016 Sam Houston State, Team 12-3, Blackburne Fall 2016 회원

SHSU-BLACKBURNE-F16S12G3

3 회원들

안내서 6개 작성하였습니다

댓글 0개

댓글 쓰기

조회 통계:

24 시간 전: 0

7일 전: 7

30일 전: 13

전체 시간: 999