주요 콘텐츠로 건너뛰기

Dell Studio 1735 Hard Drive Replacement

필요한 것

  1. Dell Studio 1735 Hard Drive Replacement, Battery: 1 단계, 이미지 1/1
    • Slide and click the battery latch release.

    • Slide the battery out of the battery bay.

  2. Dell Studio 1735 Hard Drive Replacement, Base Cover: 2 단계, 이미지 1/1
    • Loosen the eight captive screws on the base cover and lift the cover off the computer at an angle as shown in the figure.

  3. Dell Studio 1735 Hard Drive Replacement, Hard Drive: 3 단계, 이미지 1/1
    • Remove the four screws securing the hard drive assembly to the computer base.

    • Pull the blue pull-tab on the cable attached to the system board to disconnect the cable.

    • Pull the black pull-tab to lift the hard drive assembly out of the computer.

  4. Dell Studio 1735 Hard Drive Replacement: 4 단계, 이미지 1/2 Dell Studio 1735 Hard Drive Replacement: 4 단계, 이미지 2/2
    • Pull the interposer to detach it from the hard drive.

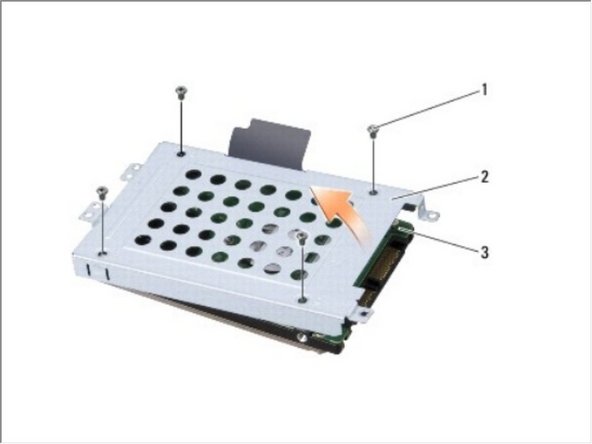
    • Remove the four M3 x 3-mm screws securing the hard drive cage to the hard drive.

    • Lift the hard drive cage off the hard drive.

결론

To reassemble your device, follow these instructions in reverse order.

다른 한 분이 해당 안내서를 완성하였습니다.

Johnathan Hammond

회원 가입일: 02/28/18

44,953 평판

안내서 408개 작성하였습니다

RampUP America, Inc. RampUP America, Inc. 회원

Community

42 회원들

안내서 1,985개 작성하였습니다

댓글 0개

댓글 쓰기

조회 통계:

24 시간 전: 2

7일 전: 6

30일 전: 11

전체 시간: 222