주요 콘텐츠로 건너뛰기

Dell Vostro 3550 CMOS Battery Replacement

필요한 것

  1. Dell Vostro 3550 CMOS Battery Replacement, Unlocking the Battery: 1 단계, 이미지 1/1
    • Slide the release latches to unlock the battery.

  2. Dell Vostro 3550 CMOS Battery Replacement, Sliding the Battery: 2 단계, 이미지 1/1
    • Slide the battery and remove it from the computer.

  3. Dell Vostro 3550 CMOS Battery Replacement, Keyboard: 3 단계, 이미지 1/3 Dell Vostro 3550 CMOS Battery Replacement, Keyboard: 3 단계, 이미지 2/3 Dell Vostro 3550 CMOS Battery Replacement, Keyboard: 3 단계, 이미지 3/3
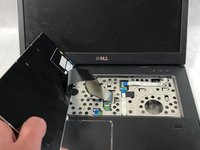
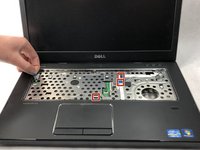
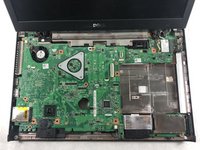
    • Turn the laptop right side up. Open the display to reveal the keyboard.

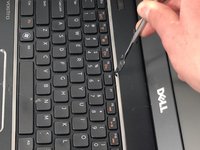
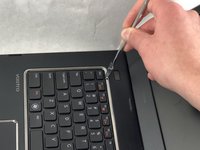
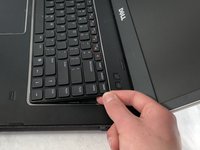
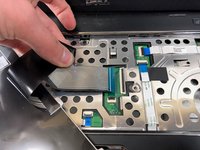
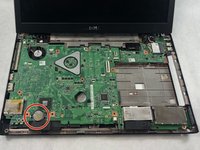
    • Use the metal spudger to pry the keyboard upward from the base. Make sure to pop each of the three clips keeping the keyboard in place.

  4. Dell Vostro 3550 CMOS Battery Replacement: 4 단계, 이미지 1/3 Dell Vostro 3550 CMOS Battery Replacement: 4 단계, 이미지 2/3 Dell Vostro 3550 CMOS Battery Replacement: 4 단계, 이미지 3/3
    • Carefully lift the keyboard upward to reveal the keyboard ribbon cable.

  5. Dell Vostro 3550 CMOS Battery Replacement: 5 단계, 이미지 1/2 Dell Vostro 3550 CMOS Battery Replacement: 5 단계, 이미지 2/2
    • Lift the black tab on the keyboard cable connector upwards to release the cable.

  6. Dell Vostro 3550 CMOS Battery Replacement: 6 단계, 이미지 1/3 Dell Vostro 3550 CMOS Battery Replacement: 6 단계, 이미지 2/3 Dell Vostro 3550 CMOS Battery Replacement: 6 단계, 이미지 3/3
    • Pull the ribbon cable away from the connector.

    • Remove the keyboard.

  7. Dell Vostro 3550 CMOS Battery Replacement, CMOS Battery: 7 단계, 이미지 1/3 Dell Vostro 3550 CMOS Battery Replacement, CMOS Battery: 7 단계, 이미지 2/3 Dell Vostro 3550 CMOS Battery Replacement, CMOS Battery: 7 단계, 이미지 3/3
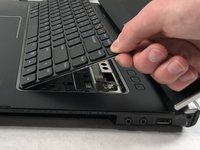
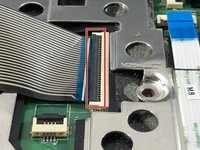
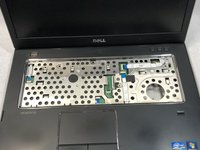
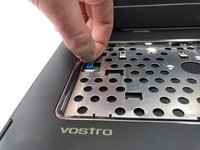
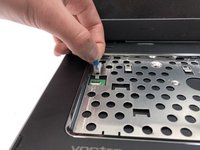
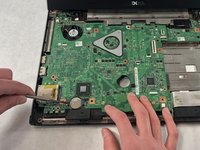
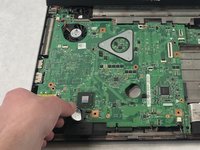
    • Remove the small cable connected to the left side of the casing.

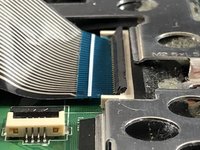
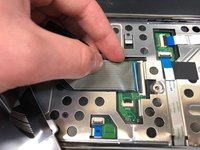
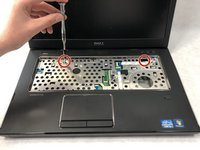
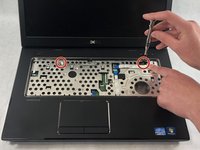
    • Repeat this step for the three remaining cables on the casing.

  8. Dell Vostro 3550 CMOS Battery Replacement: 8 단계, 이미지 1/2 Dell Vostro 3550 CMOS Battery Replacement: 8 단계, 이미지 2/2
    • Remove the two 5mm Phillips #0 screws to the far right and far left of the motherboard casing.

  9. Dell Vostro 3550 CMOS Battery Replacement: 9 단계, 이미지 1/3 Dell Vostro 3550 CMOS Battery Replacement: 9 단계, 이미지 2/3 Dell Vostro 3550 CMOS Battery Replacement: 9 단계, 이미지 3/3
    • Using the metal spudger, pry the palmrest assembly from the lower case.

    • Lift off the palmrest assembly to reveal the motherboard.

  10. Dell Vostro 3550 CMOS Battery Replacement: 10 단계, 이미지 1/3 Dell Vostro 3550 CMOS Battery Replacement: 10 단계, 이미지 2/3 Dell Vostro 3550 CMOS Battery Replacement: 10 단계, 이미지 3/3
    • Use a nylon spudger to pry the CMOS battery from the motherboard.

    • Remove the CMOS battery.

결론

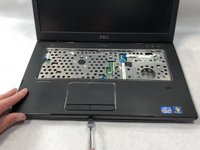
To reassemble your device, follow these instructions in reverse order.

다른 4명이 해당 안내서를 완성하였습니다.

Dylan J. Souza

회원 가입일: 03/22/19

775 평판

안내서 5개 작성하였습니다

UMass Dartmouth, Team S8-G6, Bailey Spring 2019 UMass Dartmouth, Team S8-G6, Bailey Spring 2019 회원

UMASSD-BAILEY-S19S8G6

3 회원들

안내서 7개 작성하였습니다

댓글 3개

Thank you, this saved my day.

Two small things:

- In step 7 I needed to remove four screws (visible in the picture).

- In order to perform step 9, I needed to remove seven screws from the bottom case.

Serge Helfrich - 답글

Glad you found it helpful!

Dylan J. Souza -

Note: before step 9, we need to remove all the screws from bottom before open the cover!

Thanks for all, it´s helped me A LOT!!!!!

Rodrigo Tognin - 답글

댓글 쓰기

조회 통계:

24 시간 전: 7

7일 전: 50

30일 전: 140

전체 시간: 10,066