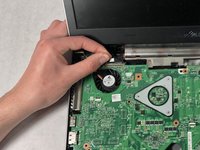
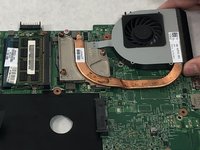
주요 콘텐츠로 건너뛰기

Dell Vostro 3550 Fan Replacement

필요한 것

  1. Dell Vostro 3550 Fan Replacement, Unlocking the Battery: 1 단계, 이미지 1/1
    • Slide the release latches to unlock the battery.

  2. Dell Vostro 3550 Fan Replacement, Sliding the Battery: 2 단계, 이미지 1/1
    • Slide the battery and remove it from the computer.

  3. Dell Vostro 3550 Fan Replacement, Keyboard: 3 단계, 이미지 1/3 Dell Vostro 3550 Fan Replacement, Keyboard: 3 단계, 이미지 2/3 Dell Vostro 3550 Fan Replacement, Keyboard: 3 단계, 이미지 3/3
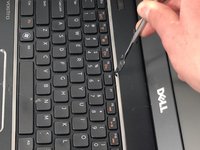
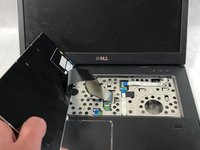
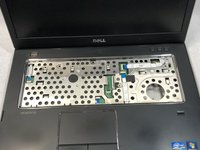
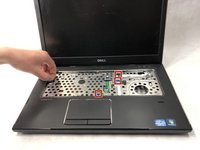
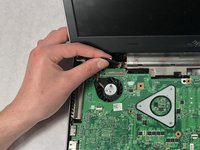
    • Turn the laptop right side up. Open the display to reveal the keyboard.

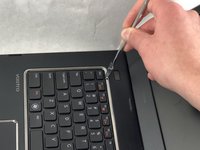
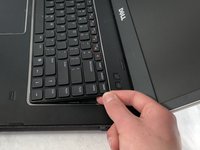
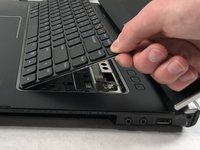
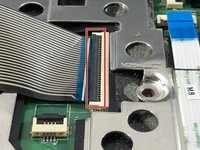
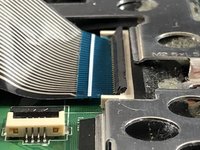
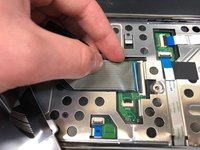
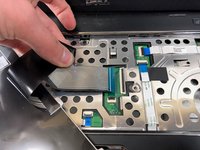
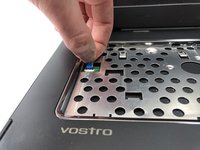
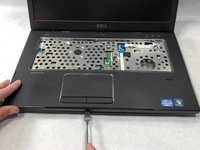
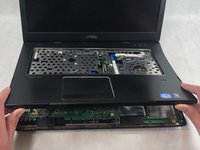
    • Use the metal spudger to pry the keyboard upward from the base. Make sure to pop each of the three clips keeping the keyboard in place.

  4. Dell Vostro 3550 Fan Replacement: 4 단계, 이미지 1/3 Dell Vostro 3550 Fan Replacement: 4 단계, 이미지 2/3 Dell Vostro 3550 Fan Replacement: 4 단계, 이미지 3/3
    • Carefully lift the keyboard upward to reveal the keyboard ribbon cable.

  5. Dell Vostro 3550 Fan Replacement: 5 단계, 이미지 1/2 Dell Vostro 3550 Fan Replacement: 5 단계, 이미지 2/2
    • Lift the black tab on the keyboard cable connector upwards to release the cable.

  6. Dell Vostro 3550 Fan Replacement: 6 단계, 이미지 1/3 Dell Vostro 3550 Fan Replacement: 6 단계, 이미지 2/3 Dell Vostro 3550 Fan Replacement: 6 단계, 이미지 3/3
    • Pull the ribbon cable away from the connector.

    • Remove the keyboard.

  7. Dell Vostro 3550 Fan Replacement, Remove the Screws: 7 단계, 이미지 1/1
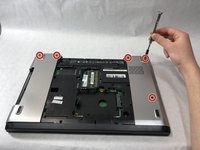
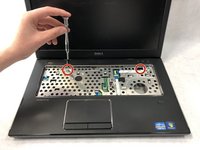
    • Remove the three 7mm Phillips #0 screws that secure the access panel to the base of the computer.

  8. Dell Vostro 3550 Fan Replacement, Lifting the Access Panel: 8 단계, 이미지 1/1
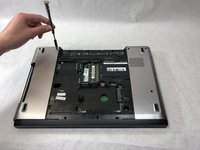
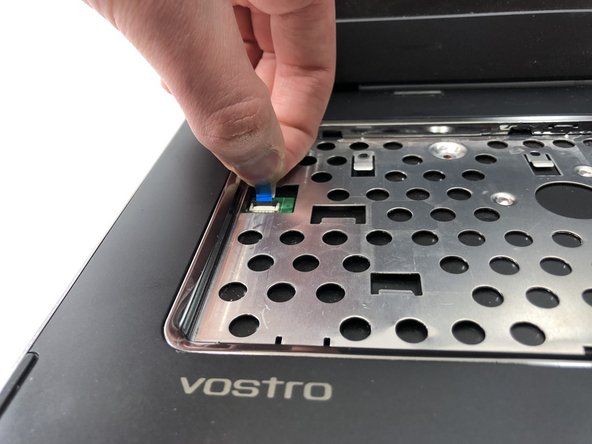
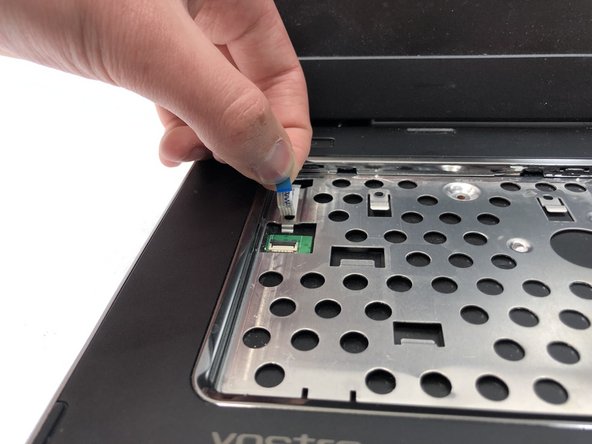
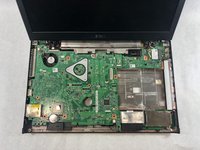
    • Lift the access panel up at an angle and remove it from the computer.

  9. Dell Vostro 3550 Fan Replacement, Remove the Screws: 9 단계, 이미지 1/1
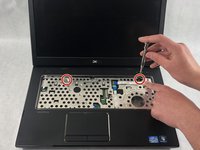
    • Remove the two 5mm Phillips #0 screws that secure the hard drive to the system.

  10. Dell Vostro 3550 Fan Replacement, Removing the Hard Drive: 10 단계, 이미지 1/1
    • Lift up the hard drive at an angle from the system and remove.

  11. Dell Vostro 3550 Fan Replacement, Remove the Screws: 11 단계, 이미지 1/1
    • Remove the four 5mm Phillips #0 screws that secure the hard drive bracket to the hard drive.

  12. Dell Vostro 3550 Fan Replacement, Motherboard: 12 단계, 이미지 1/2 Dell Vostro 3550 Fan Replacement, Motherboard: 12 단계, 이미지 2/2
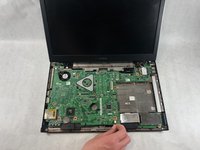
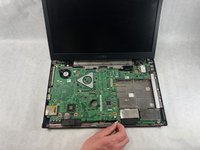
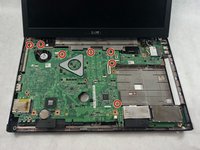
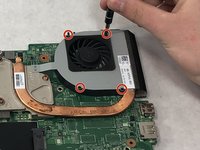
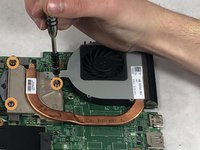
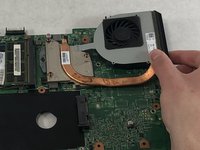
    • Remove the five 7mm Phillips #0 screws fastening the aluminum side panels to the laptop.

  13. Dell Vostro 3550 Fan Replacement: 13 단계, 이미지 1/2 Dell Vostro 3550 Fan Replacement: 13 단계, 이미지 2/2
    • Turn the computer over and open the screen.

    • Remove the two 5mm Phillips #0 screws to the far right and far left of the motherboard casing.

  14. Dell Vostro 3550 Fan Replacement: 14 단계, 이미지 1/3 Dell Vostro 3550 Fan Replacement: 14 단계, 이미지 2/3 Dell Vostro 3550 Fan Replacement: 14 단계, 이미지 3/3
    • Remove the small ribbon cable connected to the left side of the casing.

    • Repeat this step for the three remaining ribbon cables on the casing.

  15. Dell Vostro 3550 Fan Replacement: 15 단계, 이미지 1/3 Dell Vostro 3550 Fan Replacement: 15 단계, 이미지 2/3 Dell Vostro 3550 Fan Replacement: 15 단계, 이미지 3/3
    • Use the metal spudger to release the palmrest assembly from the rest of the laptop.

    • Lift off the palmrest assembly to reveal the motherboard.

  16. Dell Vostro 3550 Fan Replacement: 16 단계, 이미지 1/2 Dell Vostro 3550 Fan Replacement: 16 단계, 이미지 2/2
    • Remove the small cable connecting the motherboard to the rest of the computer.

  17. Dell Vostro 3550 Fan Replacement: 17 단계, 이미지 1/2 Dell Vostro 3550 Fan Replacement: 17 단계, 이미지 2/2
    • Remove the ribbon cable at the far left that is connecting the motherboard to the screen.

  18. Dell Vostro 3550 Fan Replacement: 18 단계, 이미지 1/3 Dell Vostro 3550 Fan Replacement: 18 단계, 이미지 2/3 Dell Vostro 3550 Fan Replacement: 18 단계, 이미지 3/3
    • Remove the seven 5mm Phillips #0 screws that are fastening the motherboard to the casing.

    • Lift upwards on the motherboard to remove it from the laptop casing.

  19. Dell Vostro 3550 Fan Replacement, Fan: 19 단계, 이미지 1/2 Dell Vostro 3550 Fan Replacement, Fan: 19 단계, 이미지 2/2
    • Flip over the motherboard to access the fan assembly.

  20. Dell Vostro 3550 Fan Replacement: 20 단계, 이미지 1/2 Dell Vostro 3550 Fan Replacement: 20 단계, 이미지 2/2
    • Remove the four 5mm Phillips #0 screws that are holding the fan down onto the motherboard.

    • Remove the three brass 8mm Phillips #0 screws fastening the heatsink to the motherboard.

  21. Dell Vostro 3550 Fan Replacement: 21 단계, 이미지 1/3 Dell Vostro 3550 Fan Replacement: 21 단계, 이미지 2/3 Dell Vostro 3550 Fan Replacement: 21 단계, 이미지 3/3
    • Gently lift the fan assembly and heatsink away from the motherboard, and put it down onto a flat surface.

  22. Dell Vostro 3550 Fan Replacement: 22 단계, 이미지 1/3 Dell Vostro 3550 Fan Replacement: 22 단계, 이미지 2/3 Dell Vostro 3550 Fan Replacement: 22 단계, 이미지 3/3
    • Once placed down, flip the fan casing upside down to expose the bottom shell of the fan.

    • Grab the shell of the fan and pull upwards.

    • Rest the shell of the fan on its hinge to reveal the blades of the fan.

  23. Dell Vostro 3550 Fan Replacement: 23 단계, 이미지 1/3 Dell Vostro 3550 Fan Replacement: 23 단계, 이미지 2/3 Dell Vostro 3550 Fan Replacement: 23 단계, 이미지 3/3
    • Gently pull upwards on the fan to separate the fan from the motor.

  24. Dell Vostro 3550 Fan Replacement: 24 단계, 이미지 1/1
    • Once the fan is removed, gently push the new one onto the motor.

결론

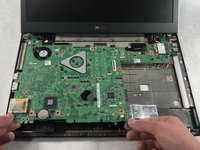
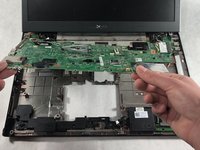
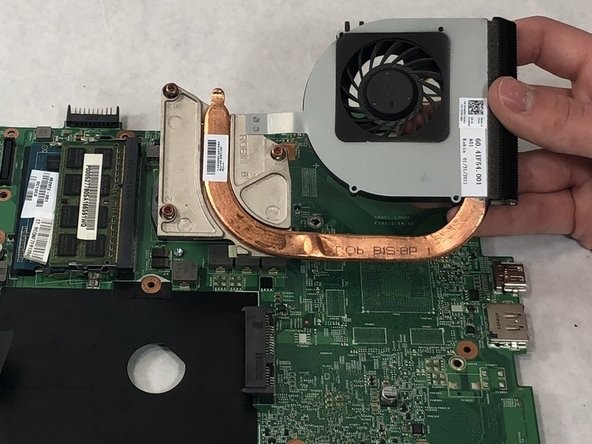
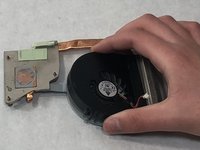
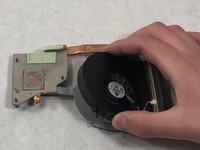
To reassemble your device, follow these instructions in reverse order.

다른 3명이 해당 안내서를 완성하였습니다.

Dylan J. Souza

회원 가입일: 03/22/19

781 평판

안내서 5개 작성하였습니다

UMass Dartmouth, Team S8-G6, Bailey Spring 2019 UMass Dartmouth, Team S8-G6, Bailey Spring 2019 회원

UMASSD-BAILEY-S19S8G6

3 회원들

안내서 7개 작성하였습니다

댓글 0개

댓글 쓰기

조회 통계:

24 시간 전: 0

7일 전: 8

30일 전: 16

전체 시간: 1,040