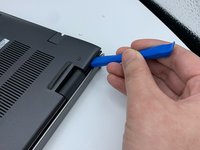
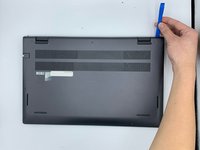
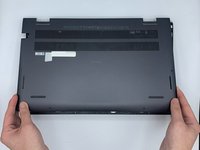
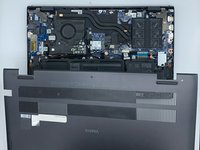
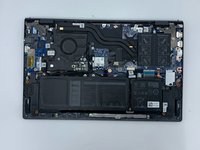
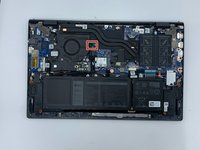
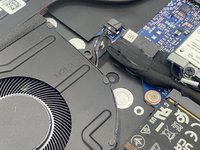
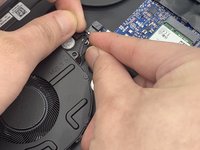
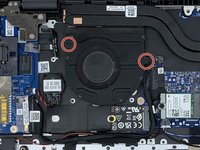
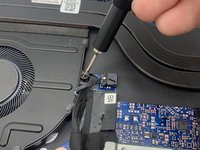
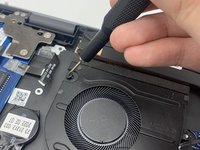
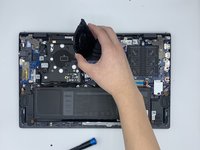
주요 콘텐츠로 건너뛰기

Dell Vostro 5510 Fan Replacement

필요한 것

  1. Dell Vostro 5510 Fan Replacement, Back Cover: 1 단계, 이미지 1개 중 1개
    • Power off your laptop before beginning disassembly.

    • Place the laptop so the bottom cover is facing upwards.

  2. Dell Vostro 5510 Fan Replacement: 2 단계, 이미지 1개 중 1개
    • Remove the remaining (M2x4mm) screws with the screwdriver.

    • Loosen the two captive (M2x7.5mm) corner screws with the screwdriver.

  3. Dell Vostro 5510 Fan Replacement: 3 단계, 이미지 3개 중 1개 Dell Vostro 5510 Fan Replacement: 3 단계, 이미지 3개 중 2개 Dell Vostro 5510 Fan Replacement: 3 단계, 이미지 3개 중 3개
    • Pry open the top left corner of the cover with the opening tool.

    • Pry open the top right corner of the cover with the opening tool.

    • Pry the rest of the cover with the opening tool, working in a clockwise motion until it is completely loosened.

  4. Dell Vostro 5510 Fan Replacement: 4 단계, 이미지 3개 중 1개 Dell Vostro 5510 Fan Replacement: 4 단계, 이미지 3개 중 2개 Dell Vostro 5510 Fan Replacement: 4 단계, 이미지 3개 중 3개
    • Lift the cover to remove it from the rest of the laptop.

  5. Dell Vostro 5510 Fan Replacement, Fan: 5 단계, 이미지 3개 중 1개 Dell Vostro 5510 Fan Replacement, Fan: 5 단계, 이미지 3개 중 2개 Dell Vostro 5510 Fan Replacement, Fan: 5 단계, 이미지 3개 중 3개
    • Disconnect the fan cable from the system board.

  6. Dell Vostro 5510 Fan Replacement: 6 단계, 이미지 3개 중 1개 Dell Vostro 5510 Fan Replacement: 6 단계, 이미지 3개 중 2개 Dell Vostro 5510 Fan Replacement: 6 단계, 이미지 3개 중 3개
    • Remove the two (M2x3mm) screws from the fan using the screwdriver.

  7. Dell Vostro 5510 Fan Replacement: 7 단계, 이미지 2개 중 1개 Dell Vostro 5510 Fan Replacement: 7 단계, 이미지 2개 중 2개
    • Lift the fan to remove it.

결론

To reassemble your device, follow these instructions in reverse order.

다른 한 분이 해당 안내서를 완성하였습니다.

작성자

1다른 기여자 명과 함께

Ky Vang

회원 가입일: 09/28/21

378 평판

안내서 3개를 작성함

댓글 0개

댓글 쓰기

조회 통계:

지난 24시간: 0

지난 7일: 4

지난 30일: 12

전체 시간: 196