주요 콘텐츠로 건너뛰기

Dell XPS 14 Back Panel Replacement

필요한 것

  1. Dell XPS 14 Back Panel Replacement, Back Panel: 1 단계, 이미지 1/1
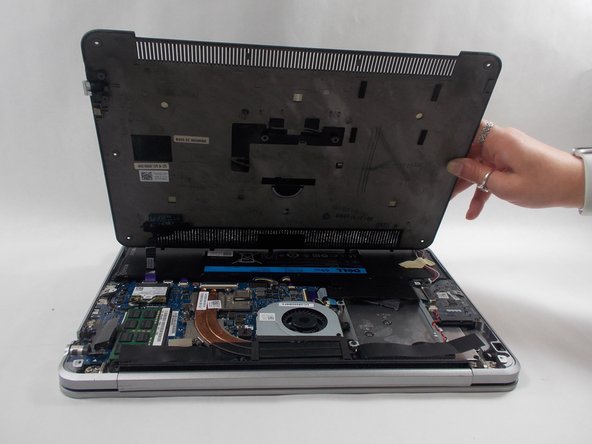
    • Position the computer back side up so that the “XPS” logo is facing you.

    • Remove six 3 mm screws along the perimeter of the back panel using a T5 Torx screwdriver.

  2. Dell XPS 14 Back Panel Replacement: 2 단계, 이미지 1/3 Dell XPS 14 Back Panel Replacement: 2 단계, 이미지 2/3 Dell XPS 14 Back Panel Replacement: 2 단계, 이미지 3/3
    • Use an opening tool to pry up the metal plate.

    • Remove the two 6 mm screws under the silver flap using a Phillips #0 screwdriver.

  3. Dell XPS 14 Back Panel Replacement: 3 단계, 이미지 1/2 Dell XPS 14 Back Panel Replacement: 3 단계, 이미지 2/2
    • Use an opening tool to pop out the back panel.

    • Once unhinged, the panel will open away from you.

    • The back panel will still be attached by a ribbon cable. Be cautious when opening the panel to ensure the ribbon stays intact.

  4. Dell XPS 14 Back Panel Replacement: 4 단계, 이미지 1/3 Dell XPS 14 Back Panel Replacement: 4 단계, 이미지 2/3 Dell XPS 14 Back Panel Replacement: 4 단계, 이미지 3/3
    • Flip over the back panel so that the interior of the panel is facing up.

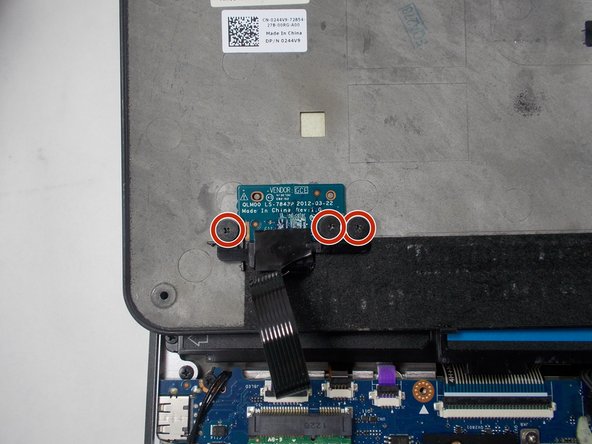
    • Remove three 2 mm screws that are connected to the vendor GCE disk on the bottom left corner of the back panel using a Phillips #0 screwdriver.

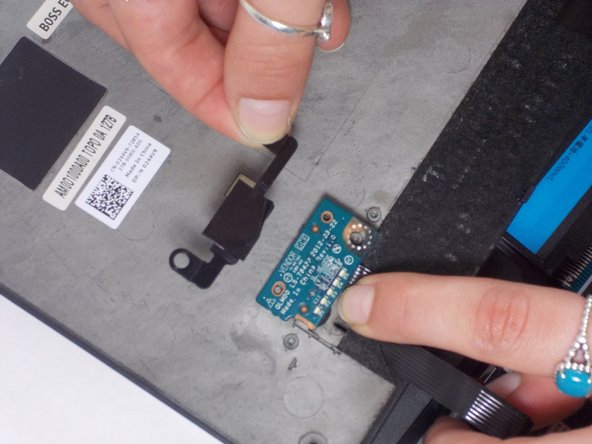
    • Remove the black plastic cover that holds the disk in place.

    • Remove the back panel.

    • The GCE disk should still be connected to the computer via a purple ribbon cable.

결론

To reassemble your device, follow these instructions in reverse order.

Kristen Gismondi

회원 가입일: 11/12/14

81,648 평판

안내서 200개 작성하였습니다

iFixit iFixit 회원

Staff

135 회원들

안내서 16,731개 작성하였습니다

댓글 0개

댓글 쓰기

조회 통계:

24 시간 전: 0

7일 전: 0

30일 전: 11

전체 시간: 221