주요 콘텐츠로 건너뛰기

Dewalt Nailers DCN21PL 2018 Main Electronics Replacement

필요한 것

  1. Dewalt Nailers DCN21PL 2018 Main Electronics Replacement, Remove the battery: 1 단계, 이미지 1/2 Dewalt Nailers DCN21PL 2018 Main Electronics Replacement, Remove the battery: 1 단계, 이미지 2/2
    • Before you begin the repair, remove the battery from the device.

  2. Dewalt Nailers DCN21PL 2018 Main Electronics Replacement, Remove casing screws: 2 단계, 이미지 1/2 Dewalt Nailers DCN21PL 2018 Main Electronics Replacement, Remove casing screws: 2 단계, 이미지 2/2
    • Use a T10 driver to remove the four screws securing the bottom half of the casing.

    • Remove the four T10 screws securing the top half of the casing.

  3. Dewalt Nailers DCN21PL 2018 Main Electronics Replacement, Remove the magazine: 3 단계, 이미지 1/1
    • Use a T10 driver to remove the screw securing the magazine to the base.

  4. Dewalt Nailers DCN21PL 2018 Main Electronics Replacement: 4 단계, 이미지 1/2 Dewalt Nailers DCN21PL 2018 Main Electronics Replacement: 4 단계, 이미지 2/2
    • Pull the magazine down and away to unlatch and release it from the nailer.

  5. Dewalt Nailers DCN21PL 2018 Main Electronics Replacement, Remove framing hook: 5 단계, 이미지 1/3 Dewalt Nailers DCN21PL 2018 Main Electronics Replacement, Remove framing hook: 5 단계, 이미지 2/3 Dewalt Nailers DCN21PL 2018 Main Electronics Replacement, Remove framing hook: 5 단계, 이미지 3/3
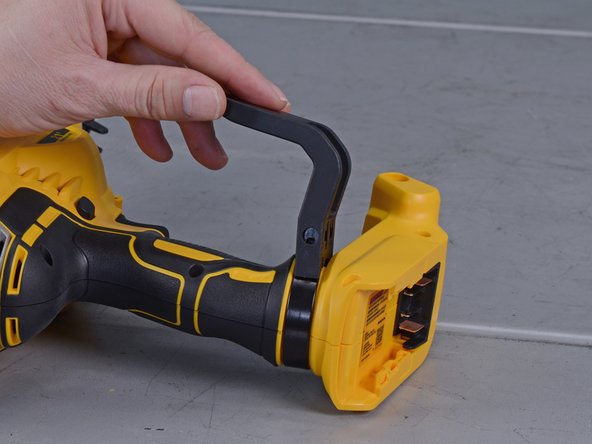
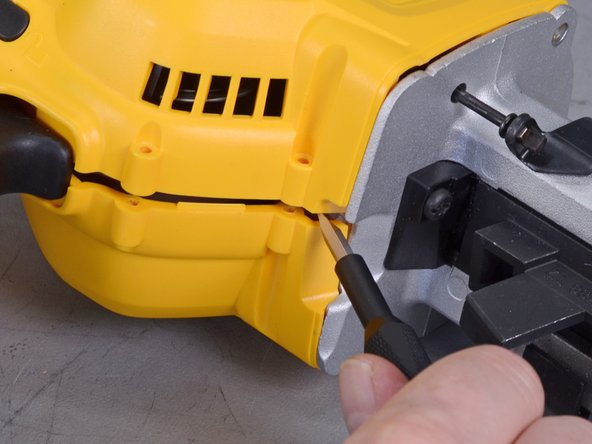
    • Use a T15 driver to remove the framing hook retaining screw.

    • Remove the hook.

  6. Dewalt Nailers DCN21PL 2018 Main Electronics Replacement, Remove hook clamp: 6 단계, 이미지 1/1
    • This step may require a lot of force.

    • Use your two thumbs to firmly spread the metal hook clamp apart while slowly pushing it forward off the handle.

    • When this clamp is being removed, it has a tendency to launch off of the handle after you release tension.

  7. Dewalt Nailers DCN21PL 2018 Main Electronics Replacement: 7 단계, 이미지 1/2 Dewalt Nailers DCN21PL 2018 Main Electronics Replacement: 7 단계, 이미지 2/2
    • Use a sharp blade to slice the label underneath the battery mount to disconnect the two halves of the case.

    • Always cut away from you or others around you.

  8. Dewalt Nailers DCN21PL 2018 Main Electronics Replacement: 8 단계, 이미지 1/1
    • Use a T20 driver to remove the two screws securing the two halves of the case to the front assembly.

  9. Dewalt Nailers DCN21PL 2018 Main Electronics Replacement, Remove return system: 9 단계, 이미지 1/2 Dewalt Nailers DCN21PL 2018 Main Electronics Replacement, Remove return system: 9 단계, 이미지 2/2
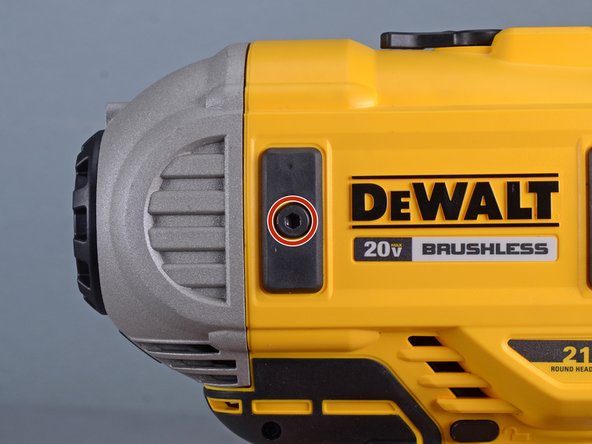
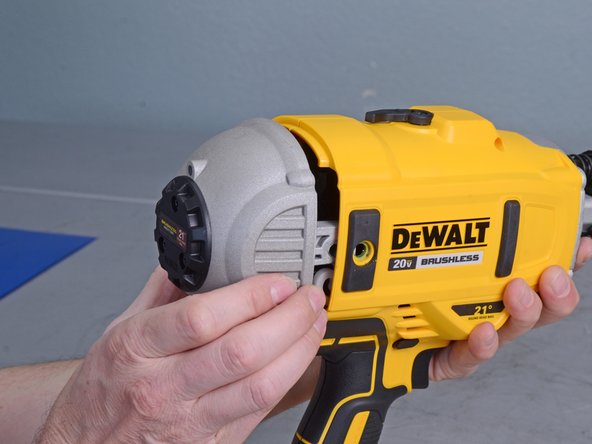
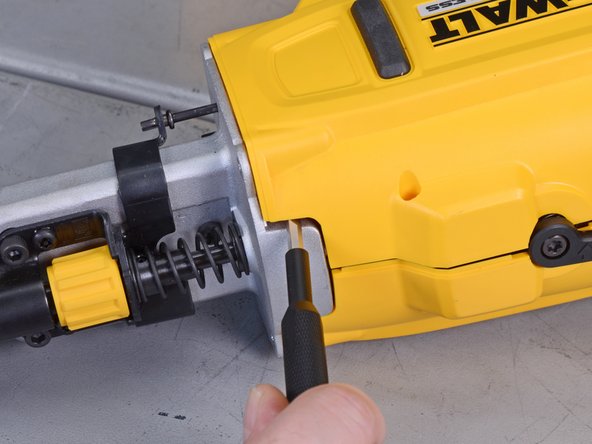
    • Use the provided 3.5 mm hex key to remove the two return system bolts on either side of the nailer.

  10. Dewalt Nailers DCN21PL 2018 Main Electronics Replacement: 10 단계, 이미지 1/3 Dewalt Nailers DCN21PL 2018 Main Electronics Replacement: 10 단계, 이미지 2/3 Dewalt Nailers DCN21PL 2018 Main Electronics Replacement: 10 단계, 이미지 3/3
    • Grab the end cap and slide the return system assembly out of the back of the nailer to remove it.

  11. Dewalt Nailers DCN21PL 2018 Main Electronics Replacement: 11 단계, 이미지 1/2 Dewalt Nailers DCN21PL 2018 Main Electronics Replacement: 11 단계, 이미지 2/2
    • Use a small flathead screwdriver in the gap between the two halves of the casing near the trigger to pry the two halves apart.

  12. Dewalt Nailers DCN21PL 2018 Main Electronics Replacement: 12 단계, 이미지 1/2 Dewalt Nailers DCN21PL 2018 Main Electronics Replacement: 12 단계, 이미지 2/2
    • Use a small flathead screwdriver near the top seam to continue prying the case apart .

  13. Dewalt Nailers DCN21PL 2018 Main Electronics Replacement, Remove right half of case: 13 단계, 이미지 1/2 Dewalt Nailers DCN21PL 2018 Main Electronics Replacement, Remove right half of case: 13 단계, 이미지 2/2
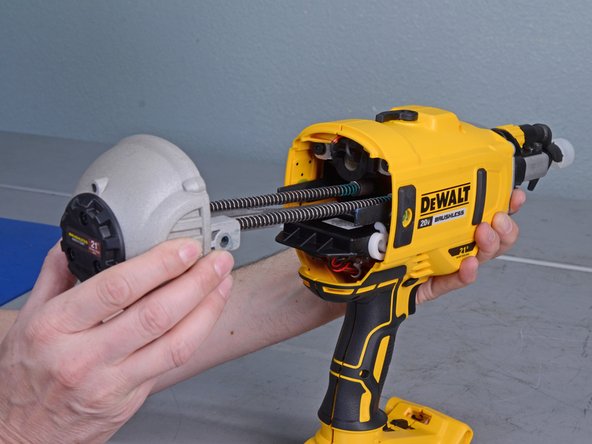
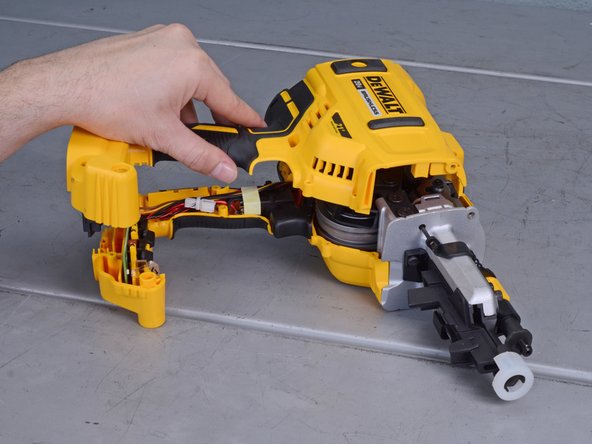
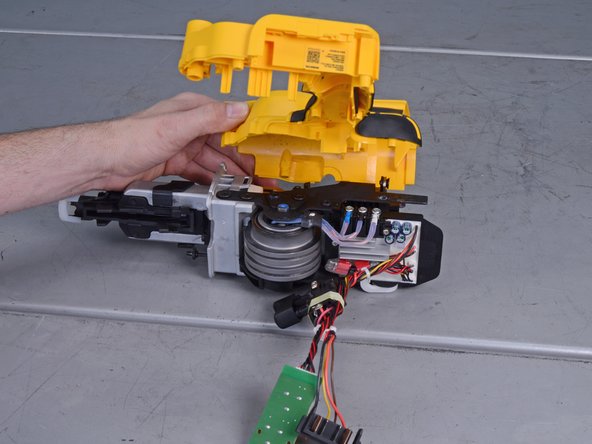
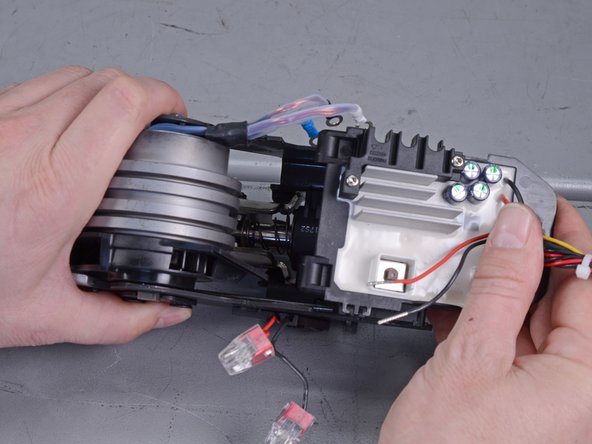
    • Once loose, lift up to remove the right half of the clamshell case.

  14. Dewalt Nailers DCN21PL 2018 Main Electronics Replacement, Remove lens cover: 14 단계, 이미지 1/2 Dewalt Nailers DCN21PL 2018 Main Electronics Replacement, Remove lens cover: 14 단계, 이미지 2/2
    • Remove the plastic lens cover.

  15. Dewalt Nailers DCN21PL 2018 Main Electronics Replacement, Remove board and switches: 15 단계, 이미지 1/3 Dewalt Nailers DCN21PL 2018 Main Electronics Replacement, Remove board and switches: 15 단계, 이미지 2/3 Dewalt Nailers DCN21PL 2018 Main Electronics Replacement, Remove board and switches: 15 단계, 이미지 3/3
    • The two switches and four detent springs are only held in place by the plastic casing, so they may fall out when you remove the board—this is fine.

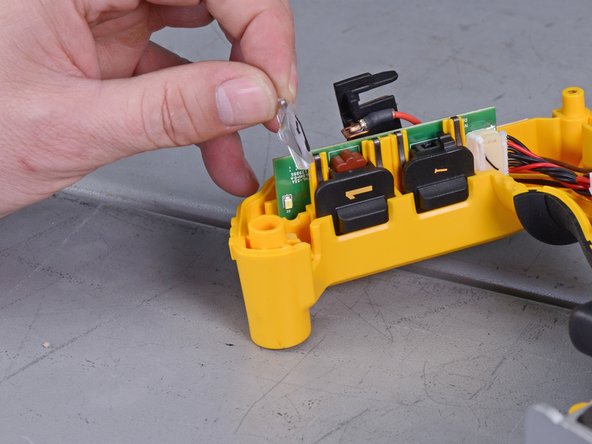
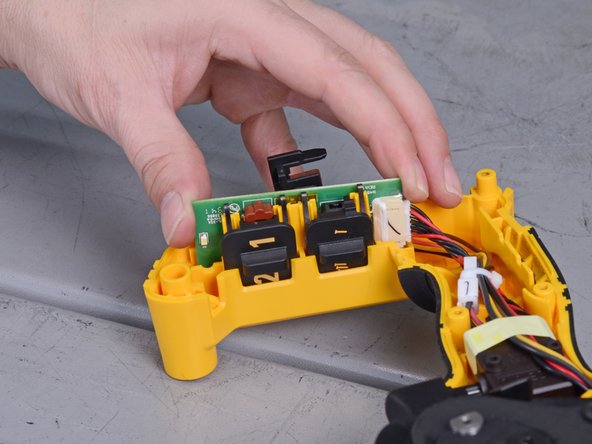
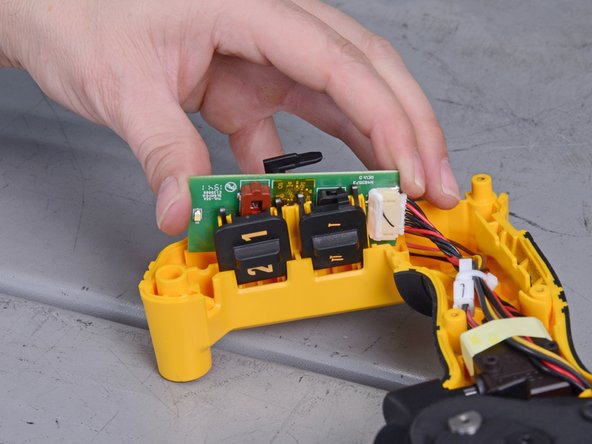
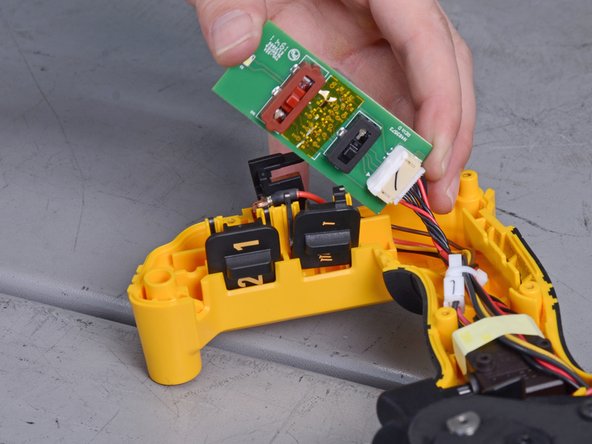
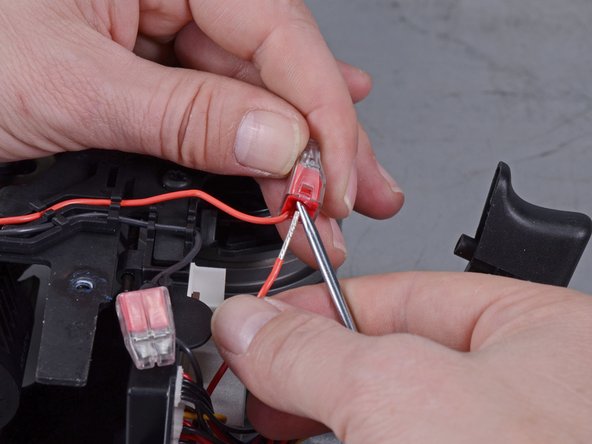
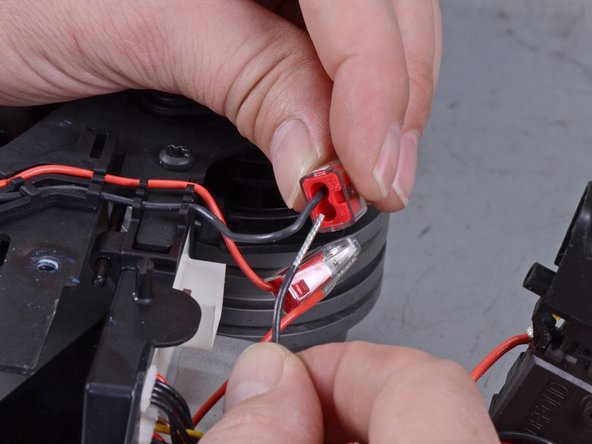
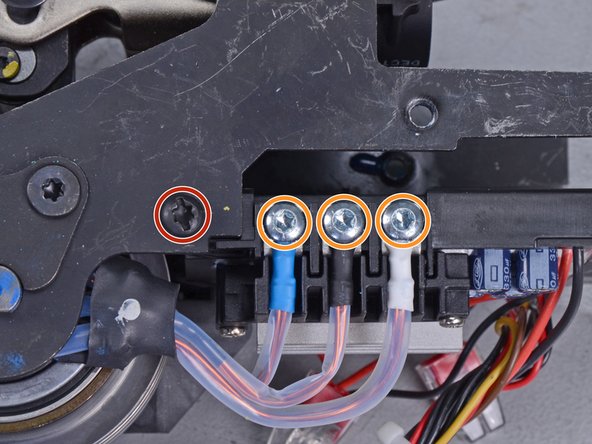
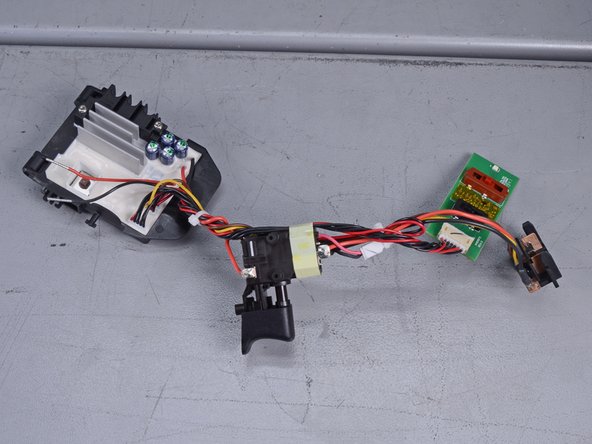
    • Grasp either side of the main circuit board and slowly pull it up and out of the slot in the casing.

    • Reassembly tip: note the correct location and orientation of the two switches and their detent springs.

  16. Dewalt Nailers DCN21PL 2018 Main Electronics Replacement, Remove trigger lock: 16 단계, 이미지 1/2 Dewalt Nailers DCN21PL 2018 Main Electronics Replacement, Remove trigger lock: 16 단계, 이미지 2/2
    • Pull up on the trigger lock to remove.

  17. Dewalt Nailers DCN21PL 2018 Main Electronics Replacement, Remove left half of case: 17 단계, 이미지 1/2 Dewalt Nailers DCN21PL 2018 Main Electronics Replacement, Remove left half of case: 17 단계, 이미지 2/2
    • Flip the nailer over.

    • Remove the remaining clamshell casing.

  18. Dewalt Nailers DCN21PL 2018 Main Electronics Replacement, Remove main electronics: 18 단계, 이미지 1/1
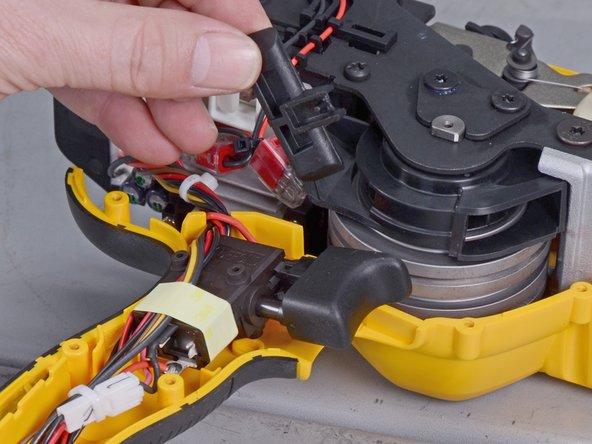
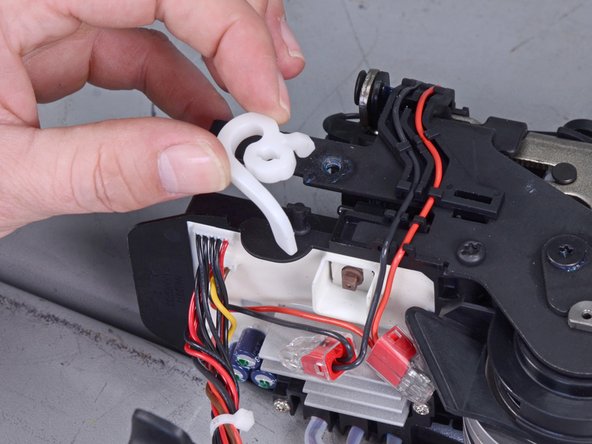
    • Use wire snips to cut the small black cable tie securing the four main board wires together.

  19. Dewalt Nailers DCN21PL 2018 Main Electronics Replacement: 19 단계, 이미지 1/2 Dewalt Nailers DCN21PL 2018 Main Electronics Replacement: 19 단계, 이미지 2/2
    • Pull the white plastic actuator straight up off its axle to remove.

  20. Dewalt Nailers DCN21PL 2018 Main Electronics Replacement: 20 단계, 이미지 1/3 Dewalt Nailers DCN21PL 2018 Main Electronics Replacement: 20 단계, 이미지 2/3 Dewalt Nailers DCN21PL 2018 Main Electronics Replacement: 20 단계, 이미지 3/3
    • Insert the point of a pick tool into the push-in connector's inlet hole, which has the main board wire plugged into it.

    • With the pick tool still inserted, pull the red main board wire out of the push-in connector.

    • Make sure you choose the inlet that connects to the main board, not the solenoid.

    • Repeat this same process for the black wire and other push-in connector.

  21. Dewalt Nailers DCN21PL 2018 Main Electronics Replacement: 21 단계, 이미지 1/2 Dewalt Nailers DCN21PL 2018 Main Electronics Replacement: 21 단계, 이미지 2/2
    • Use a T20 driver to remove the following screws:

    • Two 15 mm-long board retaining screws, one on either side.

    • Three 10 mm-long motor wire screws.

  22. Dewalt Nailers DCN21PL 2018 Main Electronics Replacement: 22 단계, 이미지 1/3 Dewalt Nailers DCN21PL 2018 Main Electronics Replacement: 22 단계, 이미지 2/3 Dewalt Nailers DCN21PL 2018 Main Electronics Replacement: 22 단계, 이미지 3/3
    • Slide the board off its guide pin to remove.

    • Reassembly tip: make sure the actuator plunger lines up with the guide hole on the main board housing.

결론

To reassemble your device, follow these instructions in reverse order.

다른 한 분이 해당 안내서를 완성하였습니다.

Carsten Frauenheim

회원 가입일: 03/10/20

116,243 평판

안내서 339개 작성하였습니다

iFixit iFixit 회원

Staff

137 회원들

안내서 17,524개 작성하였습니다

댓글 0개

댓글 쓰기

조회 통계:

24 시간 전: 0

7일 전: 12

30일 전: 33

전체 시간: 1,147