이 버전에는 잘못된 편집 사항이 있을 수 있습니다. 최신 확인된 스냅샷으로 전환하십시오.
필요한 것
-
이 단계는 번역되지 않았습니다. 번역을 도와주십시오
-
If the drive is not installed in a PC, a USB adapter can be used. If you are using an M.2 SSD (NVMe or SATA) you will need a different enclosure than shown in these guide photos.
-
If the hard drive is not installed and you do not have a USB adapter, it can be plugged into a motherboard.
-
-
이 단계는 번역되지 않았습니다. 번역을 도와주십시오
-
Boot your system into a live Ubuntu session. Locate the Disks application and select the suspicious hard drive.
-
From the drop-down menu, select SMART Data and Self Tests. This will pull up the SMART data.
-
Locate the following SMART attributes: Power On Hours and Power Cycle Count.
-
-
이 단계는 번역되지 않았습니다. 번역을 도와주십시오
-
Locate the following SMART attributes: Reallocated sector count; Current pending sector count.
-
To run a SMART Extended Self-Test, left click Start Self-Test. Select Extended from the drop-down menu.
-
-
-
이 단계는 번역되지 않았습니다. 번역을 도와주십시오
-
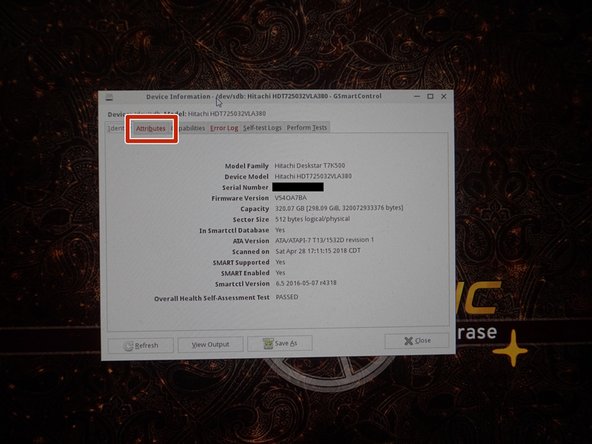
Select Disks from the desktop to open GSmartControl.
-
Select the hard disk you want to test. Click Attributes to read the SMART data.
-
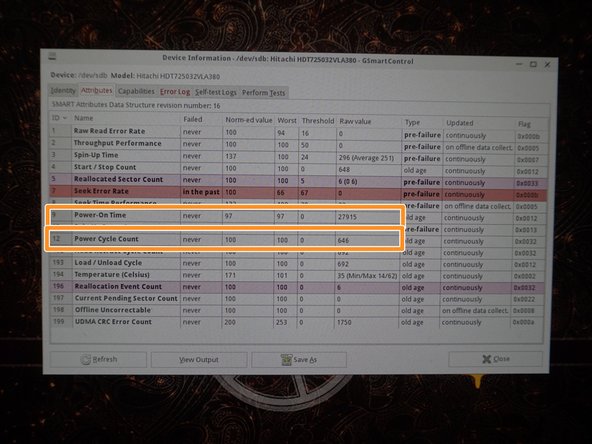
Locate the following attributes: Power On Time and Power Cycle Count.
-
-
이 단계는 번역되지 않았습니다. 번역을 도와주십시오
-
In the Attributes tab, locate the following SMART attributes: Reallocated Sector Count; Reallocation Event Count; Current Pending Sector Count.
-
To test the drive, select Perform Tests. Click Test type: and select Extended Self-Test.
-
-
이 단계는 번역되지 않았습니다. 번역을 도와주십시오
-
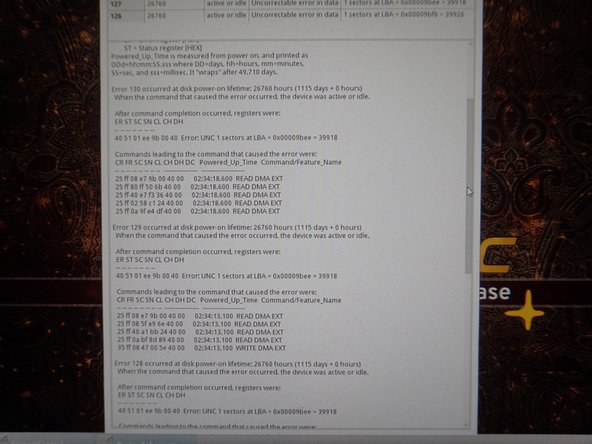
Check the error log for drive errors. Click the Error log tab, and review the logs.
-
In the Error log, review the available errors. Read these logs if any are found.
-
-
이 단계는 번역되지 않았습니다. 번역을 도와주십시오
-
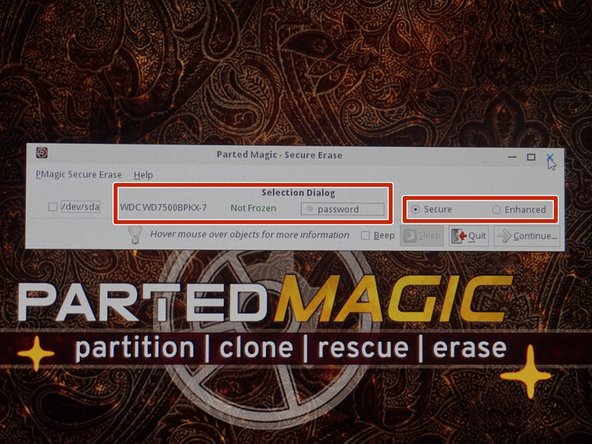
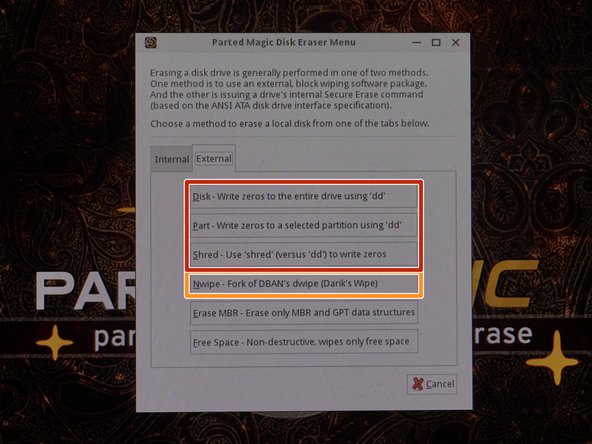
If your drive has a buggy ATA Secure Erase implementation, choose External and erase the drive with Nwipe. SSDs should only be erased with the Secure Erase command.
-
For NVMe SSDs, the best option is to use NVMe Secure Erase.
-


다른 한 분이 해당 안내서를 완성하였습니다.

팀
