주요 콘텐츠로 건너뛰기

Disassembling Acer Aspire 7551G

필요한 것

  1. Disassembling Acer Aspire 7551G, Disassembling Acer Aspire 7551G: 1 단계, 이미지 1/2 Disassembling Acer Aspire 7551G, Disassembling Acer Aspire 7551G: 1 단계, 이미지 2/2
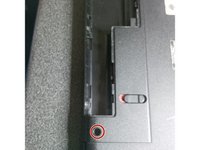
    • Remove the battery by sliding the locking latch to the right and pull the battery out.

  2. Disassembling Acer Aspire 7551G: 2 단계, 이미지 1/1
    • Use Phillips #000 Screwdriver to remove the case holding screws, remove the 4 screws that hold the back panel.

    • Apply gentle pressure when undoing the screws to preserve the condition of screw heads for future repairs or servicing.

    • It is important to manage all the extracted screws in a manner that will allow you to quickly place them where they belong during the reassembly process. You can take pictures of each step to memorize the screw placement, or purchase a magnetic pad and section the screws on it.

  3. Disassembling Acer Aspire 7551G, removing hard drive: 3 단계, 이미지 1/3 Disassembling Acer Aspire 7551G, removing hard drive: 3 단계, 이미지 2/3 Disassembling Acer Aspire 7551G, removing hard drive: 3 단계, 이미지 3/3
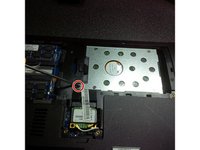
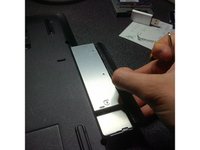
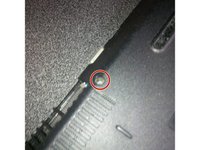
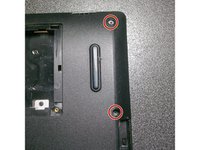
    • To remove the hard drive, undo the screw that holds it in place and carefully pull the HDD to the right.

  4. Disassembling Acer Aspire 7551G: 4 단계, 이미지 1/2 Disassembling Acer Aspire 7551G: 4 단계, 이미지 2/2
    • To remove the RAM modules just click the metal levers to the right.

    • Remove two black screws from the WiFi card.

    • While removing the antenna wires, make sure to memorize or take a picture of their color and position.

  5. Disassembling Acer Aspire 7551G, removing dvd bay.: 5 단계, 이미지 1/3 Disassembling Acer Aspire 7551G, removing dvd bay.: 5 단계, 이미지 2/3 Disassembling Acer Aspire 7551G, removing dvd bay.: 5 단계, 이미지 3/3
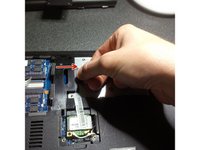
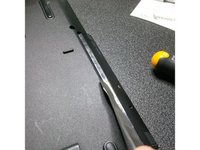
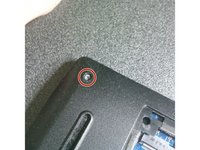
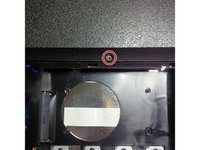
    • Using the Phillips #000 Screwdriver remove the screw that hold the DVD bay in place.

    • Use a spudger to pry the DVD bay away from the case.

  6. Disassembling Acer Aspire 7551G, removing case screws: 6 단계, 이미지 1/3 Disassembling Acer Aspire 7551G, removing case screws: 6 단계, 이미지 2/3 Disassembling Acer Aspire 7551G, removing case screws: 6 단계, 이미지 3/3
    • Use Phillips #000 Screwdriver to remove the case holding screws.

    • Remember to only apply gentle pressure when undoing the screws to preserve the condition of screw heads for future repairs or servicing.

  7. Disassembling Acer Aspire 7551G, remove screws part 2: 7 단계, 이미지 1/3 Disassembling Acer Aspire 7551G, remove screws part 2: 7 단계, 이미지 2/3 Disassembling Acer Aspire 7551G, remove screws part 2: 7 단계, 이미지 3/3
    • Use Phillips #000 Screwdriver to remove the case holding screws.

    • Remember to only apply gentle pressure when undoing the screws to preserve the condition of screw heads for future repairs or servicing.

  8. Disassembling Acer Aspire 7551G, removing the screws part 3: 8 단계, 이미지 1/3 Disassembling Acer Aspire 7551G, removing the screws part 3: 8 단계, 이미지 2/3 Disassembling Acer Aspire 7551G, removing the screws part 3: 8 단계, 이미지 3/3
    • Use Phillips #000 Screwdriver to remove the case holding screws.

    • Remember to only apply gentle pressure when undoing the screws to preserve the condition of screw heads for future repairs or servicing.

  9. Disassembling Acer Aspire 7551G, remove the keyboard: 9 단계, 이미지 1/3 Disassembling Acer Aspire 7551G, remove the keyboard: 9 단계, 이미지 2/3 Disassembling Acer Aspire 7551G, remove the keyboard: 9 단계, 이미지 3/3
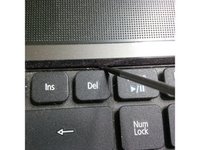
    • To remove the keyboard, pop the three latches away from the keyboard with a spudger.

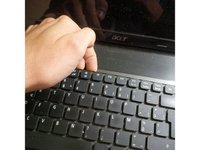
    • Gently pull the keyboard from the laptop, but be careful not to damage a flex cable that connect it to the motherboard.

  10. Disassembling Acer Aspire 7551G, remove keyboard flex cable: 10 단계, 이미지 1/2 Disassembling Acer Aspire 7551G, remove keyboard flex cable: 10 단계, 이미지 2/2
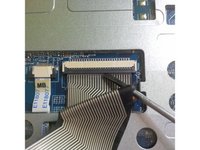
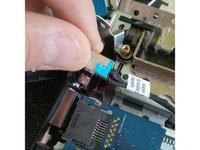
    • Move the flex cable away from the keyboard.

    • Place a Flathead screwdriver under the head of the cable and pry it upwards.

  11. Disassembling Acer Aspire 7551G, remove screws and cables of mid frame: 11 단계, 이미지 1/3 Disassembling Acer Aspire 7551G, remove screws and cables of mid frame: 11 단계, 이미지 2/3 Disassembling Acer Aspire 7551G, remove screws and cables of mid frame: 11 단계, 이미지 3/3
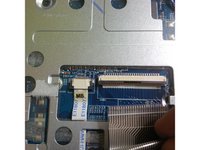
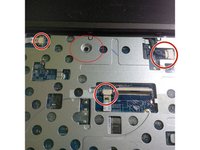
    • Use the IC Extractor/Connector Puller to remove the cables.

    • These connectors are extremely fragile, only use minimal force and extreme care.

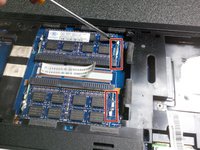
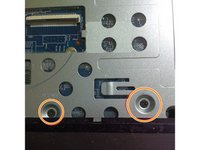
    • Use the Phillips #000 Screwdriver to remove the frame screws.

    • Apply gentle pressure when undoing the screws to preserve the condition of screw heads for future repairs or servicing.

  12. Disassembling Acer Aspire 7551G, removing the screen: 12 단계, 이미지 1/3 Disassembling Acer Aspire 7551G, removing the screen: 12 단계, 이미지 2/3 Disassembling Acer Aspire 7551G, removing the screen: 12 단계, 이미지 3/3
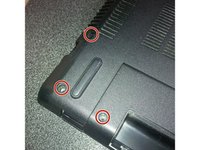
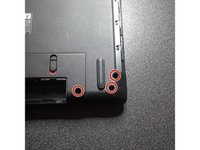
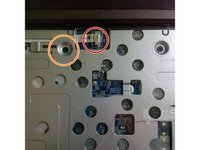
    • Remove all black plastic stickers to reveal the hidden screws.

    • Use Phillips #000 Screwdriver to remove the hidden screws.

    • Carefully slide your prybar under the edge and gently pry around the perimeter.

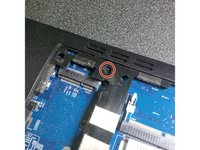
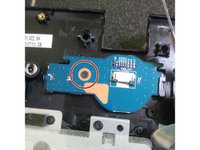
    • Remove the cable from the webcam module

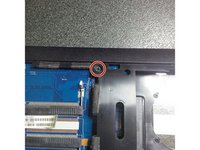
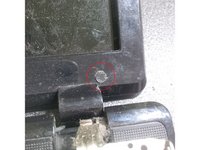
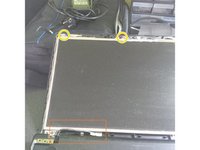
    • Remove the screws that hold the screen to the inner frame.

    • Apply gentle pressure when undoing the screws to preserve the condition of screw heads for future repairs or servicing.

  13. Disassembling Acer Aspire 7551G, removing the screen part 2: 13 단계, 이미지 1/1
    • Gently unplug the LCD cable.

  14. Disassembling Acer Aspire 7551G, opening the case: 14 단계, 이미지 1/3 Disassembling Acer Aspire 7551G, opening the case: 14 단계, 이미지 2/3 Disassembling Acer Aspire 7551G, opening the case: 14 단계, 이미지 3/3
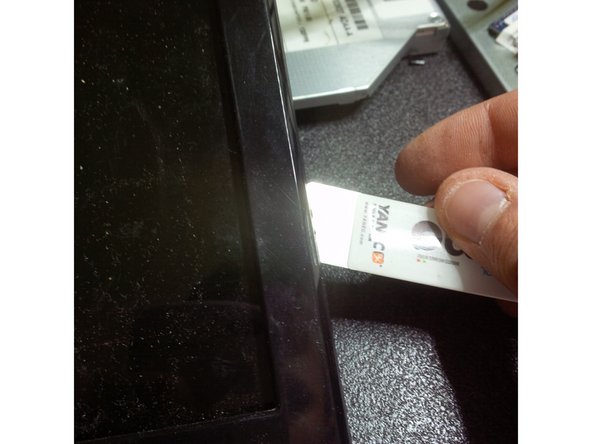
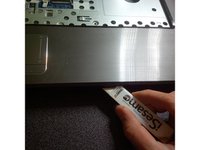
    • Use the iSesamo Opening Tool to pry under the outer edge of the laptop body.

    • After hearing the first click, move the tool around the perimeter until all of the clips are undone.

    • While some force will be required in this step, make sure not to over-apply pressure since extra force might break the plastic clips.

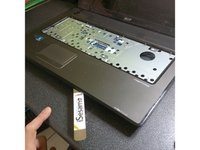
    • After the clips are undone, remove the back cover.

  15. Disassembling Acer Aspire 7551G, removing mainboard: 15 단계, 이미지 1/3 Disassembling Acer Aspire 7551G, removing mainboard: 15 단계, 이미지 2/3 Disassembling Acer Aspire 7551G, removing mainboard: 15 단계, 이미지 3/3
    • Carefully remove the ribbon cable connecting the two halves of the motherboard.

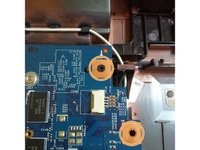
    • Use Phillips #000 Screwdriver to remove the motherboard screws.

    • Apply gentle pressure when undoing the screws to preserve the condition of screw heads for future repairs or servicing.

    • Use a plastic prybar to remove the LCD connector. Be careful not to break the cable or its plastic holder.

    • Unplug the DC jack cable before removing the motherboard.

  16. Disassembling Acer Aspire 7551G, remove mainboard part 2: 16 단계, 이미지 1/3 Disassembling Acer Aspire 7551G, remove mainboard part 2: 16 단계, 이미지 2/3 Disassembling Acer Aspire 7551G, remove mainboard part 2: 16 단계, 이미지 3/3
    • Remove the disconnected DC jack from its holder.

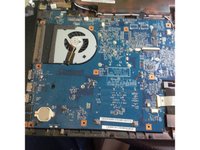
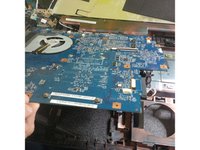
    • Carefully lift the motherboard out of the case.

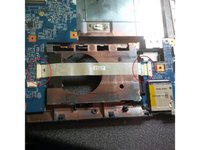
    • Use Phillips #000 Screwdriver to remove the screw that is holding the power PCB.

    • Apply gentle pressure when undoing the screws to preserve the condition of screw heads for future repairs or servicing.

  17. Disassembling Acer Aspire 7551G, removing the DC jack.: 17 단계, 이미지 1/1
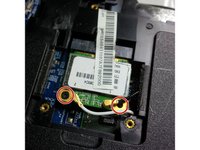
    • If the replacement of the DC jack is necessary, use the IC Extractor/Connector Puller to safely unplug the connection.

  18. Disassembling Acer Aspire 7551G, remove cooling pads and fan: 18 단계, 이미지 1/1
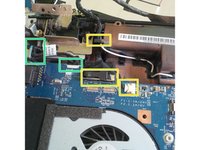
    • Use the IC Extractor/Connector Puller to safely unplug the fan power connector.

  19. Disassembling Acer Aspire 7551G, removing cooling pads and fan part 2: 19 단계, 이미지 1/3 Disassembling Acer Aspire 7551G, removing cooling pads and fan part 2: 19 단계, 이미지 2/3 Disassembling Acer Aspire 7551G, removing cooling pads and fan part 2: 19 단계, 이미지 3/3
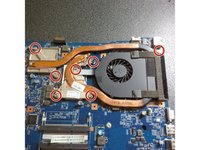
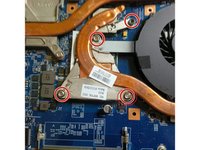
    • Use the Phillips #000 Screwdriver to remove the cooling pad screws.

    • Apply gentle pressure when undoing the screws to preserve the condition of screw heads for future repairs or servicing.

    • Make sure that the screw pressure across the metal plate remain rather constant. Undo the screws by a couple of rotations each, removing them AT the same time.

    • Lift the cooling pads and the fan assembly.

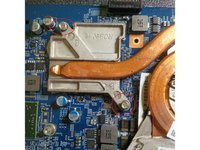
    • Remove the old thermal compound, degrease the surface with rubbing alcohol.

    • Use a can of compressed air to clean the fan assembly.

결론

To reassemble your device, follow these instructions in reverse order.

다른 5명이 해당 안내서를 완성하였습니다.

Kevin D

회원 가입일: 05/02/14

7,276 평판

안내서 21개 작성하였습니다

댓글 2개

Wonderful techniques to follow. Very good explation and practical work.

Sck - 답글

Thanks, glad i could help.

Kevin D - 답글

댓글 쓰기

조회 통계:

24 시간 전: 1

7일 전: 12

30일 전: 41

전체 시간: 13,522