이 버전에는 잘못된 편집 사항이 있을 수 있습니다. 최신 확인된 스냅샷으로 전환하십시오.
필요한 것
-
이 단계는 번역되지 않았습니다. 번역을 도와주십시오
-
Remove one 5mm phillips screw located under the identification sticker. You will need to remove the sticker or make a hole to get to the screw.
-
-
-
이 단계는 번역되지 않았습니다. 번역을 도와주십시오
-
Remove the metal case from the top case of the AirPort, there are no screws holding it on.
-
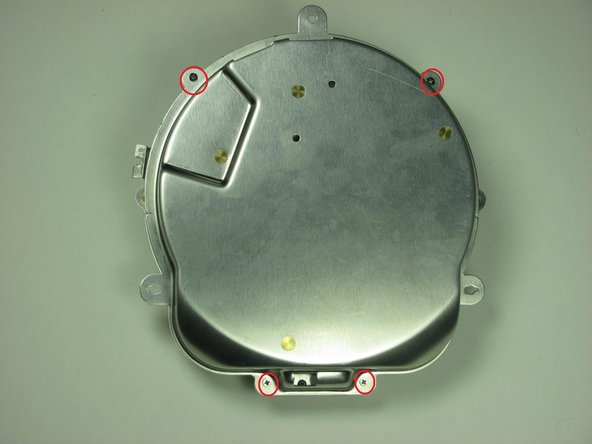
Remove the four screws from the metal casing.
-


다른 3명이 해당 안내서를 완성하였습니다.
팀

Cal Poly, Team 17-15, Regan Fall 2011 Cal Poly, Team 17-15, Regan Fall 2011 회원
CPSU-REGAN-F11S17G15
3 회원들
안내서 13개 작성하였습니다
댓글 한 개
Whoa, who’d have thought there was a hidden 5mm phillips under the serial number that does the trick? I’ve had this little beauty hanging around for decades, and my six year old started using it as a flying saucer with his lego creations, and it took me three months of pandemic before I picked up my screwdrivers and tried to take it apart so that he could really use it. For now it’s just empty, and he closes some figures in it with a rubber band and flies it around. Someday I’ll get that dremel i’ve wanted and make him some sort of hatch and latch for it, maybe add some lego baseplate bits to it or something, it can join the rebel alliance for reals.