주요 콘텐츠로 건너뛰기

Disassembling Cambridge Audio A3i Case

필요한 것

  1. Disassembling Cambridge Audio A3i Case, Case: 1 단계, 이미지 1/1
    • Remove 2 screws from each side of the amplifier.

  2. Disassembling Cambridge Audio A3i Case: 2 단계, 이미지 1/1
    • Remove 2 screws on rear of device. Slide top cover up and back from main case.

  3. Disassembling Cambridge Audio A3i Case: 3 단계, 이미지 1/2 Disassembling Cambridge Audio A3i Case: 3 단계, 이미지 2/2
    • Remove 3 screws on bottom of case.

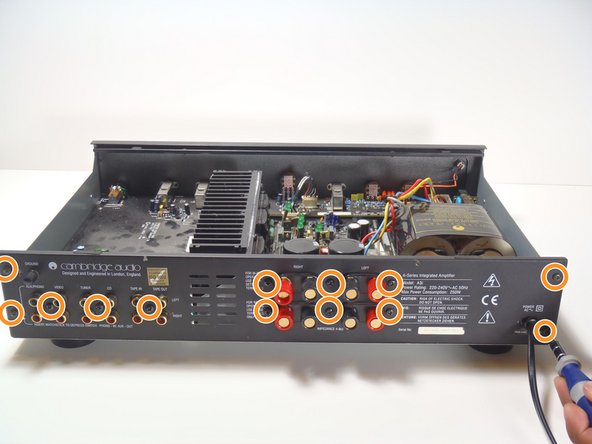
    • Remove 13 screws on rear panel.

    • Do not move the rear panel too far, as the power cord is still connected.

  4. Disassembling Cambridge Audio A3i Case: 4 단계, 이미지 1/1
    • Using a pair of pliers, squeeze the retainer for the power cord as shown and pull it toward the external side the panel.

    • It may require some wiggling, but it should slip out of the hole and then off of the cord.

결론

To reassemble your device, follow these instructions in reverse order.

다른 3명이 해당 안내서를 완성하였습니다.

Colby

회원 가입일: 04/15/10

338 평판

안내서 3개 작성하였습니다

Cal Poly, Team 28-36, Regan Spring 2010 Cal Poly, Team 28-36, Regan Spring 2010 회원

CPSU-REGAN-S10S28G36

4 회원들

안내서 3개 작성하였습니다

댓글 0개

댓글 쓰기

조회 통계:

24 시간 전: 0

7일 전: 3

30일 전: 14

전체 시간: 4,120