주요 콘텐츠로 건너뛰기

이 안내서에는 최근 변경 사항이 더 있습니다. 최신 비검증 버전으로 전환하십시오.

Disassembling DualShock 4 Controller

단지 전제 조건
이 안내서는 다른 가이드의 선행 작업으로 사용하기 위한 것입니다. 그 자체로는 불완전합니다.

필요한 것

  1. Disassembling DualShock 4 Controller, Controller: 1 단계, 이미지 1/1
    • Using the Phillips #00 Screwdriver, remove the four 6.0 mm screws securing the rear cover to the controller.

    • Do not forcefully loosen the screws, as it will amount to permanent damage of the threads, making removal impossible.

  2. Disassembling DualShock 4 Controller: 2 단계, 이미지 1/3 Disassembling DualShock 4 Controller: 2 단계, 이미지 2/3 Disassembling DualShock 4 Controller: 2 단계, 이미지 3/3
    • Beginning with the left handle:

    • Pinch the left handle of the controller to introduce an opening.

    • Wedge a plastic opening tool into the opening and slide it up towards the joystick.

    • Pull down on the plier to crack open the casing.

    • Repeat these steps for the right handle.

  3. Disassembling DualShock 4 Controller: 3 단계, 이미지 1/3 Disassembling DualShock 4 Controller: 3 단계, 이미지 2/3 Disassembling DualShock 4 Controller: 3 단계, 이미지 3/3
    • Wedge a plastic opening tool into the case-splittings and pull down to crack open the casing near the following buttons:

    • Share button

    • Options button

    • Split the plastic covers of the controller apart, taking note that they will still be attached by circuit board ribbons.

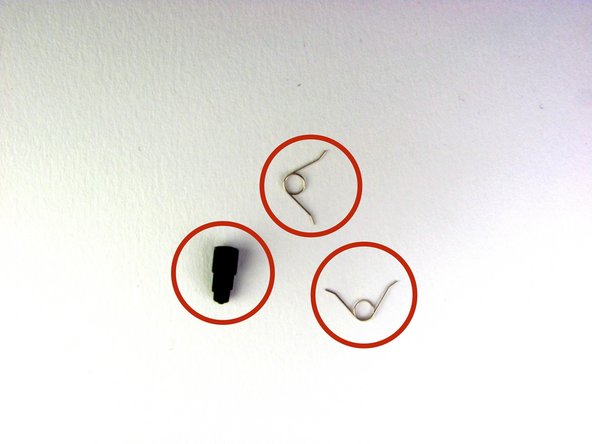
    • Three small pieces are often released from the framework. To prevent loss, maintain a controlled work field.

    • 2 Trigger Springs

    • 1 Grey Reset Button Extension

결론

To reassemble your device, follow these instructions in reverse order.

Mark

회원 가입일: 01/21/14

7,719 평판

안내서 7개 작성하였습니다

Cal Poly, Team 6-21, Maness Winter 2014 Cal Poly, Team 6-21, Maness Winter 2014 회원

CPSU-MANESS-W14S6G21

4 회원들

안내서 40개 작성하였습니다

댓글 0개

댓글 쓰기

조회 통계:

24 시간 전: 1

7일 전: 11

30일 전: 13

전체 시간: 2,256