이 버전에는 잘못된 편집 사항이 있을 수 있습니다. 최신 확인된 스냅샷으로 전환하십시오.
필요한 것
-
이 단계는 번역되지 않았습니다. 번역을 도와주십시오
-
To remove the battery from the casing, grab the front panel and back panel with opposite hands (as shown). The back panel is the same as the battery.
-
With your index finger, push in the button on the bottom of the battery to release it.
-
Pull the battery away from the phone.
-
-
이 단계는 번역되지 않았습니다. 번역을 도와주십시오
-
After removing the battery, the front phone casing becomes accessible.
-
Locate the two star-shaped T6 screws on the bottom end of the rear of the phone, underneath the battery, as indicated by the red circles.
-
Remove these two screws using the Torx T6 Screwdriver.
-
-
이 단계는 번역되지 않았습니다. 번역을 도와주십시오
-
Locate the top two U-shaped screws on the back of the phone, as shown by the red circles.
-
Remove these two screws with a SP 2.6 screw driver.
-
-
-
이 단계는 번역되지 않았습니다. 번역을 도와주십시오
-
Grab opposite panels of the phone casing and carefully open and pull apart the phone, as shown in the image.
-
-
이 단계는 번역되지 않았습니다. 번역을 도와주십시오
-
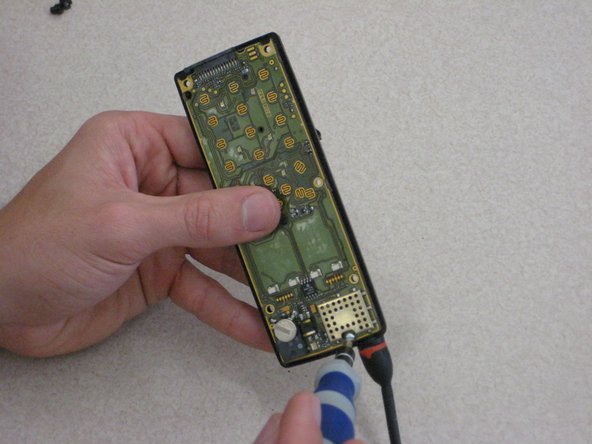
Locate the circuit board on the rear side of the front phone casing (right side of image).
-
Locate the mounting screws (indicated by red circles), which attach the board to the rear side of the front phone casing.
-
-
이 단계는 번역되지 않았습니다. 번역을 도와주십시오
-
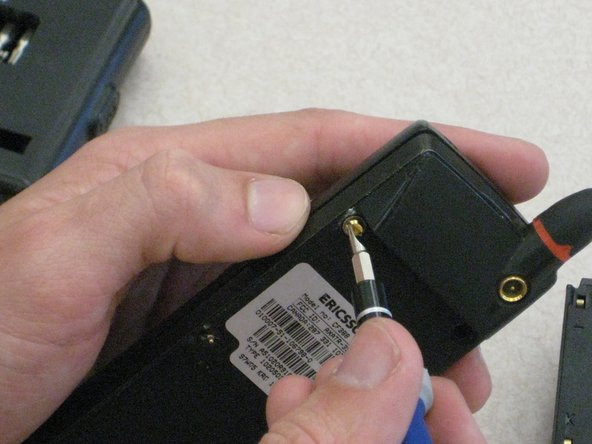
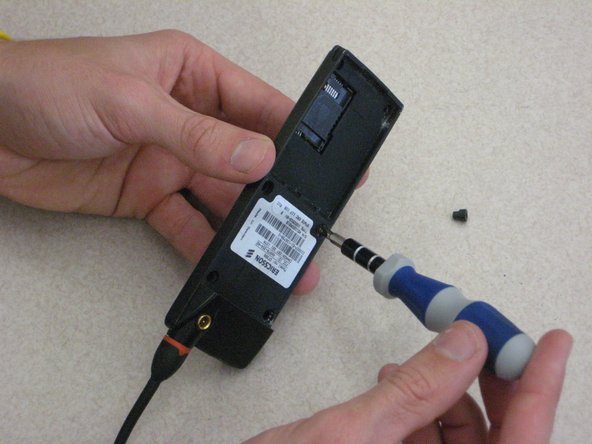
Using the SP2.6 u-shaped screw driver in one hand, loosen and remove both center screws. Hold the back part of the screw with the metal tweezers.
-
-
이 단계는 번역되지 않았습니다. 번역을 도와주십시오
-
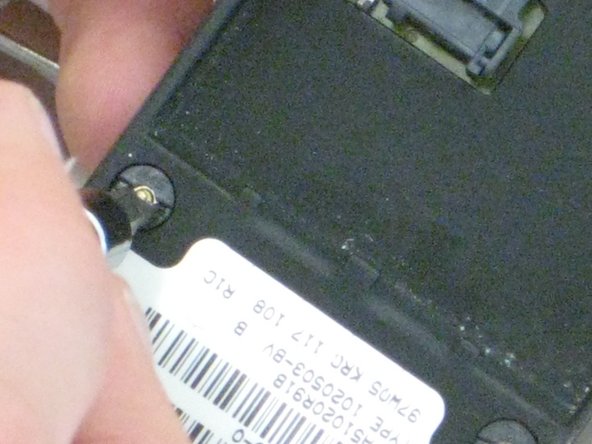
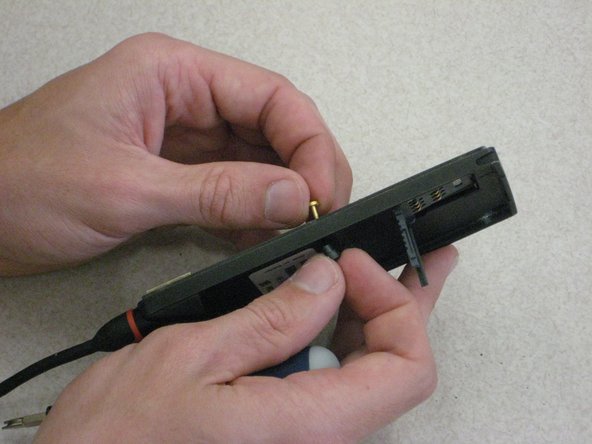
Locate the final screw at the top of the phone near the antenna, as shown by the red circle.
-
Using the U-shaped screw driver, remove the top screw.
-
-
이 단계는 번역되지 않았습니다. 번역을 도와주십시오
-
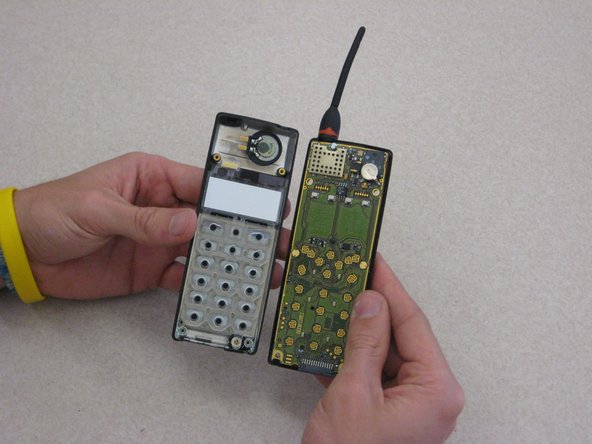
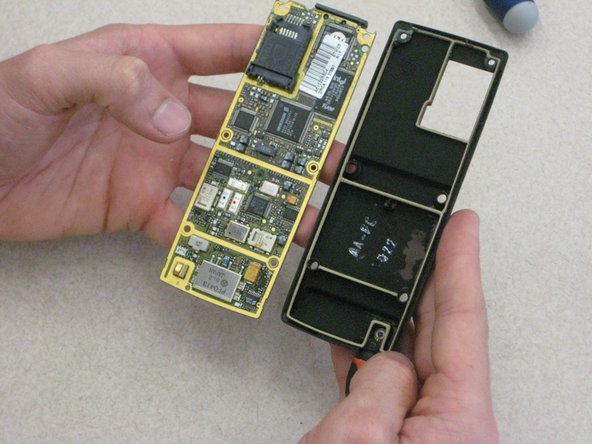
With one hand on the circuit board and one hand on the phone casing, carefully pull apart the circuit board from the front panel casing.
-


팀

Clemson, Team 1-1, Benson Spring 2012 Clemson, Team 1-1, Benson Spring 2012 회원
CLEM-BENSON-S12S1G1
3 회원들
안내서 21개 작성하였습니다