주요 콘텐츠로 건너뛰기

Disassembling Insignia NS-B2110 Internal Components

필요한 것

  1. Disassembling Insignia NS-B2110 Internal Components, Battery: 1 단계, 이미지 1/2 Disassembling Insignia NS-B2110 Internal Components, Battery: 1 단계, 이미지 2/2
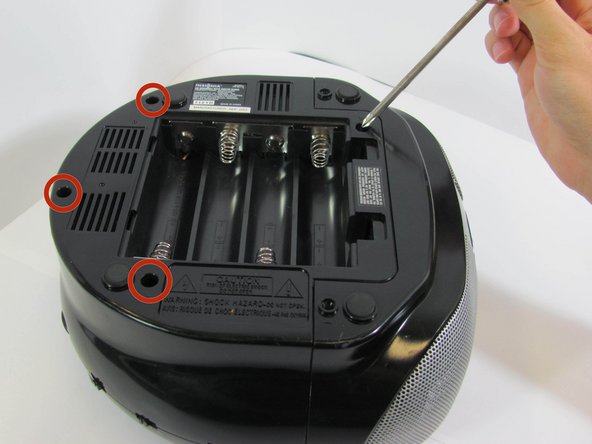
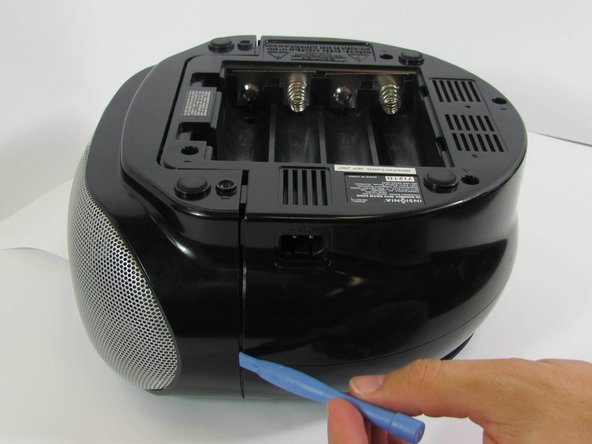
    • Flip the stereo so the CD opening is face down.

    • With two fingers, pinch the tabs and lift up to open the battery protection cover.

  2. Disassembling Insignia NS-B2110 Internal Components: 2 단계, 이미지 1/2 Disassembling Insignia NS-B2110 Internal Components: 2 단계, 이미지 2/2
    • Using a spudger or your fingers, push up against the positive end of the battery. Once it is loose, lift the battery out.

    • Repeat until all eight batteries are removed.

    • Make sure the batteries are facing the right direction. If the device does not turn on, you may have the batteries in the opposite orientation.

  3. Disassembling Insignia NS-B2110 Internal Components, Bottom Panel: 3 단계, 이미지 1/1
    • With a Phillips #2 screwdriver, remove two 2mm screws.

  4. Disassembling Insignia NS-B2110 Internal Components: 4 단계, 이미지 1/2 Disassembling Insignia NS-B2110 Internal Components: 4 단계, 이미지 2/2
    • Using a long Phillips #2 screwdriver, remove one 6mm screw located inside the battery compartment.

    • Use the same screwdriver to remove four more 6mm screws along the outside of the case.

  5. Disassembling Insignia NS-B2110 Internal Components: 5 단계, 이미지 1/3 Disassembling Insignia NS-B2110 Internal Components: 5 단계, 이미지 2/3 Disassembling Insignia NS-B2110 Internal Components: 5 단계, 이미지 3/3
    • With a plastic opening tool, wedge the bottom shell from the main speaker face along the edge.

    • The bottom cover has two red and two yellow wires attached to it that you don't want to pull off. Handle the casing carefully.

    • Once the pieces are separated, pull them apart and place the bottom cover aside, near the stereo.

  6. Disassembling Insignia NS-B2110 Internal Components, Internal Components: 6 단계, 이미지 1/2 Disassembling Insignia NS-B2110 Internal Components, Internal Components: 6 단계, 이미지 2/2
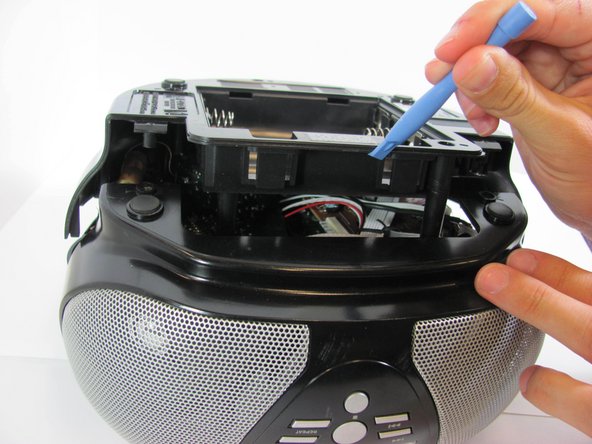
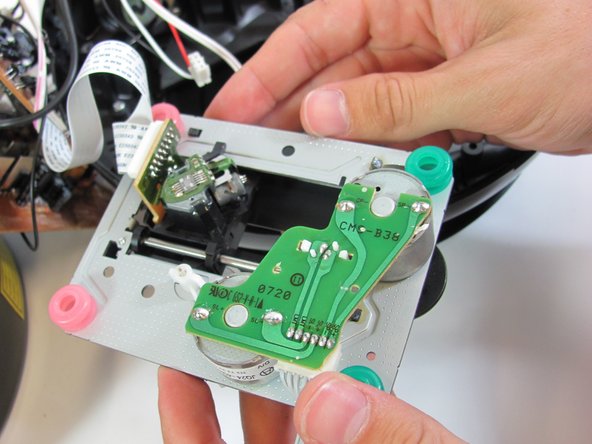
    • With a Phillips #2 screwdriver, remove five 5mm screws from the "quarter circle" circuit board.

    • More wires! Handle the circuit board carefully and take caution not to stretch the red and white wires connected the board to the other components.

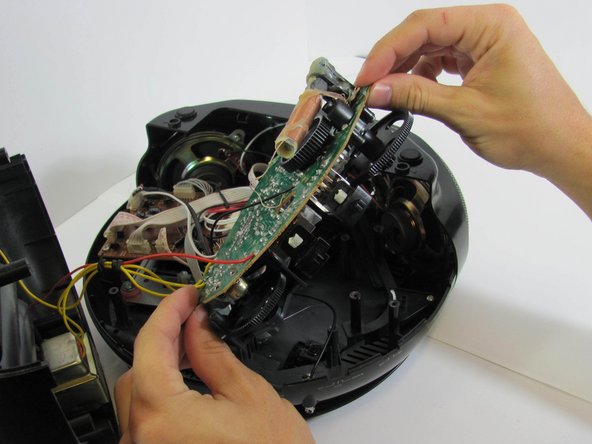
    • Remove the green quarter circle circuit board and place to the side.

  7. Disassembling Insignia NS-B2110 Internal Components: 7 단계, 이미지 1/1
    • On the brown side of the quarter circle circuit board, remove the two white ribbon cables with pink stripes attached to a plastic connector. To do this, pinch the tabs with your hands while pulling outward on the connector.

  8. Disassembling Insignia NS-B2110 Internal Components: 8 단계, 이미지 1/1
    • With a Phillips #2 screwdriver, remove four 6mm screws from the rectangular circuit board.

  9. Disassembling Insignia NS-B2110 Internal Components: 9 단계, 이미지 1/1
    • Remove the two white ribbon cables attached to white plastic connectors from the circuit board by pinching the tabs with your hands and pulling outward on the connector.

  10. Disassembling Insignia NS-B2110 Internal Components: 10 단계, 이미지 1/1
    • Red and white wires are attached to this board as well. Once again, be careful not to stretch these.

    • Remove the rectangular circuit board and place it to the side.

  11. Disassembling Insignia NS-B2110 Internal Components: 11 단계, 이미지 1/1
    • With a Phillips #2 screwdriver, remove two 5mm screws from the black plastic frame which previously held up the rectangular circuit board.

    • Remove the black plastic frame.

  12. Disassembling Insignia NS-B2110 Internal Components: 12 단계, 이미지 1/2 Disassembling Insignia NS-B2110 Internal Components: 12 단계, 이미지 2/2
    • With a Phillips #1 screwdriver, remove four 3mm screws from the silver metal circuit board.

    • This board has two white ribbons attached to it. Once again, be careful not to stretch these.

    • Remove and place the metal circuit board to the side.

  13. Disassembling Insignia NS-B2110 Internal Components: 13 단계, 이미지 1/1
    • With a Phillips #2 screwdriver, remove the two 3mm screws from the black plastic tuner frame.

결론

To reassemble your device, follow these instructions in reverse order.

다른 한 분이 해당 안내서를 완성하였습니다.

Daniel Hodges

회원 가입일: 10/14/13

301 평판

안내서 3개 작성하였습니다

Cal Poly, Team 4-31, Amido Fall 2013 Cal Poly, Team 4-31, Amido Fall 2013 회원

CPSU-AMIDO-F13S4G31

4 회원들

안내서 8개 작성하였습니다

댓글 0개

댓글 쓰기

조회 통계:

24 시간 전: 0

7일 전: 1

30일 전: 3

전체 시간: 889