주요 콘텐츠로 건너뛰기

Disassembling Panasonic LUMIX DMC-LX100

필요한 것

  1. Disassembling Panasonic LUMIX DMC-LX100, Battery: 1 단계, 이미지 1/3 Disassembling Panasonic LUMIX DMC-LX100, Battery: 1 단계, 이미지 2/3 Disassembling Panasonic LUMIX DMC-LX100, Battery: 1 단계, 이미지 3/3
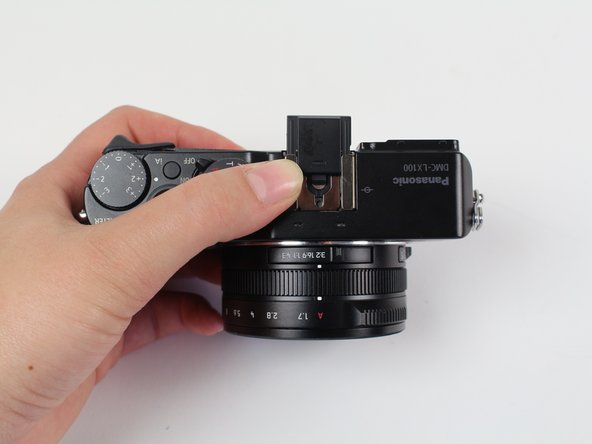
    • Looking at the bottom of the camera, slide the OPEN/LOCK switch to the left into the OPEN position.

    • The battery housing door should swing open.

  2. Disassembling Panasonic LUMIX DMC-LX100: 2 단계, 이미지 1/2 Disassembling Panasonic LUMIX DMC-LX100: 2 단계, 이미지 2/2
    • Flip the inside switch up to release the battery.

  3. Disassembling Panasonic LUMIX DMC-LX100: 3 단계, 이미지 1/1
    • Grip the edge of the battery and pull it out.

    • Use a LUMIX Panasonic DMW-BLE9PP Battery Pack for replacement.

  4. Disassembling Panasonic LUMIX DMC-LX100, LCD Screen: 4 단계, 이미지 1/3 Disassembling Panasonic LUMIX DMC-LX100, LCD Screen: 4 단계, 이미지 2/3 Disassembling Panasonic LUMIX DMC-LX100, LCD Screen: 4 단계, 이미지 3/3
    • Some of these screws may have adhesive to keep the camera from being taken apart so push hard with the screwdriver and turn slowly to avoid stripping screws.

    • Use a Phillips #000 screwdriver to remove the five 4.5 mm screws located on the bottom of the camera and the top one on the left side, with the lens facing you.

    • Use a Phillips #000 screwdriver to remove the two 3.5 mm screws, one below the lens and one on the left side.

    • Use a Phillips #000 screwdriver to remove the 7.1 mm screw from the right side of the camera.

  5. Disassembling Panasonic LUMIX DMC-LX100: 5 단계, 이미지 1/1
    • The viewfinder in this picture is taken off of the camera to more easily see where the screw is located. It is not actually removed from the camera.

    • Use a Phillips #000 screwdriver to remove the 2.5 mm screw underneath the viewfinder.

    • Pull the black plastic piece off of the viewfinder.

  6. Disassembling Panasonic LUMIX DMC-LX100: 6 단계, 이미지 1/3 Disassembling Panasonic LUMIX DMC-LX100: 6 단계, 이미지 2/3 Disassembling Panasonic LUMIX DMC-LX100: 6 단계, 이미지 3/3
    • Slide out the black plastic piece that acts as a placeholder for an attachable lens on the top of the camera.

    • Remove the small metal insert that rests beneath the black plastic piece by pulling outward, away from the lens side of the camera.

    • You may need a spudger or prying device to remove the metal piece by lifting the back end up.

  7. Disassembling Panasonic LUMIX DMC-LX100: 7 단계, 이미지 1/1
    • Some of these screws may have adhesive to keep the camera from being taken apart so push hard with the screwdriver and turn slowly to avoid stripping screws.

    • Use a Phillips #000 screwdriver to remove all four of the 7.1mm screws that are under the metal piece.

  8. Disassembling Panasonic LUMIX DMC-LX100: 8 단계, 이미지 1/1
    • There may be adhesive holding the back on, so pry carefully to not break any of the ribbon cables underneath.

    • Pry off the back of the camera using a spudger starting from the top right side of the LCD screen.

  9. Disassembling Panasonic LUMIX DMC-LX100: 9 단계, 이미지 1/1
    • Use a Phillips #000 screwdriver to remove the 7.5mm screw on the top right of the back of the camera that holds the metal backing in place.

  10. Disassembling Panasonic LUMIX DMC-LX100: 10 단계, 이미지 1/3 Disassembling Panasonic LUMIX DMC-LX100: 10 단계, 이미지 2/3 Disassembling Panasonic LUMIX DMC-LX100: 10 단계, 이미지 3/3
    • Lift the LCD screen away from the device.

    • Pry off the silver metal backing with a spudger.

    • Pull out the ribbon cable that attaches the LCD screen to the motherboard.

    • If need be, use a plastic spudger to pry the ribbon cable out of its socket.

    • Remove the LCD screen.

  11. Disassembling Panasonic LUMIX DMC-LX100, Motherboard: 11 단계, 이미지 1/1
    • You may need to use tweezers and a spudger to disconnect some of the ribbon cables so they do not break.

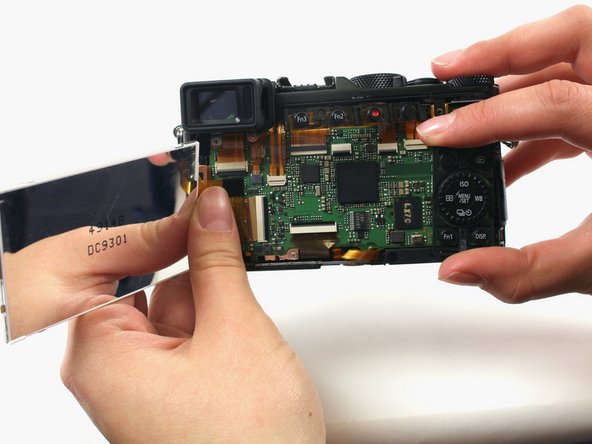
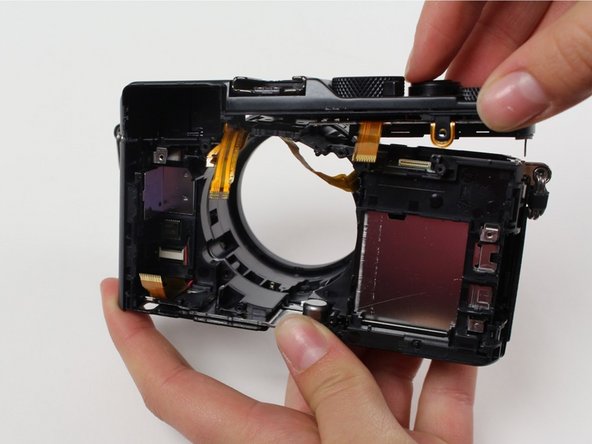
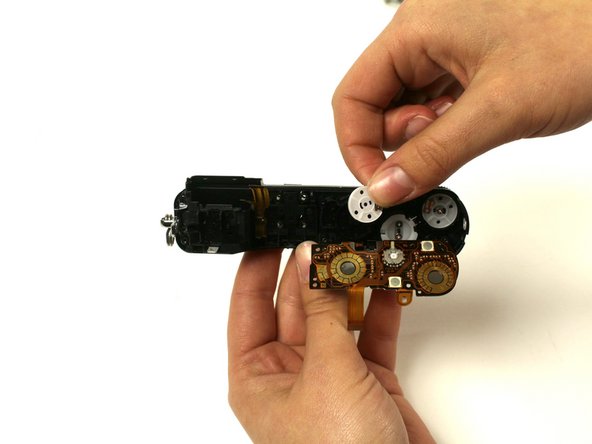
    • Disconnect the nine visible ribbon cables/ZIF connectors by flipping the black bars up and pulling the ribbon straight out of the connector.

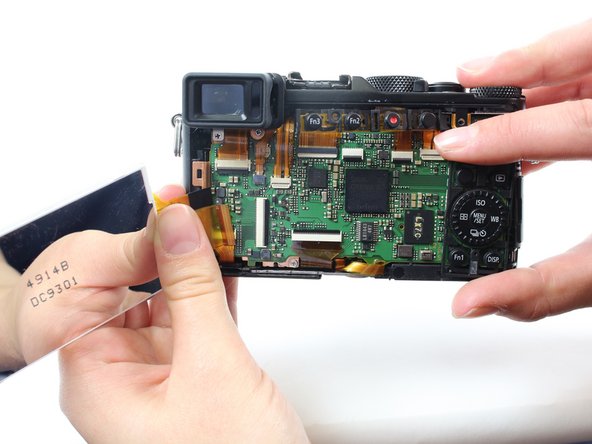
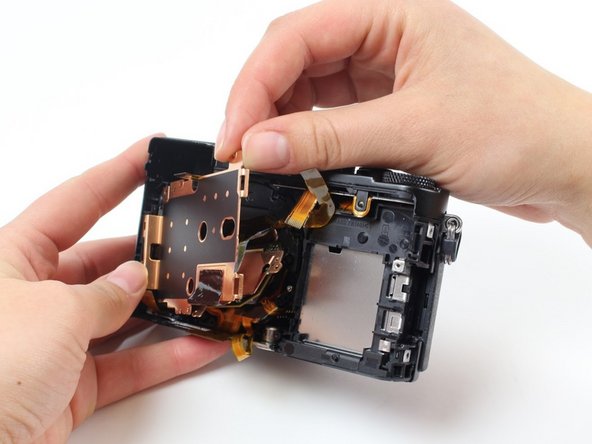
    • Disconnect two more cables in the upper left corner of the board, hidden behind the visible cables.

    • Learn more about disconnecting ZIF connectors here.

  12. Disassembling Panasonic LUMIX DMC-LX100: 12 단계, 이미지 1/1
    • Use a Phillips #000 screwdriver to remove the two 4.5 mm screws.

    • Use a Phillips #000 screwdriver to remove the 2.5 mm screw.

  13. Disassembling Panasonic LUMIX DMC-LX100: 13 단계, 이미지 1/2 Disassembling Panasonic LUMIX DMC-LX100: 13 단계, 이미지 2/2
    • Use two fingers to gently pull the viewfinder toward you and out of its housing.

    • The black plastic piece is still on the viewfinder in this image, but should have been removed during LCD screen removal.

  14. Disassembling Panasonic LUMIX DMC-LX100: 14 단계, 이미지 1/2 Disassembling Panasonic LUMIX DMC-LX100: 14 단계, 이미지 2/2
    • Start at the top of the camera and use the plastic spudger to pry the motherboard out of the camera.

  15. Disassembling Panasonic LUMIX DMC-LX100, Disassembling Panasonic LUMIX DMC-LX100: 15 단계, 이미지 1/2 Disassembling Panasonic LUMIX DMC-LX100, Disassembling Panasonic LUMIX DMC-LX100: 15 단계, 이미지 2/2
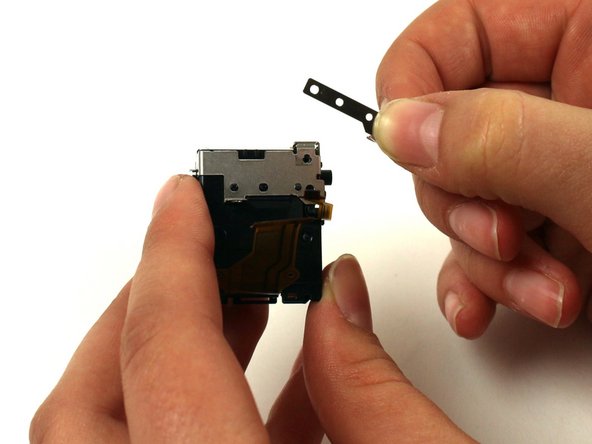
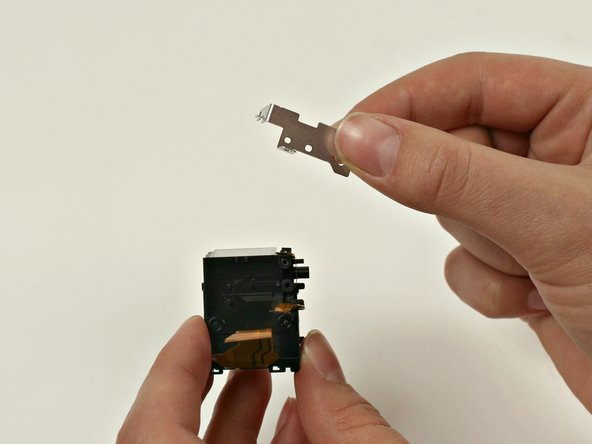
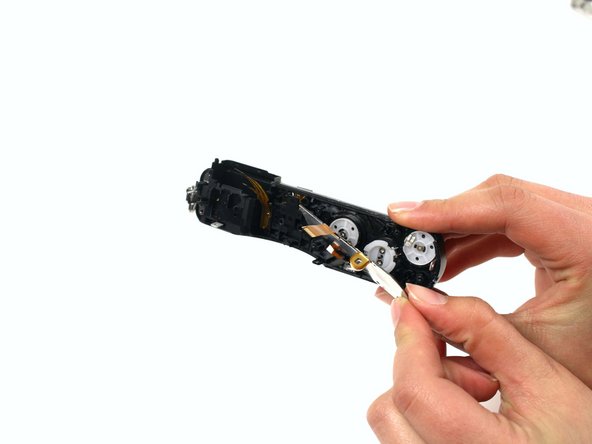
    • Take the viewfinder you took out earlier and pull the small metal piece off of it.

  16. Disassembling Panasonic LUMIX DMC-LX100: 16 단계, 이미지 1/2 Disassembling Panasonic LUMIX DMC-LX100: 16 단계, 이미지 2/2
    • Pull the large metal piece off of the viewfinder.

  17. Disassembling Panasonic LUMIX DMC-LX100: 17 단계, 이미지 1/3 Disassembling Panasonic LUMIX DMC-LX100: 17 단계, 이미지 2/3 Disassembling Panasonic LUMIX DMC-LX100: 17 단계, 이미지 3/3
    • Use a Phillips #000 screwdriver to remove the three 3.5 mm screws.

    • Use a Phillips #000 screwdriver to remove the three 3 mm screws.

    • In some models these may be T3 or T4 Torx screws.

    • Gently pull the copper plate towards you to remove it.

    • The sensor is attached to the copper plate and will come out with the copper plate. The thin, red glass plate glued to the front of the sensor is the infrared filter.

  18. Disassembling Panasonic LUMIX DMC-LX100: 18 단계, 이미지 1/1
    • Use a Phillips #000 screwdriver to remove the 4 mm screw.

    • Use a Phillips #000 screwdriver to remove the 4.5 mm screw.

    • Use a Phillips #000 screwdriver to remove the five 3.5 mm screws.

    • Use a Torx T3 screwdriver to remove the three 3.1 mm screws.

  19. Disassembling Panasonic LUMIX DMC-LX100: 19 단계, 이미지 1/2 Disassembling Panasonic LUMIX DMC-LX100: 19 단계, 이미지 2/2
    • Use a plastic spudger to gently pull the flash assembly out of its casing.

    • Gently pull the lens casing out of the camera.

    • Both the flash assembly and the lens casing will still be attached to the camera through ribbon cables so be careful not to rip them.

    • Be careful not to touch the leads on the capacitor, to avoid an electric shock.

  20. Disassembling Panasonic LUMIX DMC-LX100: 20 단계, 이미지 1/2 Disassembling Panasonic LUMIX DMC-LX100: 20 단계, 이미지 2/2
    • With two fingers, pinch the edge of the lens and gently pull it out.

    • You may need to use a spudger here to lift an edge of the lens up and make it easier to grasp.

  21. Disassembling Panasonic LUMIX DMC-LX100: 21 단계, 이미지 1/2 Disassembling Panasonic LUMIX DMC-LX100: 21 단계, 이미지 2/2
    • Use a Phillips #000 screwdriver to remove the 4.5mm screw inside the lens housing.

    • Gently pull the top piece off the camera.

  22. Disassembling Panasonic LUMIX DMC-LX100: 22 단계, 이미지 1/3 Disassembling Panasonic LUMIX DMC-LX100: 22 단계, 이미지 2/3 Disassembling Panasonic LUMIX DMC-LX100: 22 단계, 이미지 3/3
    • Use a Phillips #000 screwdriver to remove all five 4.1mm screws from the piece you took off in the previous step.

    • Gently pull the metal cover until it turns 180 degrees.

    • The metal cover will not come all the way off because it will still be attached by ribbon cables.

  23. Disassembling Panasonic LUMIX DMC-LX100: 23 단계, 이미지 1/3 Disassembling Panasonic LUMIX DMC-LX100: 23 단계, 이미지 2/3 Disassembling Panasonic LUMIX DMC-LX100: 23 단계, 이미지 3/3
    • To remove a knob, remove the screws on the white piece underneath the knob you want to remove with a Phillips #000 screwdriver.

    • The left knob is being removed in this step but the process is the same for any of the knobs pictured in this step.

    • Pull the corresponding white piece off.

    • Flip the piece over and pull the corresponding black knob off the top of the camera.

  24. Disassembling Panasonic LUMIX DMC-LX100: 24 단계, 이미지 1/1
    • You have completely disassembled your Panasonic Lumix DMC-LX100!

결론

To reassemble your device, follow these instructions in reverse order.

다른 29명이 해당 안내서를 완성하였습니다.

Sydney Dye

회원 가입일: 01/11/16

1,206 평판

안내서 2개 작성하였습니다

Cal Poly, Team 70-4, Forte Winter 2016 Cal Poly, Team 70-4, Forte Winter 2016 회원

CPSU-FORTE-W16S70G4

4 회원들

안내서 9개 작성하였습니다

댓글 35개

nice! can you do one for lx7 (leica dlux 6 even better)?

xania - 답글

Thanks for the effort in compiling this, however even being pretty experienced in precision instrumentation and electronic repair but I encountered some difficulties.

1: To remove the hot shoe cover plate you actually have to lift on the 'forward' end of the plate nearest the lens to un latch and slide it out, not the "back end"

2: The screws are so tightly glued below the hot shoe that they are nearly impossible to remove, I got 3 out but the same front one that appears to be missing in your pictures is stuck fast. The screw that holds the LVF is also glued fast and I believe it's smaller then a 000 phillips.

3: The back metal plate does appear to be glued to the top of the body and no amount of prying seems to loosen it.

It appears Panasonic intended this camera to be disposable and not dissembled. Sad because all of them seem to get dust on the sensor at some point.

Shemp Howard - 답글

Hello,

Thank you for the post.

I would love to add a microphone jack and cannot see the internal microphone wires. Are they part a ribbon (in which case ia m out of luck) or they are independent from a ribbon and accessible?

Reza Molavi - 답글

Hello, I destroyed a wire, the one for the contraol panel (menu, qmenu, arrows, ...) Everything is working fine, but not key are working.

I need the wire to connect to the motherboard.

The ref is : STJ0060SW-9<-->1SW (and 3 special characters)

Where can I buy this ?

Or buy the right keyboard ?

rodyh2 - 답글

댓글 쓰기

조회 통계:

24 시간 전: 21

7일 전: 110

30일 전: 452

전체 시간: 49,004