주요 콘텐츠로 건너뛰기
수리 커뮤니티 가입 - 계정 만들기

Disassembling PlayStation Vita Screen & Digitizer (Video Tutorial/Guide)

필요한 것

동영상 개요

  1. Disassembling PlayStation Vita Screen & Digitizer (Video Tutorial/Guide), Case Separation: 1 단계, 이미지 2개 중 1개 Disassembling PlayStation Vita Screen & Digitizer (Video Tutorial/Guide), Case Separation: 1 단계, 이미지 2개 중 2개
    • Power off and remove the memory card.

    • Using a Phillips #00 screwdriver, remove the four 6.4mm screws on the back casing.

    댓글 쓰기

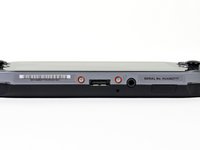
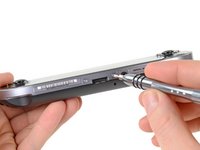
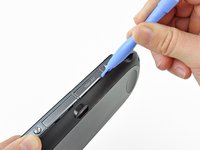
  2. Disassembling PlayStation Vita Screen & Digitizer (Video Tutorial/Guide): 2 단계, 이미지 3개 중 1개 Disassembling PlayStation Vita Screen & Digitizer (Video Tutorial/Guide): 2 단계, 이미지 3개 중 2개 Disassembling PlayStation Vita Screen & Digitizer (Video Tutorial/Guide): 2 단계, 이미지 3개 중 3개
    • Using your fingernail or a spudger, pry open the accessory port cover on the top of the device.

    • Using a Phillips #00 screwdriver, remove the two 5.4mm screws hidden beneath the accessory port cover.

    댓글 쓰기

  3. Disassembling PlayStation Vita Screen & Digitizer (Video Tutorial/Guide): 3 단계, 이미지 2개 중 1개 Disassembling PlayStation Vita Screen & Digitizer (Video Tutorial/Guide): 3 단계, 이미지 2개 중 2개
    • Remove the two 5.4mm Phillips #00 screws on the bottom of the device near the charging port.

    댓글 쓰기

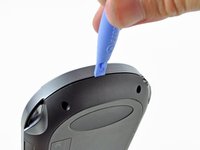
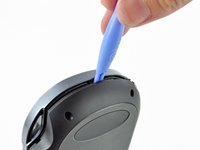
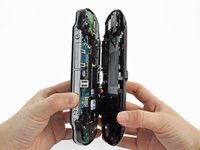
  4. Disassembling PlayStation Vita Screen & Digitizer (Video Tutorial/Guide): 4 단계, 이미지 3개 중 1개 Disassembling PlayStation Vita Screen & Digitizer (Video Tutorial/Guide): 4 단계, 이미지 3개 중 2개 Disassembling PlayStation Vita Screen & Digitizer (Video Tutorial/Guide): 4 단계, 이미지 3개 중 3개
    • Beginning at the sides of the device, use a plastic opening tool to separate the front and rear cases.

    • Continue working your way around the device gently prying it open.

    • There are still wires holding the front and rear cases together. You may damage the connections if you yank the cases completely apart.

    댓글 쓰기

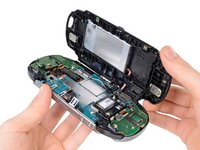
  5. Disassembling PlayStation Vita Screen & Digitizer (Video Tutorial/Guide): 5 단계, 이미지 2개 중 1개 Disassembling PlayStation Vita Screen & Digitizer (Video Tutorial/Guide): 5 단계, 이미지 2개 중 2개
    • Gently separate the two cases, minding the battery and the touch screen controller connectors holding the two cases together.

    댓글 쓰기

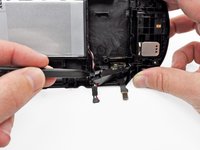
  6. Disassembling PlayStation Vita Screen & Digitizer (Video Tutorial/Guide): 6 단계, 이미지 1개 중 1개
    • Using a spudger, free the touch screen controller flex cable by gently prying up the connection.

    댓글 쓰기

  7. Disassembling PlayStation Vita Screen & Digitizer (Video Tutorial/Guide): 7 단계, 이미지 1개 중 1개
    • Free the battery cable by gently prying up on the connection with a spudger.

    댓글 쓰기

  8. Disassembling PlayStation Vita Screen & Digitizer (Video Tutorial/Guide): 8 단계, 이미지 1개 중 1개
    • Separate the front and rear cases.

    댓글 쓰기

  9. Disassembling PlayStation Vita Screen & Digitizer (Video Tutorial/Guide), Battery: 9 단계, 이미지 2개 중 1개 Disassembling PlayStation Vita Screen & Digitizer (Video Tutorial/Guide), Battery: 9 단계, 이미지 2개 중 2개
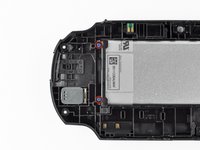
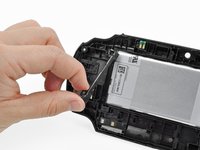
    • With the help of a spudger, gently pry off and remove the battery cable retainer on the back casing assembly.

    • The easiest access to the battery cable retainer is where the battery cable comes out.

    • You can also use the two small tabs on the side of the cable retainer. Locate the tabs and release one at a time. Be a little careful not to push the cover in and re-lock it.

    댓글 쓰기

  10. Disassembling PlayStation Vita Screen & Digitizer (Video Tutorial/Guide): 10 단계, 이미지 2개 중 1개 Disassembling PlayStation Vita Screen & Digitizer (Video Tutorial/Guide): 10 단계, 이미지 2개 중 2개
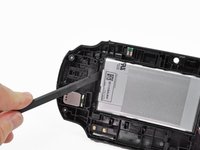
    • Using a Phillips #00 screwdriver, remove the two 5.0mm blue battery case screws.

    • Remove the plastic battery retaining bar.

    댓글 쓰기

  11. Disassembling PlayStation Vita Screen & Digitizer (Video Tutorial/Guide): 11 단계, 이미지 3개 중 1개 Disassembling PlayStation Vita Screen & Digitizer (Video Tutorial/Guide): 11 단계, 이미지 3개 중 2개 Disassembling PlayStation Vita Screen & Digitizer (Video Tutorial/Guide): 11 단계, 이미지 3개 중 3개
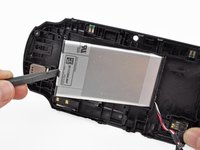
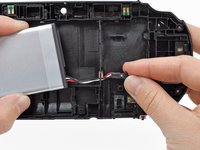
    • Using your finger or a spudger, lift the battery out and remove it.

    • Guide the battery wires through the hole in the back casing as you remove the battery.

    댓글 쓰기

결론

To reassemble your device, follow these instructions in reverse order.

취소: 해당 안내서를 완성하지 않았습니다.

다른 7명이 해당 안내서를 완성하였습니다.

작성자

2다른 기여자 명과 함께

djgodmandj

회원 가입일: 10/24/14

302 평판

안내서 1개를 작성함

1가이드 댓글

So is there any chance that this could be used as a modding possibility, where we could install a higher resolution /quality screen?

TheHeavy - 답글 공유

댓글 쓰기

조회 통계:

지난 24시간: 8

지난 7일: 56

지난 30일: 236

전체 시간: 10,033