주요 콘텐츠로 건너뛰기

이 버전에는 잘못된 편집 사항이 있을 수 있습니다. 최신 확인된 스냅샷으로 전환하십시오.

필요한 것

  1. 이 단계는 번역되지 않았습니다. 번역을 도와주십시오

    : 1 단계, 이미지 1/2 : 1 단계, 이미지 2/2
    • Make sure the toaster is unplugged before dissembling.

    • Turn the toaster over and remove the rubber bumper feet.

  2. 이 단계는 번역되지 않았습니다. 번역을 도와주십시오

    : 2 단계, 이미지 1/2 : 2 단계, 이미지 2/2
    • Use a Phillips #2 screwdriver to remove four 12 mm screws at the base of the toaster shell.

  3. 이 단계는 번역되지 않았습니다. 번역을 도와주십시오

    : 3 단계, 이미지 1/3 : 3 단계, 이미지 2/3 : 3 단계, 이미지 3/3
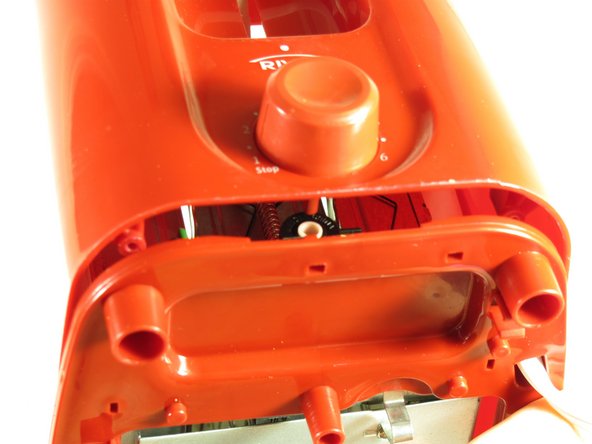
    • With the dial facing you, push the toaster base up and away until the base is just over the lip of the shell. This will disconnect the browning dial from the rest of the toaster.

    • When reassembling the toaster, make sure that the back of the dial lines up with the slot, both in position and orientation (the dial and slot are not perfect circles - they have a notch).

    • The only object holding the shell onto the toaster now is the grey part of the lever.

  4. 이 단계는 번역되지 않았습니다. 번역을 도와주십시오

    : 4 단계, 이미지 1/1
    • Reach into the shell and grab the back white part of the lever.

    • Hold the grey lever with both your index finger and middle finger. Next, pull it.

    • Pulling too hard will break the mechanism that holds the grey handle onto the white lever.

    • Remove the shell.

결승점

다른 9명이 해당 안내서를 완성하였습니다.

Naomi Willis

회원 가입일: 09/26/12

80 평판

안내서 1개 작성함

Cal Poly, Team 2-8, Propen Fall 2012 Cal Poly, Team 2-8, Propen Fall 2012 회원

CPSU-PROPEN-F12S2G8

5 회원들

안내서 6개 작성하였습니다

댓글 0개

댓글 쓰기

조회 통계:

24 시간 전: 1

7일 전: 5

30일 전: 19

전체 시간: 3,859