이 버전에는 잘못된 편집 사항이 있을 수 있습니다. 최신 확인된 스냅샷으로 전환하십시오.
필요한 것
-
이 단계는 번역되지 않았습니다. 번역을 도와주십시오
-
Unscrew the four Torx screws from the backplate.
-
The backplate may begin to separate from the keypad face. Do not try to remove it yet.
-
The screws are T5 Torx screws, 5.6mm.
-
-
이 단계는 번역되지 않았습니다. 번역을 도와주십시오
-
Using the Spudger, gently pry up the U-shaped grey cover below the keypad.
-
-
이 단계는 번역되지 않았습니다. 번역을 도와주십시오
-
Remove the two Torx screws from below the cover.
-
These are T5 Torx screws, 8.6mm.
-
-
-
이 단계는 번역되지 않았습니다. 번역을 도와주십시오
-
Gently work a spudger or a fingernail between the keypad face and the backplate.
-
-
이 단계는 번역되지 않았습니다. 번역을 도와주십시오
-
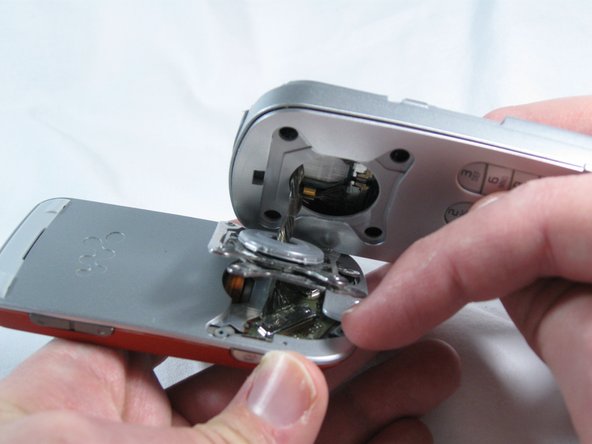
Holding the backplate away from the swivel, remove the 4 small Phillips screws and both stamped struts from the swivel assembly.
-
Note that only the bottom strut has a tab.
-
The screws are Phillips, 2.9mm
-
-
이 단계는 번역되지 않았습니다. 번역을 도와주십시오
-
The back housing is now disassembled, and the swivel assembly is revealed.
-
-
이 단계는 번역되지 않았습니다. 번역을 도와주십시오
-
Remove the four black Phillips screws holding the swivel assembly to the LCD section of the phone.
-
The screws are Phillips, 2.4mm
-
-
이 단계는 번역되지 않았습니다. 번역을 도와주십시오
-
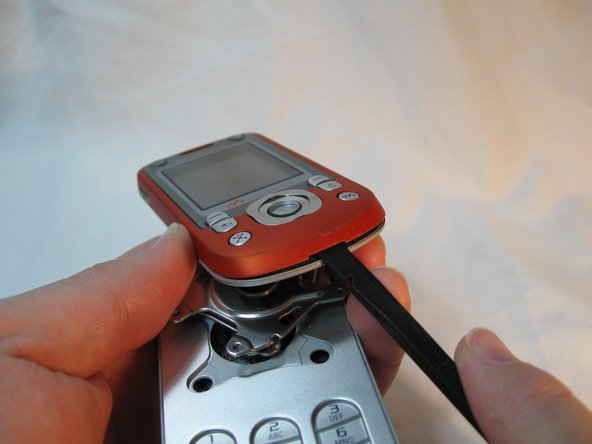
Gently remove the grey plastic cover at the top-rear of the LCD section with a spudger.
-
-
이 단계는 번역되지 않았습니다. 번역을 도와주십시오
-
Remove the two Torx screws revealed under the grey cover.
-
The screws are Torx T5, 5.6mm
-
-
이 단계는 번역되지 않았습니다. 번역을 도와주십시오
-
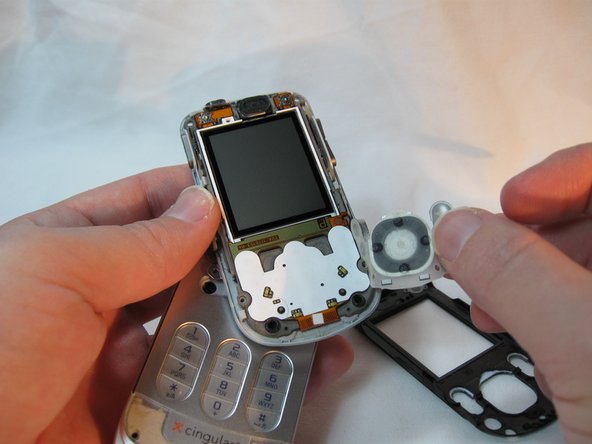
Remove the black front plate.
-
Remove the button overlay, taking note of its position for reassembly. There are small grey nubs that correspond to holes in the overlay.
-
-
이 단계는 번역되지 않았습니다. 번역을 도와주십시오
-
Gently release the small grey retaining clips around the outside of the display assembly.
-
Separate the display assembly from its backplate.
-
The LCD section is now disassembled.
-


다른 한 분이 해당 안내서를 완성하였습니다.
팀

University of Maine, Team 1-5, Diaz Fall 2012 University of Maine, Team 1-5, Diaz Fall 2012 회원
UMAINE-DIAZ-F12S1G5
1 회원
안내서 12개 작성하였습니다