주요 콘텐츠로 건너뛰기

Disassembling Sony Reader Touch Edition PRS-600 Side and Bottom Panel

필요한 것

  1. Disassembling Sony Reader Touch Edition PRS-600 Side and Bottom Panel, Back Panel: 1 단계, 이미지 1/1
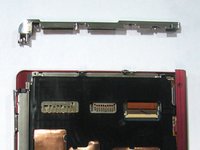
    • Using the Phillips head screwdriver PH000, remove the two 1.4 mm screws that are located on the backside of the device.

  2. Disassembling Sony Reader Touch Edition PRS-600 Side and Bottom Panel: 2 단계, 이미지 1/1
    • Slide the back cover off by pushing it to the left, away from the side that held the screws.

    • Remove the cover.

  3. Disassembling Sony Reader Touch Edition PRS-600 Side and Bottom Panel: 3 단계, 이미지 1/1
    • This is what the device should look like once the back cover panel has been removed.

  4. Disassembling Sony Reader Touch Edition PRS-600 Side and Bottom Panel, Power Button: 4 단계, 이미지 1/1
    • Remove the stylus from the device.

  5. Disassembling Sony Reader Touch Edition PRS-600 Side and Bottom Panel: 5 단계, 이미지 1/3 Disassembling Sony Reader Touch Edition PRS-600 Side and Bottom Panel: 5 단계, 이미지 2/3 Disassembling Sony Reader Touch Edition PRS-600 Side and Bottom Panel: 5 단계, 이미지 3/3
    • Using the Phillips screwdriver remove the 1.4 mm screw from the top panel.

    • Using the same screwdriver, remove the 1.4 mm screw from the back of the device.

    • Pry apart off the top panel of the device.

  6. Disassembling Sony Reader Touch Edition PRS-600 Side and Bottom Panel, Side and Bottom Panel: 6 단계, 이미지 1/2 Disassembling Sony Reader Touch Edition PRS-600 Side and Bottom Panel, Side and Bottom Panel: 6 단계, 이미지 2/2
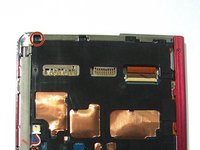
    • Using a Phillips head screwdriver, remove the two 1.4 mm screws from the bottom panel of the device.

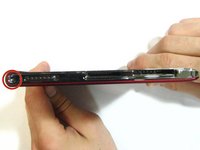
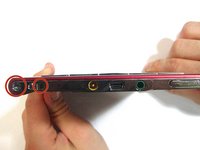
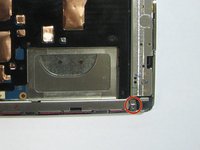
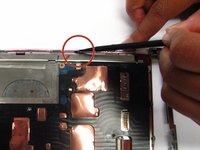
    • Using the same screwdriver, remove the 1.4 mm screw that is located on the back of the device.

  7. Disassembling Sony Reader Touch Edition PRS-600 Side and Bottom Panel: 7 단계, 이미지 1/2 Disassembling Sony Reader Touch Edition PRS-600 Side and Bottom Panel: 7 단계, 이미지 2/2
    • Pull the panel away from the device. You may have to use the flat end of the spudger to remove the side portion of the panel because it will be glued in place.

결론

To reassemble your device, follow these instructions in reverse order.

Zachary Jeffers

회원 가입일: 10/13/14

412 평판

안내서 4개 작성하였습니다

Clemson, Team 1-4, Benson Fall 2014 Clemson, Team 1-4, Benson Fall 2014 회원

CLEM-BENSON-F14S1G4

4 회원들

안내서 22개 작성하였습니다

댓글 0개

댓글 쓰기

조회 통계:

24 시간 전: 0

7일 전: 1

30일 전: 4

전체 시간: 282