주요 콘텐츠로 건너뛰기

이 버전에는 잘못된 편집 사항이 있을 수 있습니다. 최신 확인된 스냅샷으로 전환하십시오.

필요한 것

  1. 이 단계는 번역되지 않았습니다. 번역을 도와주십시오

    : 1 단계, 이미지 1/1
    • Remove the 8 small screws.

  2. 이 단계는 번역되지 않았습니다. 번역을 도와주십시오

    : 2 단계, 이미지 1/2 : 2 단계, 이미지 2/2
    • Remove the other 6 screws.

    • Remove the hard disk and the RAM slots.

  3. 이 단계는 번역되지 않았습니다. 번역을 도와주십시오

    : 3 단계, 이미지 1/1
    • This is the hard disk - Hitachi 500 GB

  4. 이 단계는 번역되지 않았습니다. 번역을 도와주십시오

    : 4 단계, 이미지 1/1
    • Ensure that the hard disk has been removed. Carefully detach the bottom cover.

  5. 이 단계는 번역되지 않았습니다. 번역을 도와주십시오

    : 5 단계, 이미지 1/1
    • Once the bottom cover is removed, your device should look like this.

  6. 이 단계는 번역되지 않았습니다. 번역을 도와주십시오

    : 6 단계, 이미지 1/1
    • Remove the 4 screws to detach the battery.

    • Remove all of the sticky tape.

    • Carefully disconnect the small power connector by using a tool to push the connector out through the small gap in the middle of the connector.

    • The connector won't come out all the way, because the battery pack is in its way.

  7. 이 단계는 번역되지 않았습니다. 번역을 도와주십시오

    : 7 단계, 이미지 1/2 : 7 단계, 이미지 2/2
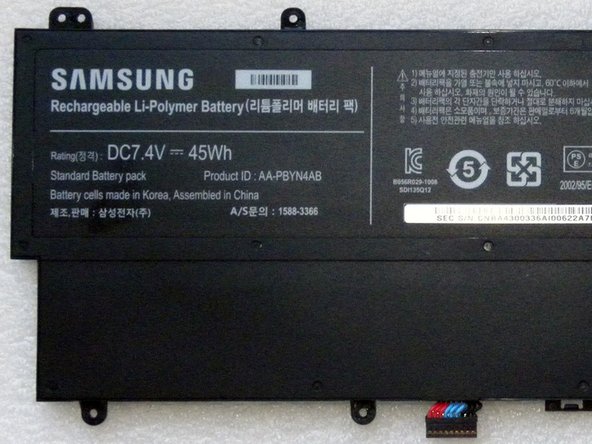
    • This is the Samsung 7.4V 45Wh battery.

    • Ensure that the battery is removed before continuing.

  8. 이 단계는 번역되지 않았습니다. 번역을 도와주십시오

    : 8 단계, 이미지 1/1
    • When the battery is removed, this is how it will look.

  9. 이 단계는 번역되지 않았습니다. 번역을 도와주십시오

    : 9 단계, 이미지 1/1
    • Remove the processor fan.

    • There are 2 screws holding it in place. Loosen and remove them.

  10. 이 단계는 번역되지 않았습니다. 번역을 도와주십시오

    : 10 단계, 이미지 1/1
    • This is the processor fan.

  11. 이 단계는 번역되지 않았습니다. 번역을 도와주십시오

    : 11 단계, 이미지 1/1
    • Remove the processor heat sink.

    • 3 screws hold this part in place. Loosen and remove them.

  12. 이 단계는 번역되지 않았습니다. 번역을 도와주십시오

    : 12 단계, 이미지 1/1
    • Disconnect the antenna cables from the WiFi card.

    • Remove the screw.

    • Be sure to match the colors when reattaching the cables.

  13. 이 단계는 번역되지 않았습니다. 번역을 도와주십시오

    : 13 단계, 이미지 1/1
    • Remove the screw.

    • Lift the latch upwards to loosen the cable.

  14. 이 단계는 번역되지 않았습니다. 번역을 도와주십시오

    : 14 단계, 이미지 1/1
    • Remove the screw.

  15. 이 단계는 번역되지 않았습니다. 번역을 도와주십시오

    : 15 단계, 이미지 1/1
    • Remove the screw.

  16. 이 단계는 번역되지 않았습니다. 번역을 도와주십시오

    : 16 단계, 이미지 1/1
    • To remove the Motherboard, carefully disconnect the cables.

  17. 이 단계는 번역되지 않았습니다. 번역을 도와주십시오

    : 17 단계, 이미지 1/2 : 17 단계, 이미지 2/2
    • This is the Motherboard - there is a front and rear view.

결승점

다른 34명이 해당 안내서를 완성하였습니다.

Jose Gustavo Abreu Murta

회원 가입일: 07/06/10

4,598 평판

안내서 9개 작성하였습니다

댓글 30개

Hello,

Do you know where can i reset the Bios CMOS in that motherboard?

I think there are people who wants to know becose system upgrade is leading to bios ACPI Error.

Thanks for your help

Luis Orland - 답글

No, I do not know where is a reset pin of BIOS.

Try to disconnect NVRAM battery.

Wait 15 minutes and reconnect again.

Jose Gustavo Abreu Murta - 답글

To reset BIOS this NP530U3, only disconnect all power supply (MAIN battery, CMOS battery and power source). And hold press POWER button for 1 min.

warmdk - 답글

I try it but don't work, do you know another way to do this

manhique -

Hello,

I have seen many screens with model number LTN140AT21-XXX for this laptop. My laptop NP530u4b has a screen LTN140AT21-802. I would like to know if I can use a LTN140AT21-002 screen, or if only is good a screen with number LTN140AT21-8.

thanks for your help.

alex - 답글

댓글 쓰기

조회 통계:

24 시간 전: 2

7일 전: 21

30일 전: 74

전체 시간: 52,903