주요 콘텐츠로 건너뛰기

Dome Ceiling Light Bulb Replacement

필요한 것

  1. Dome Ceiling Light Bulb Replacement, Find the light that will not turn on: 1 단계, 이미지 1/1
    • Find the dim or blinking light in your household that needs to be changed.

  2. Dome Ceiling Light Bulb Replacement, Gather the working materials: 2 단계, 이미지 1/1
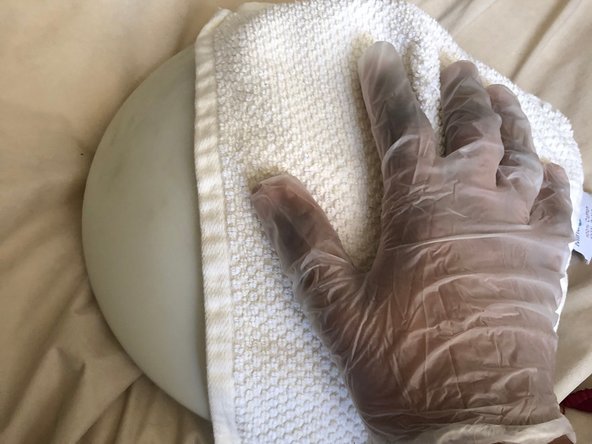
    • Gather the material that you will be using like shoes, rags, and plastic gloves.

  3. Dome Ceiling Light Bulb Replacement, Purchase replacement light: 3 단계, 이미지 1/1
    • Put new light to the side to avoid mixing up with old light.

  4. Dome Ceiling Light Bulb Replacement, Loosen the dome lid: 4 단계, 이미지 1/1
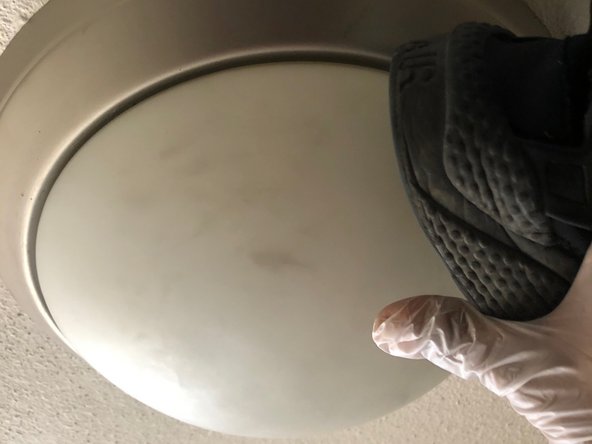
    • Using the rubber sole of the shoe bump the dome lid in a clockwise direction to loosen the dome lid

    • CAUTION: If using a shoe to gain traction on your dome lid, do so with extreme caution so you don't break the light.

  5. Dome Ceiling Light Bulb Replacement, Remove the lid: 5 단계, 이미지 1/1
    • Now using your hand, remove the dome lid by turning you wrist in a clockwise direction.

  6. Dome Ceiling Light Bulb Replacement, Check light: 6 단계, 이미지 1/1
    • Check light for dust, and bugs that got inside

  7. Dome Ceiling Light Bulb Replacement, Clean rag: 7 단계, 이미지 1/1
    • Make the rag wet as you will be needing it to clean the light dome.

  8. Dome Ceiling Light Bulb Replacement, Clean dome: 8 단계, 이미지 1/2 Dome Ceiling Light Bulb Replacement, Clean dome: 8 단계, 이미지 2/2
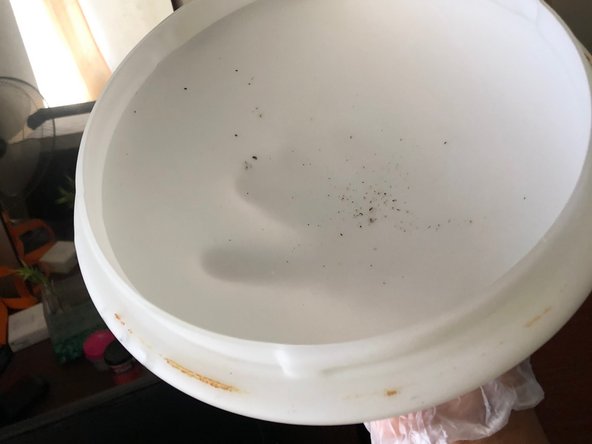
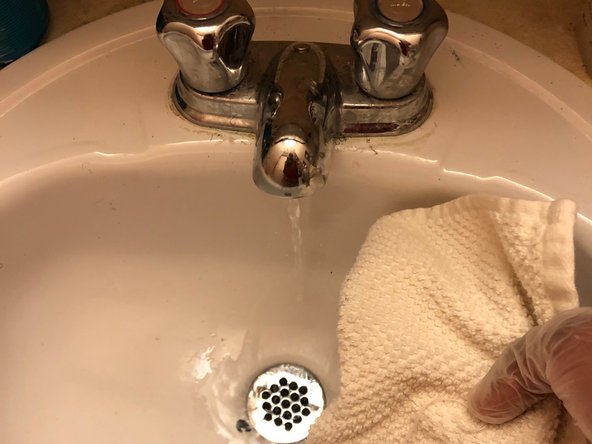
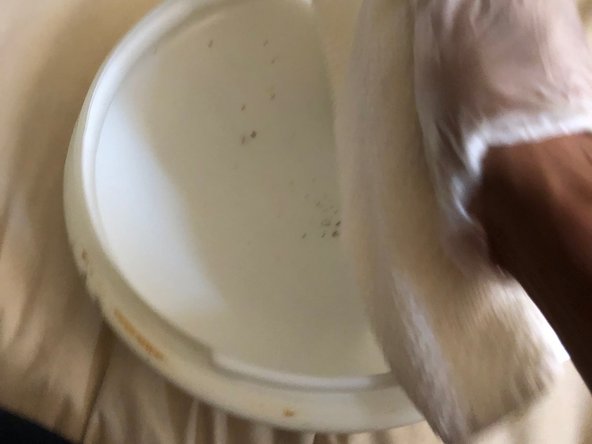
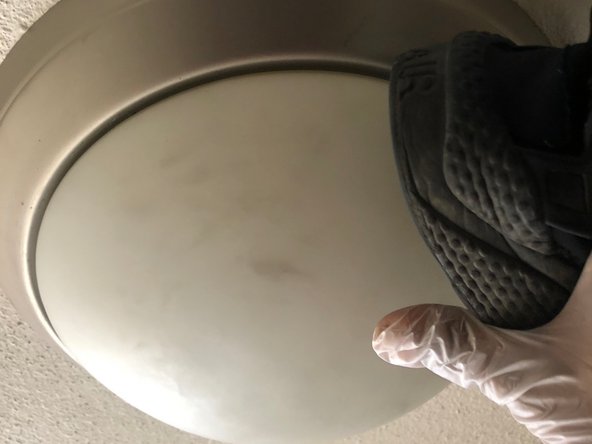
    • Clean the top and bottom of the dome light to insure there wont be any spots in light when put back.

  9. Dome Ceiling Light Bulb Replacement, Find burnt light: 9 단계, 이미지 1/1
    • Turn on light in order to find witch light has burned out.

  10. Dome Ceiling Light Bulb Replacement, Pull out light: 10 단계, 이미지 1/1
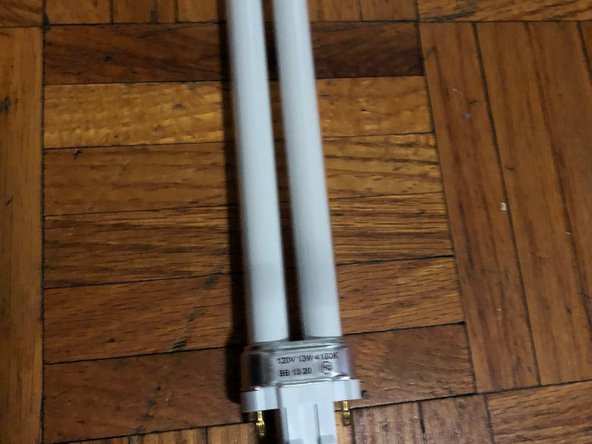
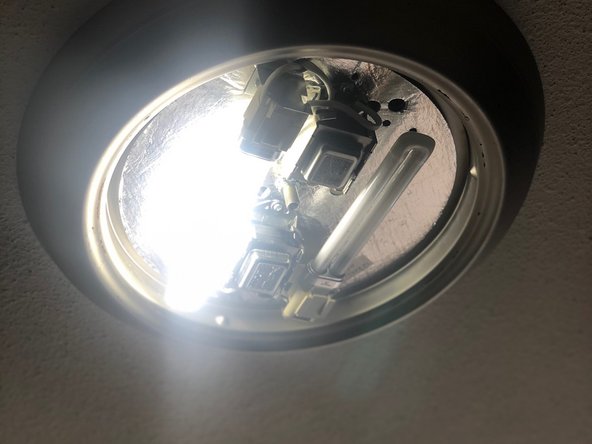
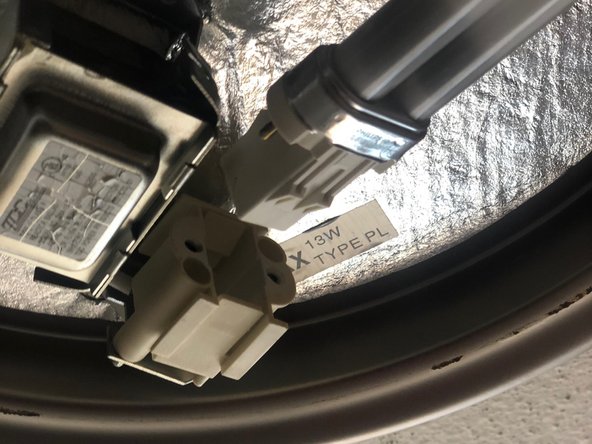
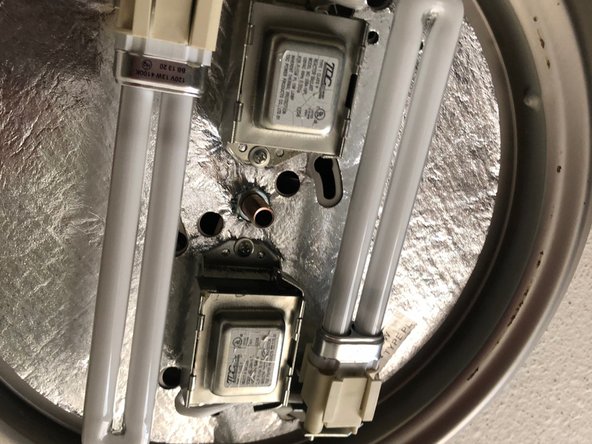
    • Safely pull out light after you have turned off the light switch. Also keep in mind where the holes are when you remove the old light.

  11. Dome Ceiling Light Bulb Replacement, Place in new light: 11 단계, 이미지 1/1
    • Place in new light and make sure that you have it in firmly to avoid any accident.

  12. Dome Ceiling Light Bulb Replacement, Turn on the light: 12 단계, 이미지 1/1
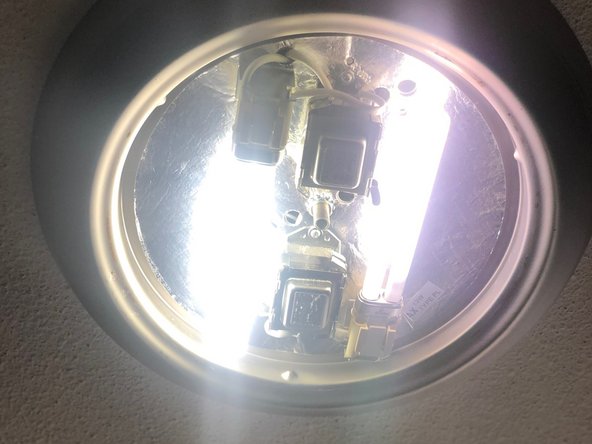
    • Turn on the light to make sure that the new light is not defective and works properly.

  13. Dome Ceiling Light Bulb Replacement, Put dome back on: 13 단계, 이미지 1/1
    • Place the cover back on the light and twist counter clockwise as much as you can.

  14. Dome Ceiling Light Bulb Replacement, Tighten the cover: 14 단계, 이미지 1/1
    • Using the shoe tighten the light until it doesn't move anymore. We don't want the light to fall out sudden and cause injury.

  15. Dome Ceiling Light Bulb Replacement, Clean cover: 15 단계, 이미지 1/1
    • Once again clean the dome cover to remove shoe scuffs

  16. Dome Ceiling Light Bulb Replacement, Turn on light: 16 단계, 이미지 1/1
    • Watch your new light glow

결론

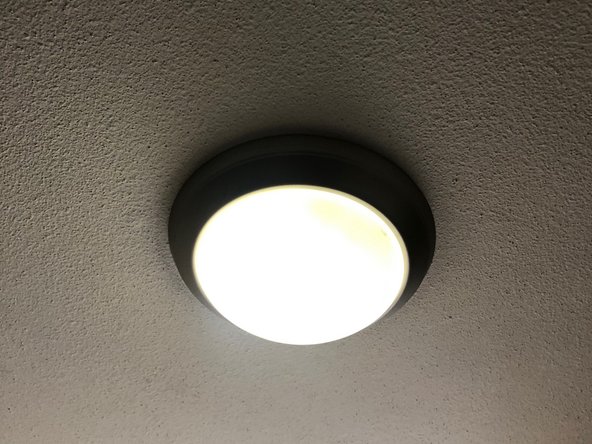
once the light has been replaced and the dome is placed back properly all you gotta do is turn on the lights once more to make sure its working.

jalen brown

회원 가입일: 01/23/21

253 평판

안내서 1개 작성함

York University, Team S1-G6, O'Regan Winter 2021 York University, Team S1-G6, O'Regan Winter 2021 회원

YORK-O'REGAN-W21S1G6

2 회원들

안내서 2개 작성하였습니다

댓글 0개

댓글 쓰기

조회 통계:

24 시간 전: 2

7일 전: 5

30일 전: 32

전체 시간: 1,197