주요 콘텐츠로 건너뛰기

DualShock 4 CUH-ZCT2U Shell Replacement

보관된 가이드
해당 안내서는 단지 역사적인 목적으로 보관됩니다. 최신 버전 안내서를 사용하여 수리 하십시오.

필요한 것

  1. DualShock 4 CUH-ZCT2U Shell Replacement, Front and Back Shell: 1 단계, 이미지 1/1
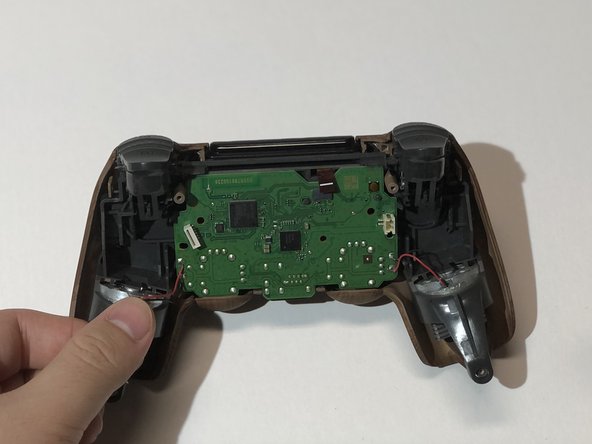
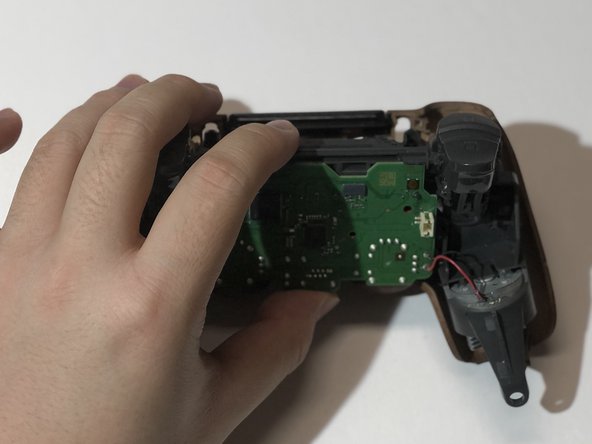
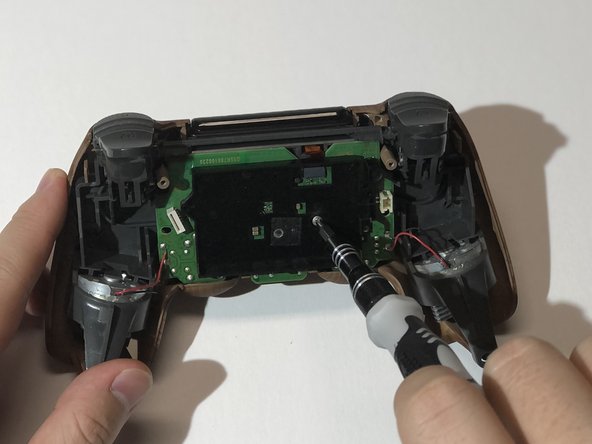
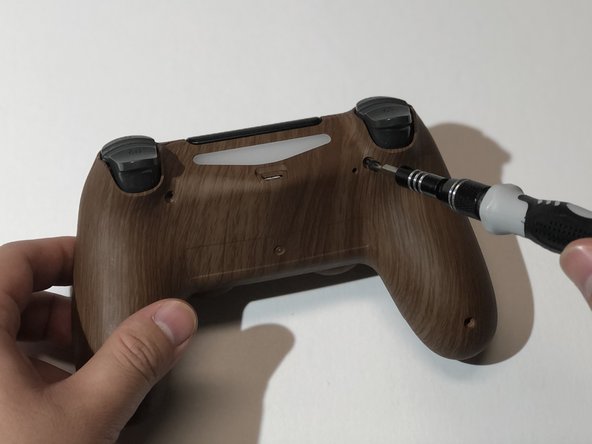
    • Remove the four 6 mm Phillips #00 screws on the back of the controller.

  2. DualShock 4 CUH-ZCT2U Shell Replacement: 2 단계, 이미지 1/2 DualShock 4 CUH-ZCT2U Shell Replacement: 2 단계, 이미지 2/2
    • Squeeze the sides of the handles to create an opening in the crease.

    • Insert an opening tool into the crease you created and move it along the crease to loosen the tabs located near the shoulder buttons and the thumb sticks.

  3. DualShock 4 CUH-ZCT2U Shell Replacement: 3 단계, 이미지 1/1
    • Gently lift the back shell off the controller.

    • Potential for device damage. Do not pull the back shell completely off. Doing so may cause the ribbon cable connecting the back shell to the motherboard to tear or break.

    • Use tweezers to pull the ribbon cable out of the socket on the motherboard.

  4. DualShock 4 CUH-ZCT2U Shell Replacement: 4 단계, 이미지 1/3 DualShock 4 CUH-ZCT2U Shell Replacement: 4 단계, 이미지 2/3 DualShock 4 CUH-ZCT2U Shell Replacement: 4 단계, 이미지 3/3
    • Clasp onto the battery plug on the right side of the controller using tweezers and slowly wiggle it out of the socket.

    • Once the plug is removed from the socket, lift the battery off the battery housing.

  5. DualShock 4 CUH-ZCT2U Shell Replacement: 5 단계, 이미지 1/3 DualShock 4 CUH-ZCT2U Shell Replacement: 5 단계, 이미지 2/3 DualShock 4 CUH-ZCT2U Shell Replacement: 5 단계, 이미지 3/3
    • Remove the 6 mm Phillips #00 screw keeping the battery housing in place.

    • Lift the battery housing off the motherboard.

  6. DualShock 4 CUH-ZCT2U Shell Replacement: 6 단계, 이미지 1/3 DualShock 4 CUH-ZCT2U Shell Replacement: 6 단계, 이미지 2/3 DualShock 4 CUH-ZCT2U Shell Replacement: 6 단계, 이미지 3/3
    • Gently pull the ribbon cable near the top right of the motherboard out of the socket using tweezers.

    • This will allow the motherboard and the controller frame to be removed from the front shell.

  7. DualShock 4 CUH-ZCT2U Shell Replacement: 7 단계, 이미지 1/3 DualShock 4 CUH-ZCT2U Shell Replacement: 7 단계, 이미지 2/3 DualShock 4 CUH-ZCT2U Shell Replacement: 7 단계, 이미지 3/3
    • Holding the edges, lift the controller frame off the front shell and make sure the ribbon cable does not snag on the frame.

    • Potential for device damage. If the ribbon cable gets caught as the controller frame is being pulled off, it may rip off the head of the ribbon cable.

  8. DualShock 4 CUH-ZCT2U Shell Replacement: 8 단계, 이미지 1/3 DualShock 4 CUH-ZCT2U Shell Replacement: 8 단계, 이미지 2/3 DualShock 4 CUH-ZCT2U Shell Replacement: 8 단계, 이미지 3/3
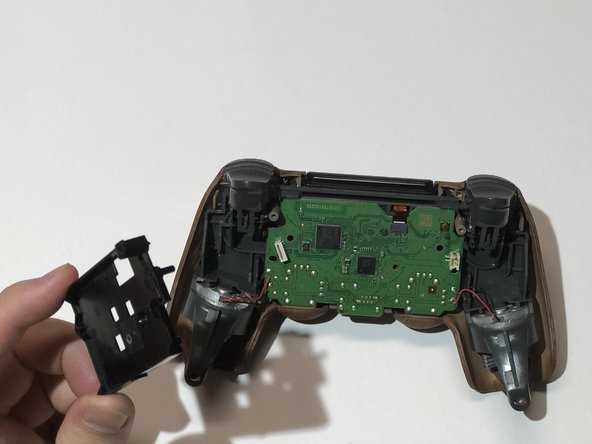
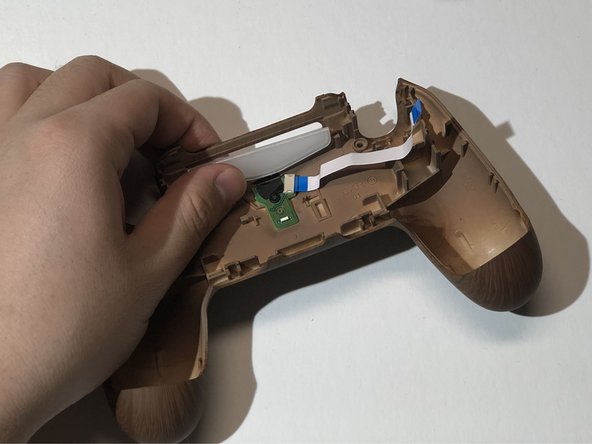
    • Once left with the front shell, peel off the rubber coverings for the buttons.

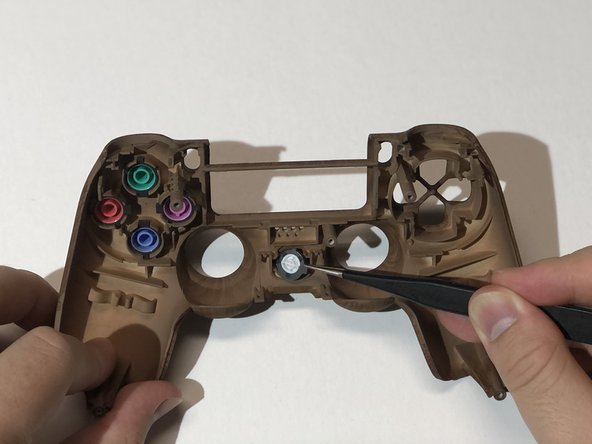
    • Push the buttons inwards from the front side of the shell to lift them out of the socket, then proceed to remove them.

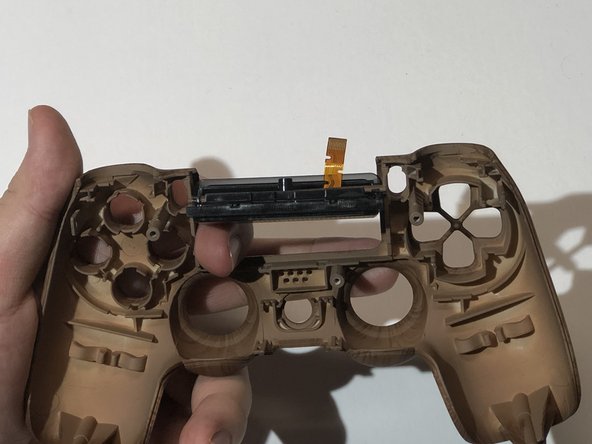
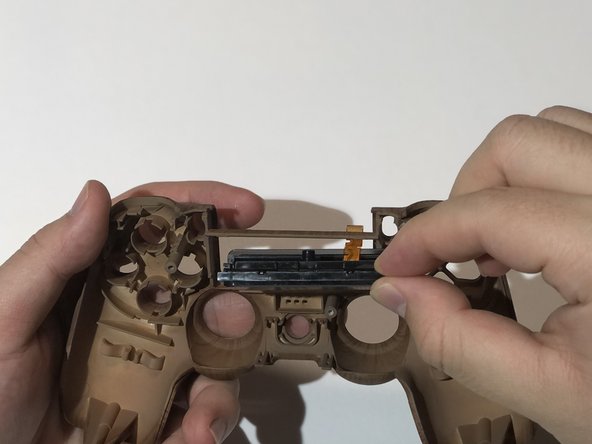
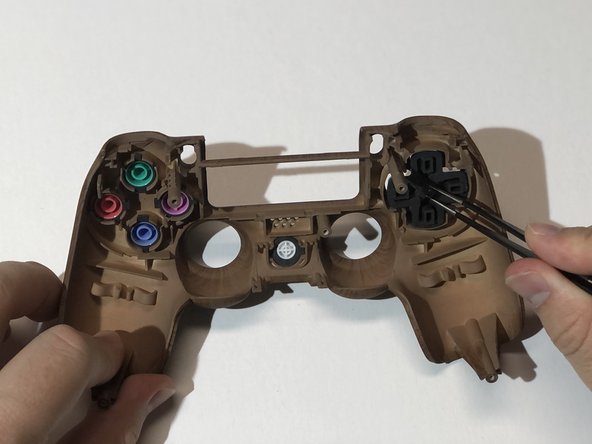
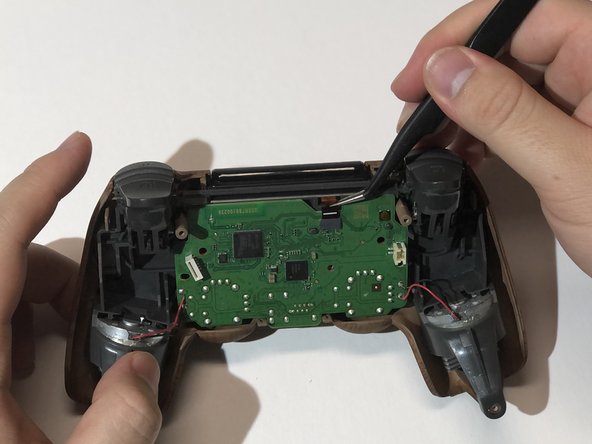
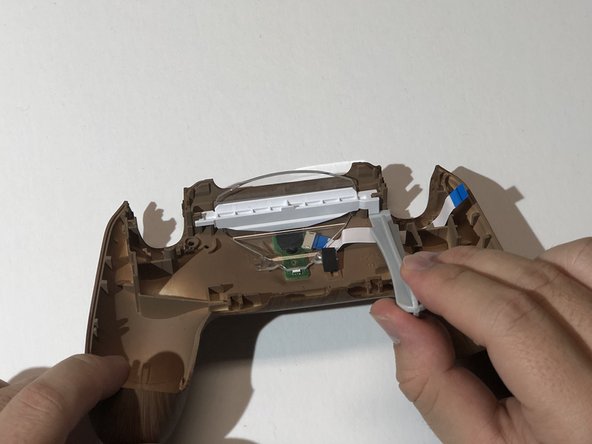
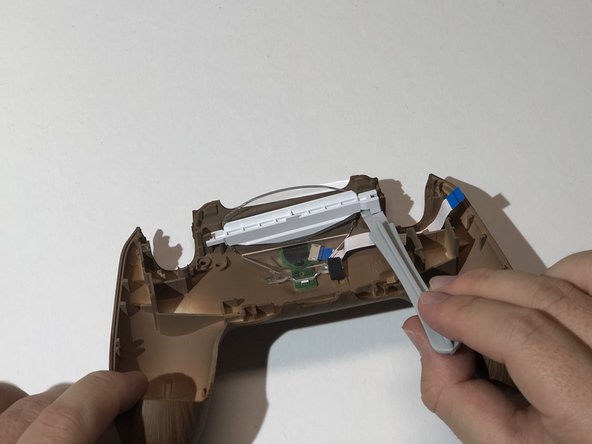
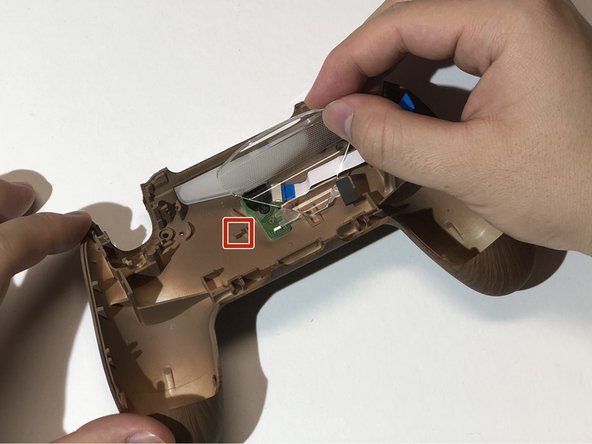
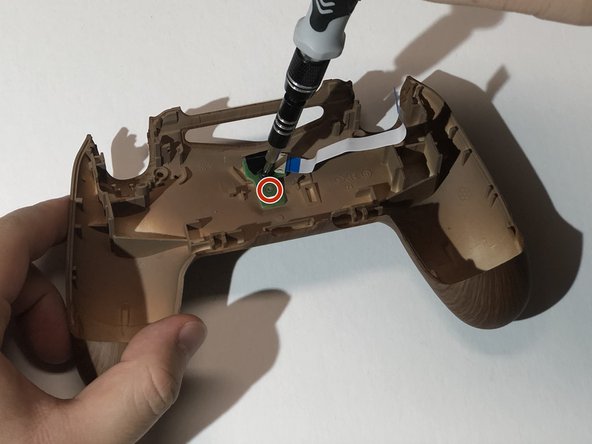
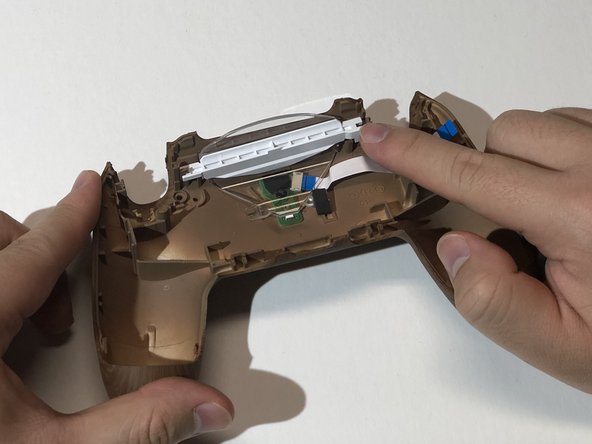
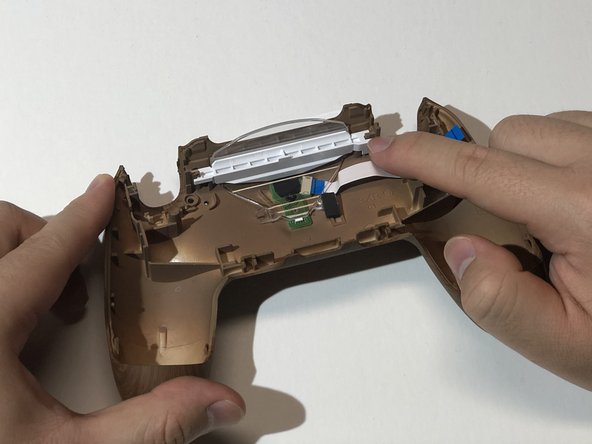
    • To remove the touch bar, push inwards on the base of the touch bar from the front side of the shell.

  9. DualShock 4 CUH-ZCT2U Shell Replacement: 9 단계, 이미지 1/3 DualShock 4 CUH-ZCT2U Shell Replacement: 9 단계, 이미지 2/3 DualShock 4 CUH-ZCT2U Shell Replacement: 9 단계, 이미지 3/3
    • Place the buttons into the new shell by aligning the nubs on each button with the grooves of the sockets it is being placed into.

    • This helps align the buttons correctly on the front of the controller and removes the problem of placing the buttons in the wrong socket.

  10. DualShock 4 CUH-ZCT2U Shell Replacement: 10 단계, 이미지 1/2 DualShock 4 CUH-ZCT2U Shell Replacement: 10 단계, 이미지 2/2
    • Place the rubber covering over the buttons.

    • Make sure the holes on each corner of the rubber covering is occupied by one of the corresponding prongs on the shell and apply pressure to fit it in place.

  11. DualShock 4 CUH-ZCT2U Shell Replacement: 11 단계, 이미지 1/3 DualShock 4 CUH-ZCT2U Shell Replacement: 11 단계, 이미지 2/3 DualShock 4 CUH-ZCT2U Shell Replacement: 11 단계, 이미지 3/3
    • Insert the top of the touch bar through the space below the separation bar.

    • Move the touch bar upwards towards the separation bar on the shell. It should naturally find its way into place.

    • Make sure that the ribbon cable on the touch bar goes behind the separation bar on the shell.

  12. DualShock 4 CUH-ZCT2U Shell Replacement: 12 단계, 이미지 1/3 DualShock 4 CUH-ZCT2U Shell Replacement: 12 단계, 이미지 2/3 DualShock 4 CUH-ZCT2U Shell Replacement: 12 단계, 이미지 3/3
    • Place the controller frame and motherboard back on the front shell.

    • Use tweezers to keep the ribbon cable that is connected to the touch bar inside the small rectangular hole on the controller frame.

    • Reconnect the ribbon cable into the socket on the motherboard.

  13. DualShock 4 CUH-ZCT2U Shell Replacement: 13 단계, 이미지 1/3 DualShock 4 CUH-ZCT2U Shell Replacement: 13 단계, 이미지 2/3 DualShock 4 CUH-ZCT2U Shell Replacement: 13 단계, 이미지 3/3
    • Align the battery housing with the support holes on the motherboard and place it down on top of the motherboard.

    • Use a 6 mm Phillips #00 screw to screw the battery housing into place.

  14. DualShock 4 CUH-ZCT2U Shell Replacement: 14 단계, 이미지 1/3 DualShock 4 CUH-ZCT2U Shell Replacement: 14 단계, 이미지 2/3 DualShock 4 CUH-ZCT2U Shell Replacement: 14 단계, 이미지 3/3
    • Place the battery onto the battery housing.

    • Keep the battery plug on the right side of the controller facing the socket.

    • Push the battery plug into the socket.

  15. DualShock 4 CUH-ZCT2U Shell Replacement: 15 단계, 이미지 1/3 DualShock 4 CUH-ZCT2U Shell Replacement: 15 단계, 이미지 2/3 DualShock 4 CUH-ZCT2U Shell Replacement: 15 단계, 이미지 3/3
    • Using an opening tool, gently pry upwards from the bottom right side of the white plastic chassis.

    • Remove the white plastic chassis from the shell.

  16. DualShock 4 CUH-ZCT2U Shell Replacement: 16 단계, 이미지 1/3 DualShock 4 CUH-ZCT2U Shell Replacement: 16 단계, 이미지 2/3 DualShock 4 CUH-ZCT2U Shell Replacement: 16 단계, 이미지 3/3
    • Peel back the rubber tape connecting the transparent plastic light screen to the shell.

    • Slide the transparent plastic light screen away from the hook to remove it.

    • Pop the translucent plastic light screen out of the slot after removing the transparent plastic light screen.

  17. DualShock 4 CUH-ZCT2U Shell Replacement: 17 단계, 이미지 1/3 DualShock 4 CUH-ZCT2U Shell Replacement: 17 단계, 이미지 2/3 DualShock 4 CUH-ZCT2U Shell Replacement: 17 단계, 이미지 3/3
    • Gently peel back the tape covering the screw on the charging port.

    • Remove the 4 mm Phillips #00 screw from the charging port.

    • Remove the charging port from the shell.

  18. DualShock 4 CUH-ZCT2U Shell Replacement: 18 단계, 이미지 1/2 DualShock 4 CUH-ZCT2U Shell Replacement: 18 단계, 이미지 2/2
    • Align the standoff on the new shell with the hole on the charging port board.

    • Screw the charging port into the shell with the 4 mm Phillips #00 screw.

    • Gently move the tape back onto the shell and over the screw.

  19. DualShock 4 CUH-ZCT2U Shell Replacement: 19 단계, 이미지 1/2 DualShock 4 CUH-ZCT2U Shell Replacement: 19 단계, 이미지 2/2
    • Place the translucent light screen into the slot on the top of the shell.

    • Slide the transparent light screen over the charging port and into the hook on the shell to hold both light screens together.

    • Stick the rubber tape on the transparent light screen onto the new shell.

    • Make sure the ribbon cable does not get stuck between the shell and the transparent light screen.

  20. DualShock 4 CUH-ZCT2U Shell Replacement: 20 단계, 이미지 1/3 DualShock 4 CUH-ZCT2U Shell Replacement: 20 단계, 이미지 2/3 DualShock 4 CUH-ZCT2U Shell Replacement: 20 단계, 이미지 3/3
    • With the smooth side of the white plastic chassis facing away from you, insert the left edge of the plastic chassis into the groove on the top left side of the back shell.

    • Align the clip on the right edge of the plastic chassis with the post on the top right side of the back shell and press the clip down to hold the light screens in place.

  21. DualShock 4 CUH-ZCT2U Shell Replacement: 21 단계, 이미지 1/2 DualShock 4 CUH-ZCT2U Shell Replacement: 21 단계, 이미지 2/2
    • Take the ribbon cable that is connected to the back shell and insert the golden connectors into the socket on the motherboard facing away from the battery.

    • Potential for device damage. If inserted incorrectly, the golden connectors may bend or break off.

  22. DualShock 4 CUH-ZCT2U Shell Replacement: 22 단계, 이미지 1/3 DualShock 4 CUH-ZCT2U Shell Replacement: 22 단계, 이미지 2/3 DualShock 4 CUH-ZCT2U Shell Replacement: 22 단계, 이미지 3/3
    • Align the tabs on both shells and bring the two halves together. Make sure the transparent plastic light screen slides into the slit on the controller frame before closing the shell

    • Potential for device damage. If the plastic light screen is positioned incorrectly, it may crack or shatter the screen.

    • Apply even force on both sides of the controller until the two shells click into place.

    • Screw in the four 6 mm Phillips #00 screws on the back of the controller.

결승점

다른 5명이 해당 안내서를 완성하였습니다.

Peter Lam

회원 가입일: 09/19/20

1,600 평판

안내서 2개 작성하였습니다

York University, Team S1-G14, O'Regan Summer 2021 York University, Team S1-G14, O'Regan Summer 2021 회원

YORK-O'REGAN-SU21S1G14

1 회원

안내서 8개 작성하였습니다

댓글 0개

댓글 쓰기

조회 통계:

24 시간 전: 0

7일 전: 0

30일 전: 0

전체 시간: 2,152