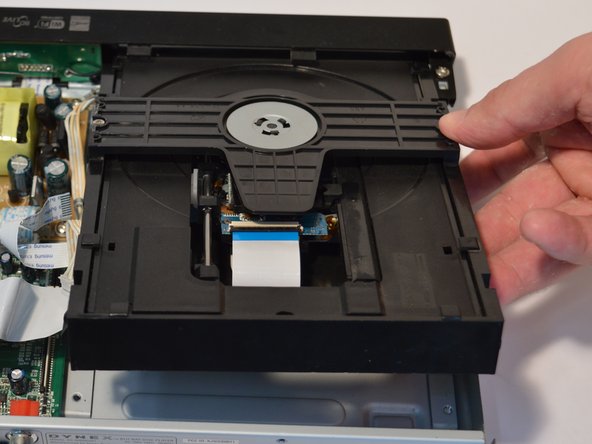
주요 콘텐츠로 건너뛰기

Dynex DX-WBRDVD1 Optical Drive Replacement

필요한 것

  1. Dynex DX-WBRDVD1 Optical Drive Replacement, Top Cover: 1 단계, 이미지 1/2 Dynex DX-WBRDVD1 Optical Drive Replacement, Top Cover: 1 단계, 이미지 2/2
    • Remove the four 5mm Phillips #1 screws that connect the black outer shell to the silver back of the device.

  2. Dynex DX-WBRDVD1 Optical Drive Replacement: 2 단계, 이미지 1/1
    • Remove the two 5mm screws on the left and right side panels.

    • There is one screw on each side that secures the cover to the body of the device.

  3. Dynex DX-WBRDVD1 Optical Drive Replacement: 3 단계, 이미지 1/1
    • Lift the black cover to a 45 degree angle from the rear of the device and pull the cover away entirely.

    • Check that the power cord is not preventing the device from opening or closing.

  4. Dynex DX-WBRDVD1 Optical Drive Replacement, Optical Drive: 4 단계, 이미지 1/2 Dynex DX-WBRDVD1 Optical Drive Replacement, Optical Drive: 4 단계, 이미지 2/2
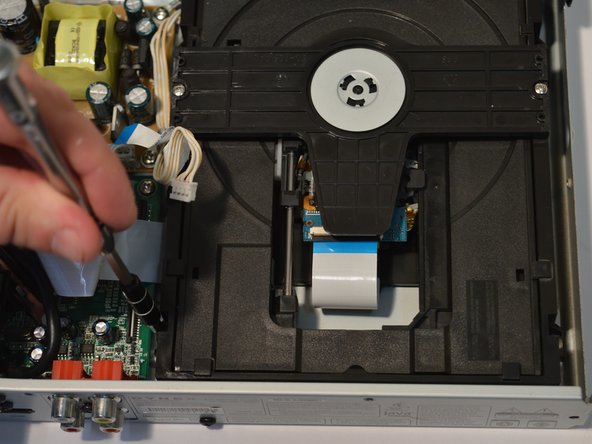
    • Use a Phillips #1 screwdriver to remove the two screws that secure the Optical Drive.

  5. Dynex DX-WBRDVD1 Optical Drive Replacement: 5 단계, 이미지 1/2 Dynex DX-WBRDVD1 Optical Drive Replacement: 5 단계, 이미지 2/2
    • Detach the tape wires from the motherboard and power board.

  6. Dynex DX-WBRDVD1 Optical Drive Replacement: 6 단계, 이미지 1/2 Dynex DX-WBRDVD1 Optical Drive Replacement: 6 단계, 이미지 2/2
    • Lift the disc drive up to a 45 degree angle and pull back out of the device shell

결론

To reassemble your device, follow these instructions in reverse order.

다른 2명이 해당 안내서를 완성하였습니다.

Harrison Williams

회원 가입일: 04/05/18

499 평판

안내서 2개 작성하였습니다

댓글 0개

댓글 쓰기

조회 통계:

24 시간 전: 3

7일 전: 3

30일 전: 8

전체 시간: 387