주요 콘텐츠로 건너뛰기

Dyson Ball Multi Floor Upright Electrical Cord Replacement

필요한 것

  1. Dyson Ball Multi Floor Upright Electrical Cord Replacement, Electrical Cord: 1 단계, 이미지 1/2 Dyson Ball Multi Floor Upright Electrical Cord Replacement, Electrical Cord: 1 단계, 이미지 2/2
    • Press the red button on the back to release the hose and allow for easy access to the back

  2. Dyson Ball Multi Floor Upright Electrical Cord Replacement: 2 단계, 이미지 1/1
    • Remove the four 15 mm T-10 black screws now showing in the back of the vacuum hose track, using the Phillips 0 screwdriver found in the iFixit tool kit.

  3. Dyson Ball Multi Floor Upright Electrical Cord Replacement: 3 단계, 이미지 1/2 Dyson Ball Multi Floor Upright Electrical Cord Replacement: 3 단계, 이미지 2/2
    • Use a pair of needle nosed pliers to press both tabs simultaneously.

    • Hold onto the front hatch while doing this or it will fall off and a spring and lever will fall out with it.

    • Remove the hatch carefully exposing the wiring underneath

  4. Dyson Ball Multi Floor Upright Electrical Cord Replacement: 4 단계, 이미지 1/2 Dyson Ball Multi Floor Upright Electrical Cord Replacement: 4 단계, 이미지 2/2
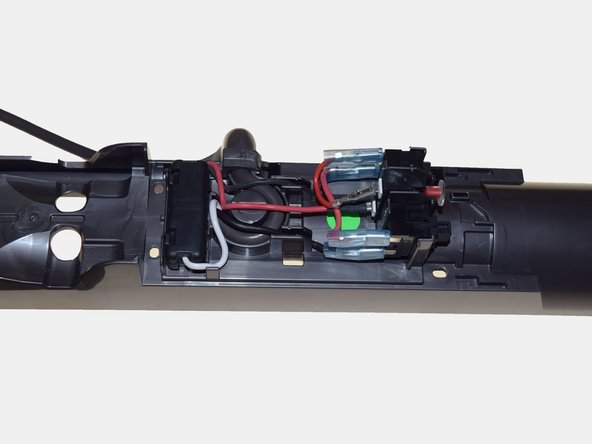
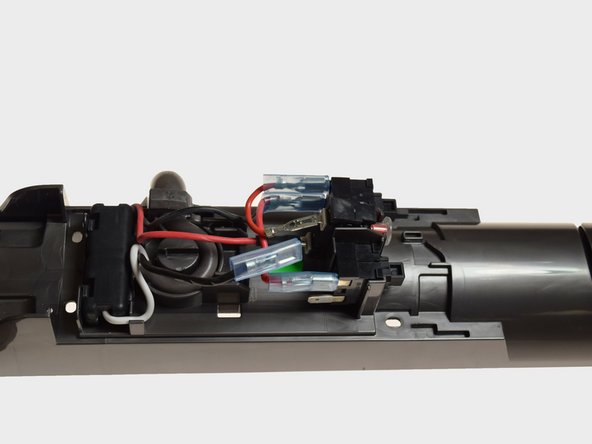
    • Remove the black wire from its connection near the top of the hatch

  5. Dyson Ball Multi Floor Upright Electrical Cord Replacement: 5 단계, 이미지 1/2 Dyson Ball Multi Floor Upright Electrical Cord Replacement: 5 단계, 이미지 2/2
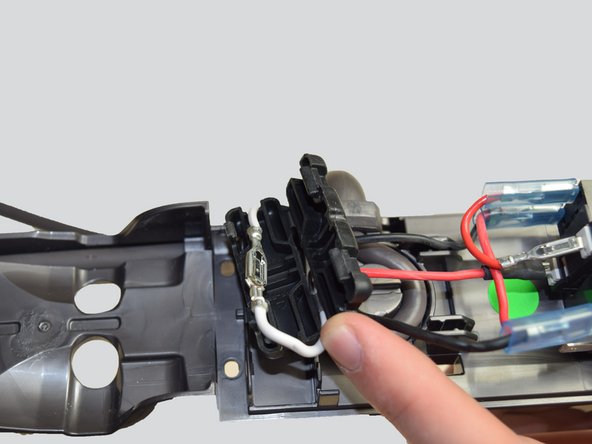
    • Open the black box near the bottom of the hatch area using the two push tabs

    • This exposes the white wire's connection

  6. Dyson Ball Multi Floor Upright Electrical Cord Replacement: 6 단계, 이미지 1/1
    • Disconnect the white wire using the small metal tab.

    • Do not damage the wire during the process.

  7. Dyson Ball Multi Floor Upright Electrical Cord Replacement: 7 단계, 이미지 1/1
    • Pull vertically on the grey cord now and it should separate from the rest of the vacuum

    • To replace the cord, slide the new grey cord into place and connect the two wires again then complete the steps in reverse

결론

To reassemble your device, follow these instructions in reverse order.

다른 한 분이 해당 안내서를 완성하였습니다.

Nicole Abraham

회원 가입일: 01/26/17

839 평판

안내서 5개 작성하였습니다

Cal Poly, Team 21-2, Maness Winter 2017 Cal Poly, Team 21-2, Maness Winter 2017 회원

CPSU-MANESS-W17S21G2

4 회원들

안내서 10개 작성하였습니다

댓글 한 개

Supposing that one doesn't hold onto the front part, and the spring and lever fall out, how does one replace said spring and lever?

Jordan Adams - 답글

댓글 쓰기

조회 통계:

24 시간 전: 1

7일 전: 15

30일 전: 54

전체 시간: 3,624