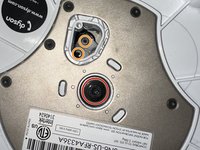
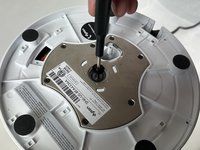
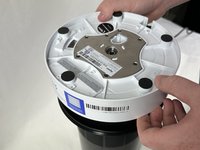
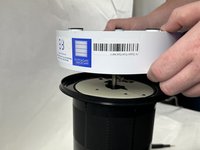
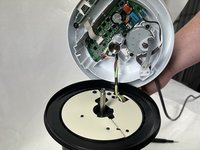
주요 콘텐츠로 건너뛰기

Dyson Pure Cool AM11 Base Replacement

필요한 것

  1. Dyson Pure Cool AM11 Base Replacement, Base: 1 단계, 이미지 3개 중 1개 Dyson Pure Cool AM11 Base Replacement, Base: 1 단계, 이미지 3개 중 2개 Dyson Pure Cool AM11 Base Replacement, Base: 1 단계, 이미지 3개 중 3개
    • With the device flipped upside down, use a Phillips #1 screwdriver to remove the 4 screws holding the 3 tabs down.

  2. Dyson Pure Cool AM11 Base Replacement: 2 단계, 이미지 3개 중 1개 Dyson Pure Cool AM11 Base Replacement: 2 단계, 이미지 3개 중 2개 Dyson Pure Cool AM11 Base Replacement: 2 단계, 이미지 3개 중 3개
    • Remove all 3 tabs that you unscrewed.

  3. Dyson Pure Cool AM11 Base Replacement: 3 단계, 이미지 2개 중 1개 Dyson Pure Cool AM11 Base Replacement: 3 단계, 이미지 2개 중 2개
    • Using a Torx T20 Screwdriver, remove the screw in the center of the base.

    • Remove the two screws connected to the rotation arm.

  4. Dyson Pure Cool AM11 Base Replacement: 4 단계, 이미지 3개 중 1개 Dyson Pure Cool AM11 Base Replacement: 4 단계, 이미지 3개 중 2개 Dyson Pure Cool AM11 Base Replacement: 4 단계, 이미지 3개 중 3개
    • Lift the base of the housing from the rest of the fan.

    • Be careful not to pull too hard while lifting the lower body housing as there is wires that run throughout the housing that could be damaged if too much force is used.

결승점

작성자

4다른 기여자 명과 함께

Gregory Crimmins

회원 가입일: 11/01/23

109 평판

안내서 1개를 작성함

UMass Dartmouth, Team 2-7, Gulbrandsen Fall 2023 UMass Dartmouth, Team 2-7, Gulbrandsen Fall 2023 회원

UMASSD-GULBRANDSEN-F23S2G7

3 회원들

안내서 5개를 작성함

0가이드 댓글

댓글 쓰기

조회 통계:

지난 24시간: 4

지난 7일: 14

지난 30일: 43

전체 시간: 700