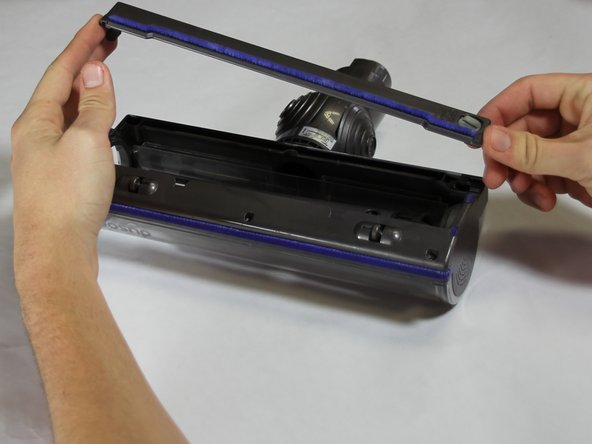
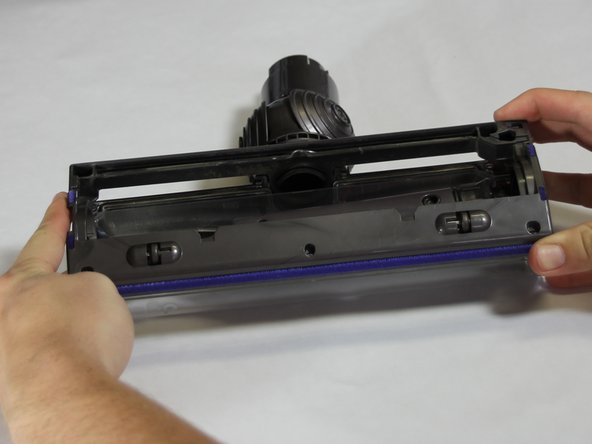
주요 콘텐츠로 건너뛰기

Dyson V6 Motorhead Upper Housing and Brush Bar Housing Replacement

필요한 것

  1. Dyson V6 Motorhead Upper Housing and Brush Bar Housing Replacement, Brush Bar: 1 단계, 이미지 1/1
    • Press the button to disconnect the vacuum head from the connecting pole.

  2. Dyson V6 Motorhead Upper Housing and Brush Bar Housing Replacement: 2 단계, 이미지 1/1
    • Turn the end cap counterclockwise using the iFixit Opening Tool.

    • If you do not have an iFixit Opening Tool, a quarter may be used instead.

  3. Dyson V6 Motorhead Upper Housing and Brush Bar Housing Replacement: 3 단계, 이미지 1/3 Dyson V6 Motorhead Upper Housing and Brush Bar Housing Replacement: 3 단계, 이미지 2/3 Dyson V6 Motorhead Upper Housing and Brush Bar Housing Replacement: 3 단계, 이미지 3/3
    • Pull the brush bar out of the housing.

  4. Dyson V6 Motorhead Upper Housing and Brush Bar Housing Replacement, Upper Housing and Brush Bar Housing: 4 단계, 이미지 1/2 Dyson V6 Motorhead Upper Housing and Brush Bar Housing Replacement, Upper Housing and Brush Bar Housing: 4 단계, 이미지 2/2
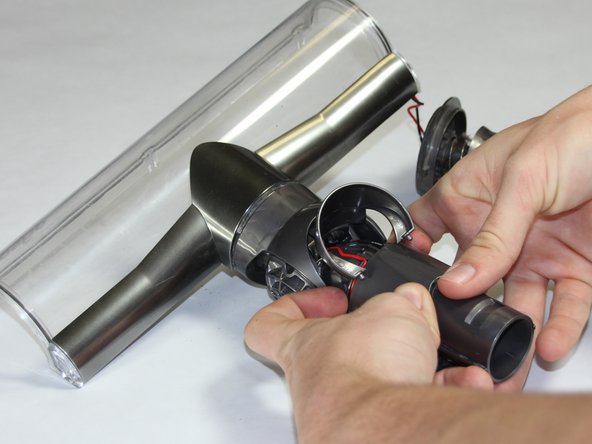
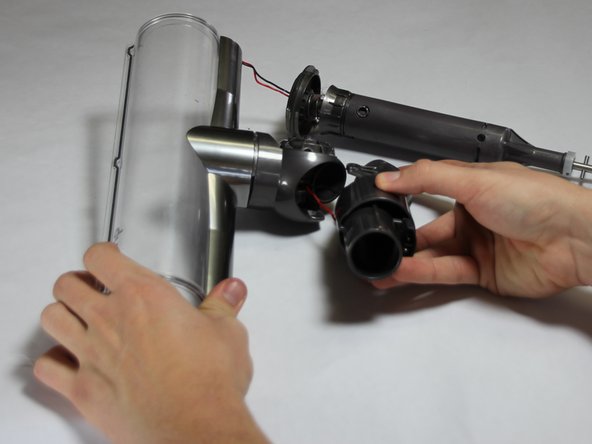
    • Turn the padlock key counterclockwise using the iFixit Opening Tool.

    • If you do not have an iFixit Opening Tool, a quarter may be used instead.

  5. Dyson V6 Motorhead Upper Housing and Brush Bar Housing Replacement: 5 단계, 이미지 1/1
    • Unscrew the three front 1.4 cm torx screws using the T8 Torx screwdriver.

  6. Dyson V6 Motorhead Upper Housing and Brush Bar Housing Replacement: 6 단계, 이미지 1/2 Dyson V6 Motorhead Upper Housing and Brush Bar Housing Replacement: 6 단계, 이미지 2/2
    • Remove the upper plate once the padlock is unlocked.

  7. Dyson V6 Motorhead Upper Housing and Brush Bar Housing Replacement: 7 단계, 이미지 1/3 Dyson V6 Motorhead Upper Housing and Brush Bar Housing Replacement: 7 단계, 이미지 2/3 Dyson V6 Motorhead Upper Housing and Brush Bar Housing Replacement: 7 단계, 이미지 3/3
    • Unscrew the top two corner 1.4 cm torx screws using the iFixit T8 Torx screwdriver.

    • Remove axie and roller after the screws are taken out.

  8. Dyson V6 Motorhead Upper Housing and Brush Bar Housing Replacement: 8 단계, 이미지 1/1
    • Remove the drive assembly from vacuum housing.

    • Red wire connecting the drive assembly to housing.

  9. Dyson V6 Motorhead Upper Housing and Brush Bar Housing Replacement: 9 단계, 이미지 1/3 Dyson V6 Motorhead Upper Housing and Brush Bar Housing Replacement: 9 단계, 이미지 2/3 Dyson V6 Motorhead Upper Housing and Brush Bar Housing Replacement: 9 단계, 이미지 3/3
    • Pop off the circular plating to remove the housing from the connection piece.

    • Red wire connects through the upper portion of the housing.

결론

To reassemble your device, follow these instructions in reverse order.

다른 7명이 해당 안내서를 완성하였습니다.

Addie Hedge

회원 가입일: 01/24/17

710 평판

안내서 5개 작성하였습니다

Cal Poly, Team 22-6, Maness Winter 2017 Cal Poly, Team 22-6, Maness Winter 2017 회원

CPSU-MANESS-W17S22G6

4 회원들

안내서 5개 작성하였습니다

댓글 6개

can the direct drive motor unit be replaced rather than replacing the whole motor head. If so where can the motor be purchased from - I’ve internet searched without success!

Mikey - 답글

I am in the same boat, any luck finding just the direct drive motor ?

jerryd -

You can try ebay.

Joe - 답글

Took mine apart and i was certain it was the motor. Removed the drive belt and the motor turned freely. Discovered that the brush pulley was stiff and jammed. Freed it up with wd40 and worked the pulley until it loosened right up. Placed the belt back and now works perfectly. Maybe try this before presuming the motor is burnt out? Just a thought. Cheers!

Paul Stewart - 답글

I’ve disassembled and see the black wire is broken! Has anyone done this?

lawrence - 답글

댓글 쓰기

조회 통계:

24 시간 전: 0

7일 전: 3

30일 전: 33

전체 시간: 14,153