주요 콘텐츠로 건너뛰기

Eclipse 180BL Battery Replacement

필요한 것

  1. Eclipse 180BL Battery Replacement, Battery: 1 단계, 이미지 1개 중 1개
    • Remove the two screws located on the bottom of the device with a phillips head screw driver.

    • The two screws can be removed using the PH00 head from the iFixit repair toolkit.

    • Both screws are 1/8 inch in length.

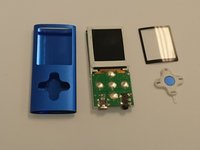
    • The bottom cap will come off to reveal the inside main component.
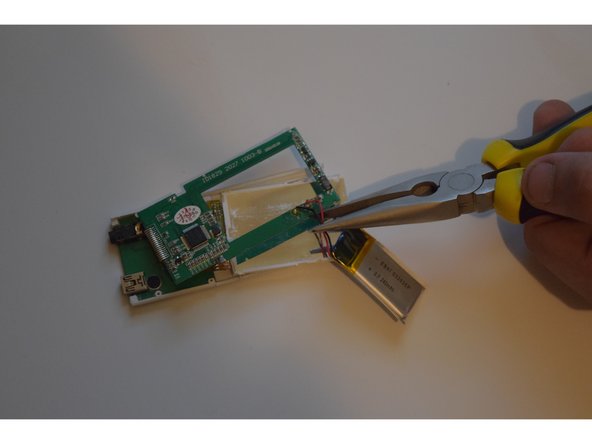
  2. Eclipse 180BL Battery Replacement: 2 단계, 이미지 2개 중 1개 Eclipse 180BL Battery Replacement: 2 단계, 이미지 2개 중 2개
    • Remove the main inner component using Spudger, by pushing on the USB port. This will take some force.

    • Hold on the sides with your fingers, and push to release from the top.

  3. Eclipse 180BL Battery Replacement: 3 단계, 이미지 3개 중 1개 Eclipse 180BL Battery Replacement: 3 단계, 이미지 3개 중 2개 Eclipse 180BL Battery Replacement: 3 단계, 이미지 3개 중 3개
    • The plastic LCD cover and the key pad will now be loose; they were held in place by the tension between the case and the internal main component.

    • Locate the large square pack with a black and red wire coming out of it, this is the battery.

    • Cut the red and black wires to remove the old battery.

  4. Eclipse 180BL Battery Replacement: 4 단계, 이미지 1개 중 1개
    • To Replace, connect the two new lines ( red and black) between the new battery and the device.

    • You have successfully replaced the battery!

결론

To reassemble your device, follow these instructions in reverse order.

다른 3명이 해당 안내서를 완성하였습니다.

작성자

2다른 기여자 명과 함께

Thomas Schwarz

회원 가입일: 09/07/15

499 평판

안내서 3개를 작성함

0가이드 댓글

댓글 쓰기

조회 통계:

지난 24시간: 4

지난 7일: 14

지난 30일: 31

전체 시간: 1,779