주요 콘텐츠로 건너뛰기

Eco X Gear Voice Coil Replacement

필요한 것

  1. Eco X Gear Voice Coil Replacement, Frame: 1 단계, 이미지 1/1
    • Disconnect any power source and/or turn off device.

  2. Eco X Gear Voice Coil Replacement: 2 단계, 이미지 1/1
    • Remove the 15 rubber plugs from the cavities using needle nose pliers.

  3. Eco X Gear Voice Coil Replacement: 3 단계, 이미지 1/1
    • Use a phillips head screwdriver to remove the fifteen 6.4mm screws.

  4. Eco X Gear Voice Coil Replacement: 4 단계, 이미지 1/1
    • Carefully separate the two sections of the frame.

    • Wires still connect the two sections. Be cautious to avoid damaging the wires, terminals, and electronics.

  5. Eco X Gear Voice Coil Replacement, Voice Coil: 5 단계, 이미지 1/1
    • Disconnect the wiring to improve accessibility to the cones.

  6. Eco X Gear Voice Coil Replacement: 6 단계, 이미지 1/2 Eco X Gear Voice Coil Replacement: 6 단계, 이미지 2/2
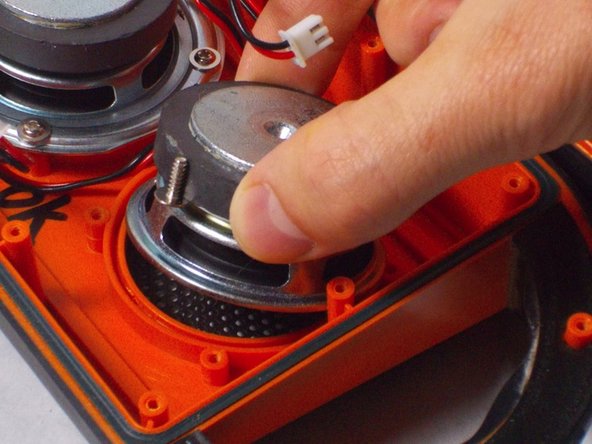
    • Remove the four screws that hold down the speaker and pry up the speaker from the frame.

  7. Eco X Gear Voice Coil Replacement: 7 단계, 이미지 1/1
    • Once the voice coil is removed, solder it back onto the bracket or replace the voice coil entirely.

결론

To reassemble your device, follow these instructions in reverse order.

James Lipsett

회원 가입일: 03/20/17

625 평판

안내서 6개 작성하였습니다

UMass Dartmouth, Team S9-G3, Martin Spring 2017 UMass Dartmouth, Team S9-G3, Martin Spring 2017 회원

UMASSD-MARTIN-S17S9G3

2 회원들

안내서 6개 작성하였습니다

댓글 0개

댓글 쓰기

조회 통계:

24 시간 전: 2

7일 전: 2

30일 전: 11

전체 시간: 189