주요 콘텐츠로 건너뛰기

Edwin the Duck Motherboard Replacement

필요한 것

  1. Edwin the Duck Motherboard Replacement, Motherboard: 1 단계, 이미지 1/2 Edwin the Duck Motherboard Replacement, Motherboard: 1 단계, 이미지 2/2
    • Unscrew the four 9mm screws with a T8 screwdriver bit

    • Remove the back plate off

  2. Edwin the Duck Motherboard Replacement: 2 단계, 이미지 1/2 Edwin the Duck Motherboard Replacement: 2 단계, 이미지 2/2
    • Carefully take off the rubber skin.

    • Be patient and don't rush. You don't want to rip or damage the rubber skin resulting in losing the waterproof cover.

  3. Edwin the Duck Motherboard Replacement: 3 단계, 이미지 1/1
    • Using the J1 screwdriver bit, unscrew all six 9 mm screws that run along the border.

  4. Edwin the Duck Motherboard Replacement: 4 단계, 이미지 1/2 Edwin the Duck Motherboard Replacement: 4 단계, 이미지 2/2
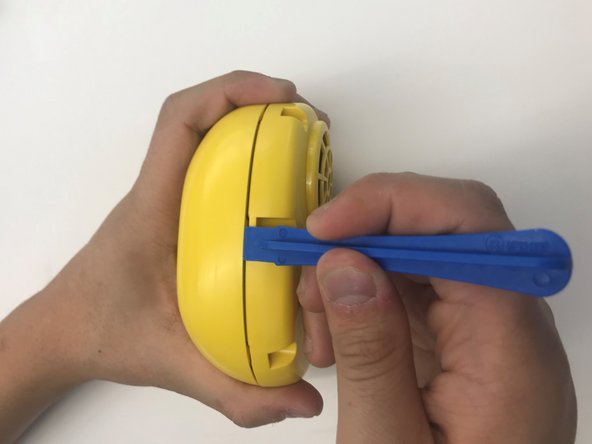
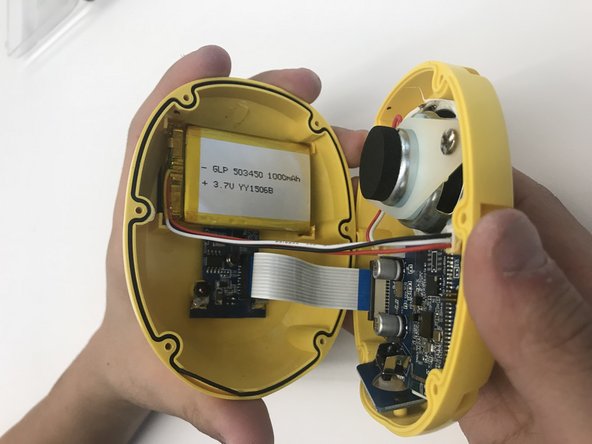
    • Use the plastic opening tool to open the inside of the duck.

    • Be very careful when splitting the two halves apart. There are wires connecting to both sides. Remember to open slowly.

  5. Edwin the Duck Motherboard Replacement: 5 단계, 이미지 1/2 Edwin the Duck Motherboard Replacement: 5 단계, 이미지 2/2
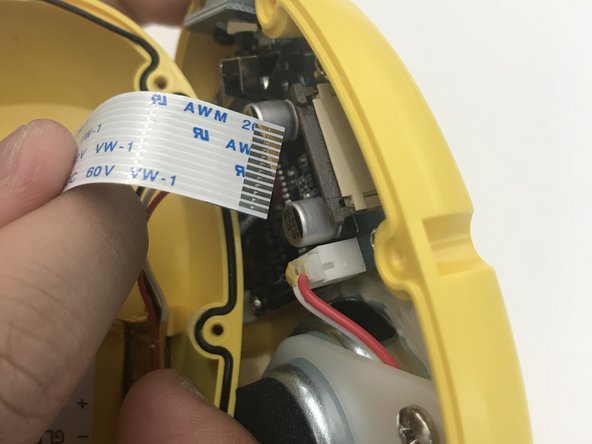
    • Using the plastic opening tool pull up the black tab up until it stops.

    • Be careful not to pull up the black tab too far up, otherwise the cable won't be secure anymore.

    • Pull up the white cable tab, up slowly

  6. Edwin the Duck Motherboard Replacement: 6 단계, 이미지 1/1
    • Use the J1 screwdriver bit to unscrew all four 9 mm screws attached to the motherboard.

  7. Edwin the Duck Motherboard Replacement: 7 단계, 이미지 1/1
    • Remove the top connector as you see in the picture.

    • Replace the new motherboard and you are finished.

결론

To reassemble your device, follow these instructions in reverse order.

다른 한 분이 해당 안내서를 완성하였습니다.

Caleb Kim

회원 가입일: 10/18/17

143 평판

안내서 1개 작성함

UW Tacoma, Team S1-G4, Rose Fall 2017 UW Tacoma, Team S1-G4, Rose Fall 2017 회원

UWT-ROSE-F17S1G4

4 회원들

안내서 8개 작성하였습니다

댓글 0개

댓글 쓰기

조회 통계:

24 시간 전: 0

7일 전: 2

30일 전: 5

전체 시간: 397