주요 콘텐츠로 건너뛰기

Eee Pad Transformer Prime TF201 Charging Port Replacement

필요한 것

  1. Eee Pad Transformer Prime TF201 Charging Port Replacement, Opening Your Device: 1 단계, 이미지 1/1
    • Power down your device.

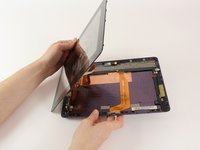
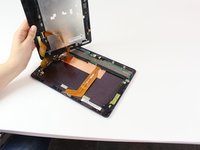
    • Place the small suction cup on a corner of the screen and lightly pull up to expose a seam between the screen and case.

  2. Eee Pad Transformer Prime TF201 Charging Port Replacement: 2 단계, 이미지 1/3 Eee Pad Transformer Prime TF201 Charging Port Replacement: 2 단계, 이미지 2/3 Eee Pad Transformer Prime TF201 Charging Port Replacement: 2 단계, 이미지 3/3
    • Insert the plastic opening tool into the seam near the corner of the device.

    • Slowly slide the tool around the perimeter of the device, gradually prying up the screen.

    • It is normal to hear snaps as the spring clips holding the screen in place are released.

    • It is also normal to hear adhesive separating, as a small amount is used to help secure the screen.

  3. Eee Pad Transformer Prime TF201 Charging Port Replacement: 3 단계, 이미지 1/3 Eee Pad Transformer Prime TF201 Charging Port Replacement: 3 단계, 이미지 2/3 Eee Pad Transformer Prime TF201 Charging Port Replacement: 3 단계, 이미지 3/3
    • When the screen is free of all spring clips and adhesive, slowly open the device like a clam shell with the hinge being the left hand side of the device.

    • Do not completely separate the screen from the case by more than a few inches, as they are still connected by three orange ribbon cables.

    • Safely place the device back on the table by laying the screen face down.

    • There will be some slight overlapping of the back of the case over the screen.

  4. Eee Pad Transformer Prime TF201 Charging Port Replacement: 4 단계, 이미지 1/2 Eee Pad Transformer Prime TF201 Charging Port Replacement: 4 단계, 이미지 2/2
    • Disconnect the ribbon cable by placing a plastic opening tool under the black plastic tab that is on the opposite side of the port as the ribbon cable.

    • Pry upward until the black tab moves 90 degrees, and gently pull the ribbon cable out of the port.

  5. Eee Pad Transformer Prime TF201 Charging Port Replacement: 5 단계, 이미지 1/1
    • Place a plastic opening tool under the white plastic tab on one of the ribbon cable ports.

    • Pry upward until the black tab moves 90 degrees, and gently pull the ribbon cable out of the port.

    • Repeat the previous process to remove the other ribbon cable.

  6. Eee Pad Transformer Prime TF201 Charging Port Replacement: 6 단계, 이미지 1/1
    • Remove the battery (secured by six screws and a white wire connector) by following the removal portion of this battery replacement guide.

    • The device that we wrote this guide for did not come with a battery, so we cannot include it in our own guide steps.

    • The battery is removed during all repairs to protect against short circuits, shocks, and internal damage to the device.

  7. Eee Pad Transformer Prime TF201 Charging Port Replacement, LED Chip: 7 단계, 이미지 1/2 Eee Pad Transformer Prime TF201 Charging Port Replacement, LED Chip: 7 단계, 이미지 2/2
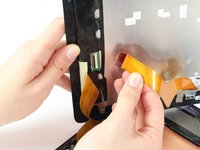
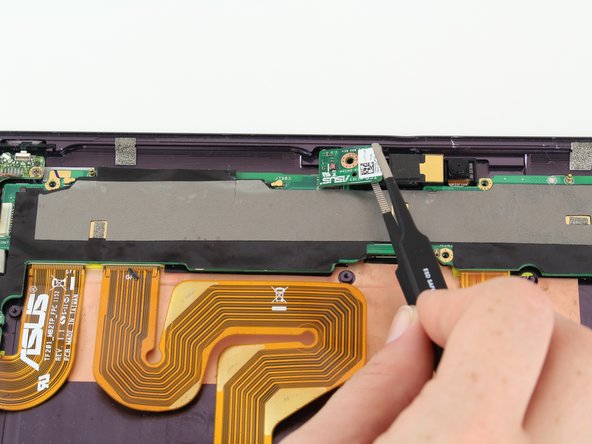
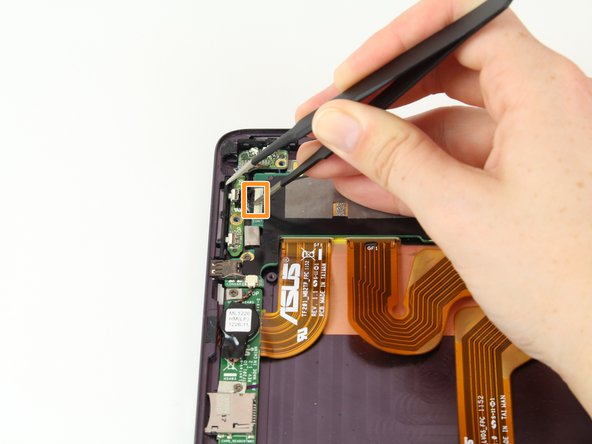
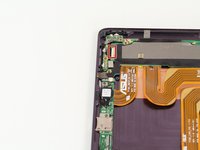
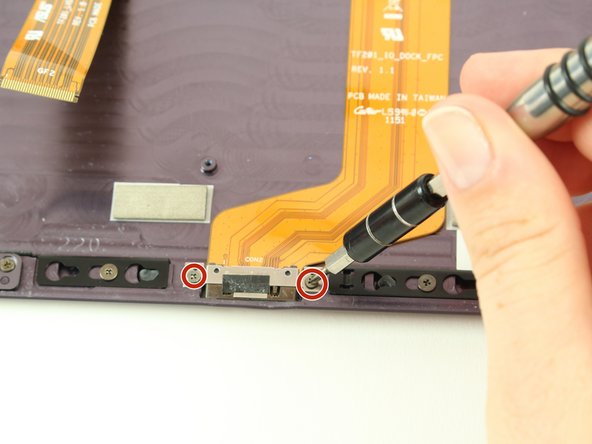
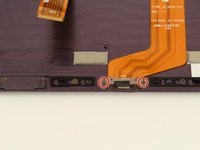
    • With a Phillips #00 screwdriver, remove the one 3.8 mm screw in the LED chip. The LED chip is a small green chip (about 1 square centimeter) located at the top center of the device.

    • Gently remove the chip with a pair of precision tweezers by grabbing the chip from one side, being careful not to pinch on a black piece of hardware on the chip.

  8. Eee Pad Transformer Prime TF201 Charging Port Replacement, Charging Port: 8 단계, 이미지 1/3 Eee Pad Transformer Prime TF201 Charging Port Replacement, Charging Port: 8 단계, 이미지 2/3 Eee Pad Transformer Prime TF201 Charging Port Replacement, Charging Port: 8 단계, 이미지 3/3
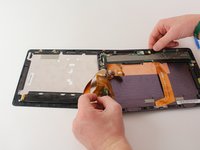
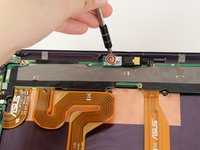
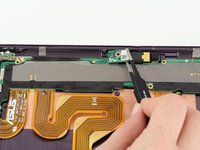
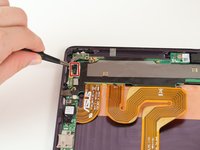
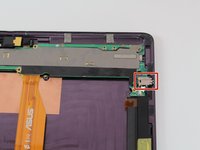
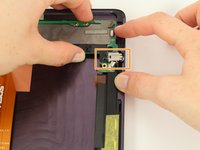
    • With precision tweezers, pull back the strip of black tape covering the connection between the button key switch and the motherboard.

    • Disconnect the wires by using precision tweezers to gently pushing the black plug out of the white receptacle.

    • Avoid pulling the black plug out with the tweezers. It is easy for the tweezers to slip and sever the wires to the plug.

  9. Eee Pad Transformer Prime TF201 Charging Port Replacement: 9 단계, 이미지 1/2 Eee Pad Transformer Prime TF201 Charging Port Replacement: 9 단계, 이미지 2/2
    • Using a Phillips #00 screwdriver, remove six 2.5mm screws on the motherboard.

  10. Eee Pad Transformer Prime TF201 Charging Port Replacement: 10 단계, 이미지 1/1
    • Disconnect the speaker assembly from the motherboard by using precision tweezers to unplug the white plug from its tan receptacle.

  11. Eee Pad Transformer Prime TF201 Charging Port Replacement: 11 단계, 이미지 1/3 Eee Pad Transformer Prime TF201 Charging Port Replacement: 11 단계, 이미지 2/3 Eee Pad Transformer Prime TF201 Charging Port Replacement: 11 단계, 이미지 3/3
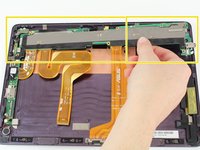
    • Disengage the right side of the motherboard by gently sliding the audio jack out of the device case.

    • With one hand, gently pull the wall of the device outward. With your other hand, pull the motherboard and audio jack to the inside.

    • Be careful to not snap the motherboard. You may notice some flexing in the motherboard as you pull the audio jack in. Keep this flexing to a minimum.

    • Remove the motherboard by lifting the right side, and sliding the motherboard slightly to the right to free the left edge.

    • Do not completely separate the motherboard from the case, as it is still connected to the case with tape and ribbon cables.

  12. Eee Pad Transformer Prime TF201 Charging Port Replacement: 12 단계, 이미지 1/3 Eee Pad Transformer Prime TF201 Charging Port Replacement: 12 단계, 이미지 2/3 Eee Pad Transformer Prime TF201 Charging Port Replacement: 12 단계, 이미지 3/3
    • Disengage the camera connections and yellow tape by gently pulling up on the motherboard while holding the yellow tape and camera connections down.

    • You will need to align the camera connections so they re-engage one another during reassembly.

    • A black piece of tape covers the bottom of the motherboard. Do not remove the black tape from the motherboard, only the yellow tape from the black tape.

    • Fold the motherboard toward you 180 degrees and set it down in the middle of the case.

    • In this position, two ribbon cable ports covered by yellow tape should be visible on the motherboard.

  13. Eee Pad Transformer Prime TF201 Charging Port Replacement: 13 단계, 이미지 1/3 Eee Pad Transformer Prime TF201 Charging Port Replacement: 13 단계, 이미지 2/3 Eee Pad Transformer Prime TF201 Charging Port Replacement: 13 단계, 이미지 3/3
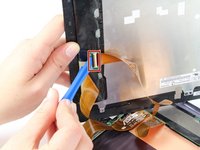
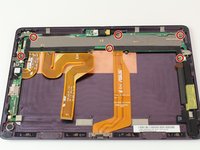
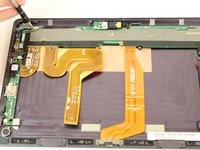
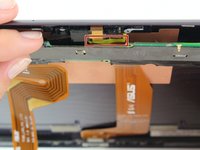
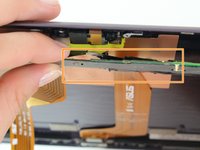
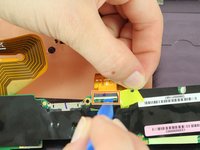
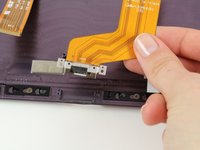
    • With precision tweezers, peel back the yellow tape in the center of the motherboard to expose the ribbon cable to the charging port.

    • Leave the right hand side of the yellow tape attached, as you will need to recover the connection during reassembly.

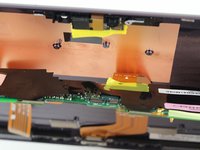
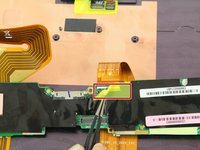
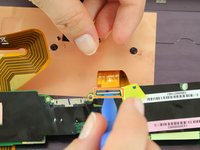
    • Lift the tan tab on the back of the ribbon cable port upward 90 degrees with a narrow plastic opening tool.

    • Pull the ribbon cable out of the port, freeing it from the motherboard.

  14. Eee Pad Transformer Prime TF201 Charging Port Replacement: 14 단계, 이미지 1/3 Eee Pad Transformer Prime TF201 Charging Port Replacement: 14 단계, 이미지 2/3 Eee Pad Transformer Prime TF201 Charging Port Replacement: 14 단계, 이미지 3/3
    • With a Philips #00 screwdriver, remove the two 2.5mm screws on the charging receptacle.

    • Remove the charging receptacle and ribbon cable.

    • The ribbon cable and receptacle is considered one piece, and replacement parts are sold as one unit.

결론

To reassemble your device, follow these instructions in reverse order.

Aaron Morland

회원 가입일: 10/06/16

346 평판

안내서 3개 작성하였습니다

Cal Poly, Team 10-1, Livingston Fall 2016 Cal Poly, Team 10-1, Livingston Fall 2016 회원

CPSU-LIVINGSTON-F16S10G1

2 회원들

안내서 12개 작성하였습니다

댓글 한 개

On my TF201 it says always “not charging” when i plug the charger. But the Amp-meter shows 900mA and the charging process is fine. What's the issue?

K. Bez - 답글

댓글 쓰기

조회 통계:

24 시간 전: 0

7일 전: 5

30일 전: 15

전체 시간: 2,379