주요 콘텐츠로 건너뛰기

Electric Lint Remover Blade Replacement

필요한 것

  1. Electric Lint Remover Blade Replacement, Blade: 1 단계, 이미지 1/2 Electric Lint Remover Blade Replacement, Blade: 1 단계, 이미지 2/2
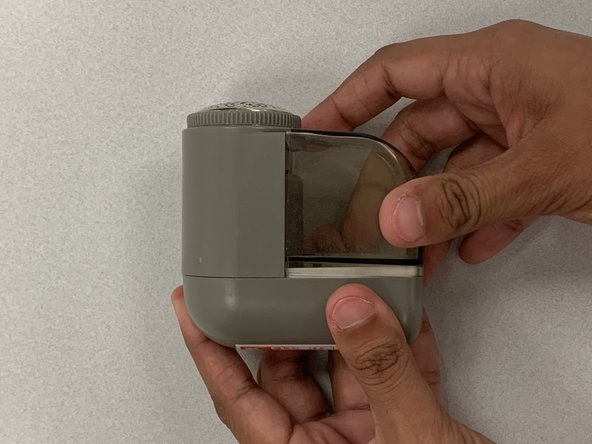
    • Remove the lint container by sliding to the right until it clicks off.

    • Remove any lint from the lint container for a clean process.

  2. Electric Lint Remover Blade Replacement: 2 단계, 이미지 1/3 Electric Lint Remover Blade Replacement: 2 단계, 이미지 2/3 Electric Lint Remover Blade Replacement: 2 단계, 이미지 3/3
    • Rotate the perforated cap counterclockwise until it can be removed.

  3. Electric Lint Remover Blade Replacement: 3 단계, 이미지 1/2 Electric Lint Remover Blade Replacement: 3 단계, 이미지 2/2
    • Use your flathead screwdriver to get in between the device and the blades.

    • Push the plastic blade holder outward from the device until it pops off.

  4. Electric Lint Remover Blade Replacement: 4 단계, 이미지 1/2 Electric Lint Remover Blade Replacement: 4 단계, 이미지 2/2
    • Lift the wire out of the defective blade's hole, using the flathead screwdriver.

  5. Electric Lint Remover Blade Replacement: 5 단계, 이미지 1/3 Electric Lint Remover Blade Replacement: 5 단계, 이미지 2/3 Electric Lint Remover Blade Replacement: 5 단계, 이미지 3/3
    • Insert the replacement blade into the empty slot.

    • Caution: pinching the replacement blade from surface may result in injury.

  6. Electric Lint Remover Blade Replacement: 6 단계, 이미지 1/2 Electric Lint Remover Blade Replacement: 6 단계, 이미지 2/2
    • Flip the cap onto its backside and firmly hold down the side with the loose blade.

    • Pull back the wire using your fingers, and insert wire back into the blade hole.

  7. Electric Lint Remover Blade Replacement: 7 단계, 이미지 1/3 Electric Lint Remover Blade Replacement: 7 단계, 이미지 2/3 Electric Lint Remover Blade Replacement: 7 단계, 이미지 3/3
    • Insert the plastic blade holder back on the shaft of the device, by aligning the hexagonal hole on the cap with the shaft.

    • Press down gently on the plastic blade cap.

    • Caution: Make sure to press on the cap and not on the blades, otherwise action may cause injury.

  8. Electric Lint Remover Blade Replacement: 8 단계, 이미지 1/2 Electric Lint Remover Blade Replacement: 8 단계, 이미지 2/2
    • Place perforated cap on top of the blade cap and turn clockwise until tight.

  9. Electric Lint Remover Blade Replacement: 9 단계, 이미지 1/2 Electric Lint Remover Blade Replacement: 9 단계, 이미지 2/2
    • Slide the lint container to the left and press until it clicks into place.

결론

We hope this guide helped you. Happy Fixing!

Chris Koenig

회원 가입일: 10/03/23

169 평판

안내서 1개 작성함

CSU Los Angeles, Team 9-4, Ribeiro Fall 2023 CSU Los Angeles, Team 9-4, Ribeiro Fall 2023 회원

CSULA-RIBEIRO-F23S9G4

3 회원들

안내서 1개 작성하였습니다

댓글 0개

댓글 쓰기

조회 통계:

24 시간 전: 0

7일 전: 6

30일 전: 43

전체 시간: 170