주요 콘텐츠로 건너뛰기

Ematic Funtab FTABXXX Battery Replacement

필요한 것

  1. Ematic Funtab FTABXXX Battery Replacement, Battery: 1 단계, 이미지 1/2 Ematic Funtab FTABXXX Battery Replacement, Battery: 1 단계, 이미지 2/2
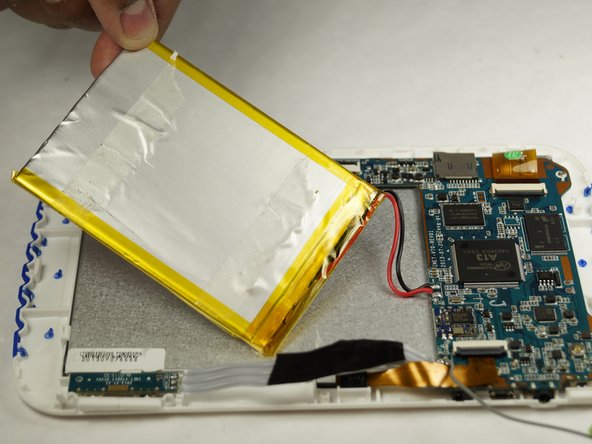
    • First, be sure to power off the device.

    • Carefully pry open the device. Note the plastic tabs in the image that hold the device together.

  2. Ematic Funtab FTABXXX Battery Replacement: 2 단계, 이미지 1/1
    • Locate the battery. Generally located in the middle of the device.

  3. Ematic Funtab FTABXXX Battery Replacement: 3 단계, 이미지 1/2 Ematic Funtab FTABXXX Battery Replacement: 3 단계, 이미지 2/2
    • Carefully pry off the battery from the display screen. This will be slight difficult since the battery is held onto the back of the display by adhesive.

  4. Ematic Funtab FTABXXX Battery Replacement: 4 단계, 이미지 1/1
    • Locate the red and black wire that runs from the battery and to the motherboard. Note the location of the wires, and carefully remove the soldered wires.

  5. Ematic Funtab FTABXXX Battery Replacement: 5 단계, 이미지 1/1
    • Attach the new battery to the same location as the old battery via adhesive.

    • Then, carefully solder the red wire to the '+' symbol on the motherboard and the black wire to the '-' symbol.

  6. Ematic Funtab FTABXXX Battery Replacement: 6 단계, 이미지 1/1
    • Once the solder has cooled, snap the front and back bezels together. Be sure to charge the new battery.

결론

To reassemble your device, follow these instructions in reverse order.

Robert Zarobinski

회원 가입일: 01/21/15

269 평판

안내서 2개 작성하였습니다

USF Tampa, Team 6-3, Brown Winter 2015 USF Tampa, Team 6-3, Brown Winter 2015 회원

USFT-BROWN-W15S6G3

3 회원들

안내서 10개 작성하였습니다

댓글 0개

댓글 쓰기

조회 통계:

24 시간 전: 0

7일 전: 0

30일 전: 0

전체 시간: 352