이 버전에는 잘못된 편집 사항이 있을 수 있습니다. 최신 확인된 스냅샷으로 전환하십시오.
필요한 것
-
이 단계는 번역되지 않았습니다. 번역을 도와주십시오
-
Remove the back panel by inserting your fingers into the indentations next to the tabs. Press the tabs inward towards each other while pulling the back panel toward you.
-
-
이 단계는 번역되지 않았습니다. 번역을 도와주십시오
-
Using the T10 Torx Security Bit Screwdriver, unscrew the screws on the upper left and right corners of the inner panel to remove the inner back panel.
-
-
이 단계는 번역되지 않았습니다. 번역을 도와주십시오
-
Press down on the two plastic hinges to remove the upper portion of printer.
-
-
이 단계는 번역되지 않았습니다. 번역을 도와주십시오
-
Grasp the plastic plug on the end of the speaker wire, then gently pull the plug away from the printer until the wire is removed.
-
-
-
이 단계는 번역되지 않았습니다. 번역을 도와주십시오
-
Rotate the printer so the paper tray is facing towards you.
-
Gently lift the scanner tray up and away from the printer.
-
Press the gray plastic tabs inward to release the tabs from the printer.
-
-
이 단계는 번역되지 않았습니다. 번역을 도와주십시오
-
Returning to the back of the printer, remove the scanner from the back hinges.
-
-
이 단계는 번역되지 않았습니다. 번역을 도와주십시오
-
Gently grasp and unplug the two white ribbon cables from the printer body.
-
-
이 단계는 번역되지 않았습니다. 번역을 도와주십시오
-
Unplug the white plastic multi-wire connector (with orange, black, red, and brown wires) from it's port.
-
-
이 단계는 번역되지 않았습니다. 번역을 도와주십시오
-
Detach the scanner tray from the printer by lifting the scanner tray off the printer body.
-
-
이 단계는 번역되지 않았습니다. 번역을 도와주십시오
-
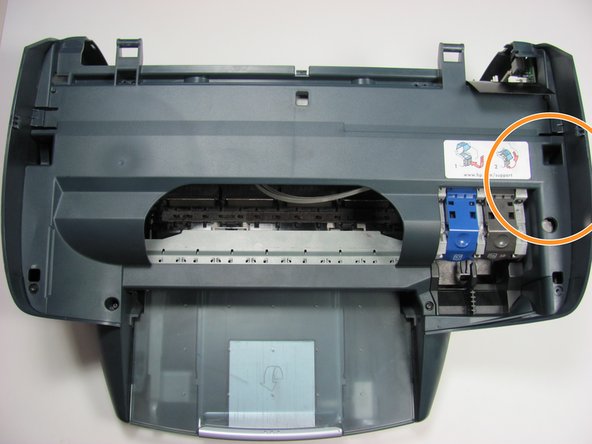
Locate the panel labeled with a HP support link sticker.
-
Release the tab by the support link sticker.
-
Remove the black screw below the tab.
-
-
이 단계는 번역되지 않았습니다. 번역을 도와주십시오
-
Unhook the encoder strip from its small silver hooks and remove it from the printer.
-
To replace, feed the new encoder strip through the silver hooks.
-


다른 4명이 해당 안내서를 완성하였습니다.
팀

Cal Poly, Team 12-31, Maness Spring 2011 Cal Poly, Team 12-31, Maness Spring 2011 회원
CPSU-MANESS-S11S12G31
5 회원들
안내서 9개 작성하였습니다