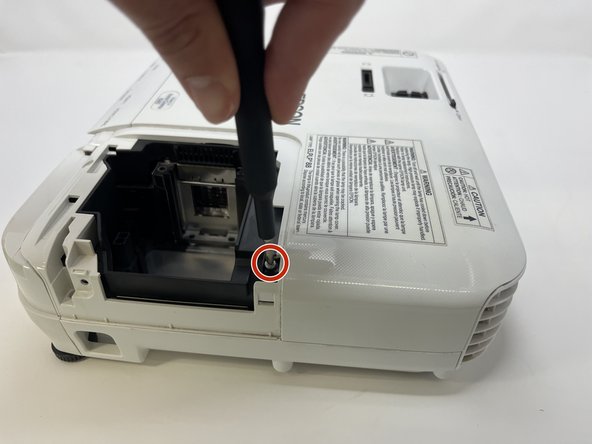
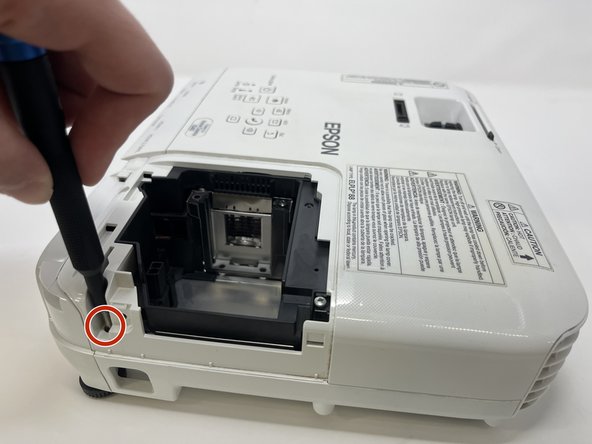
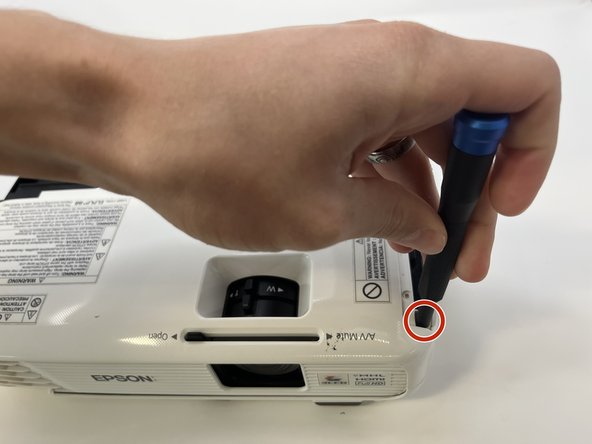
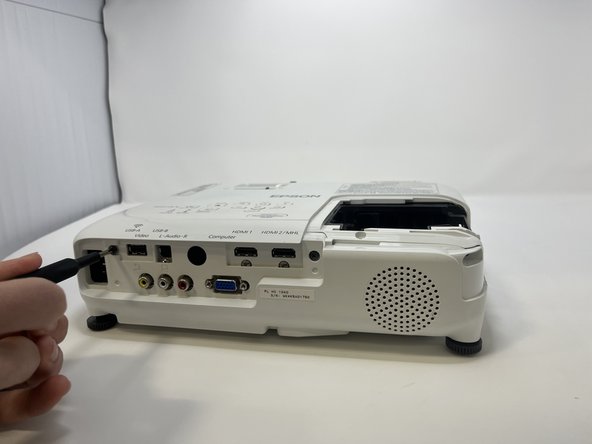
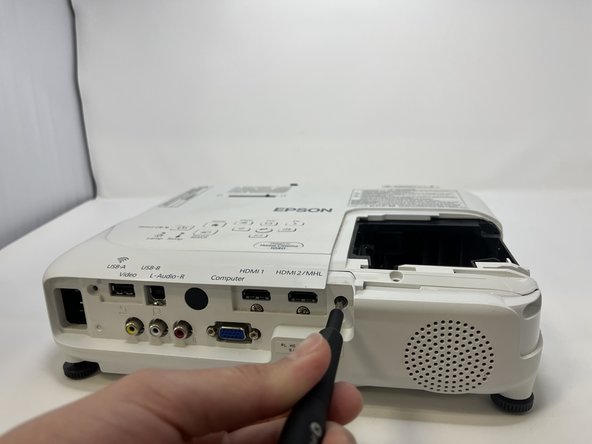
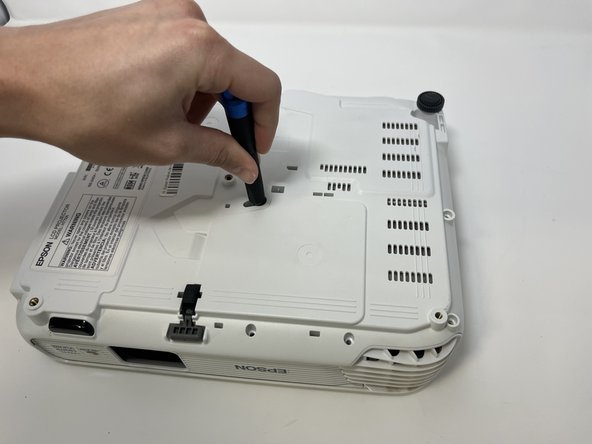
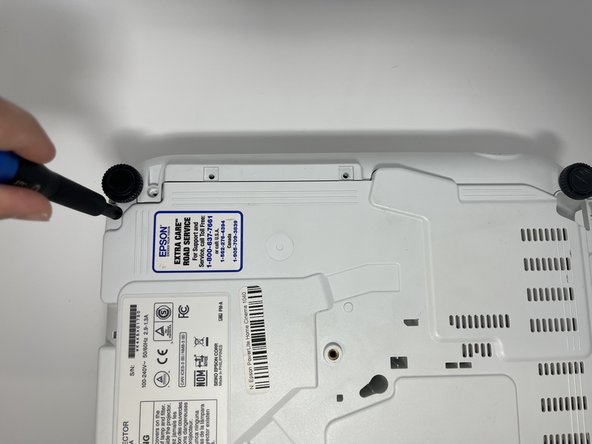
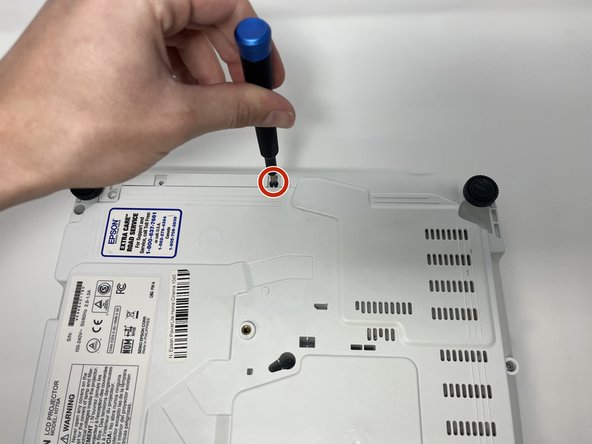
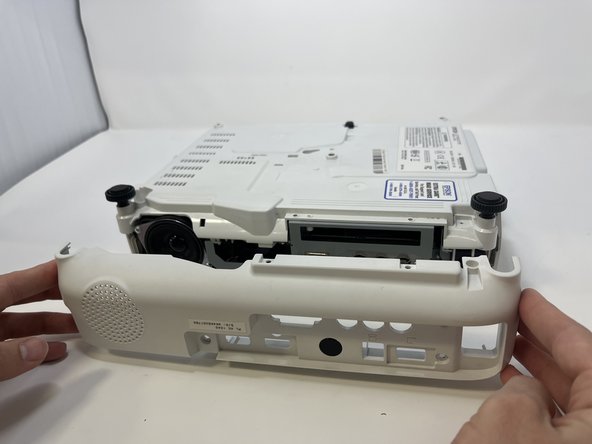
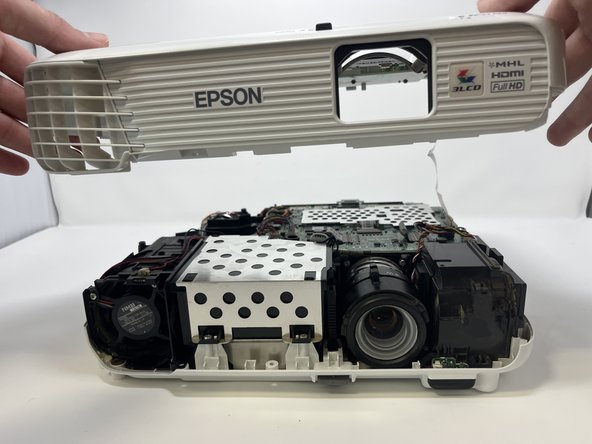
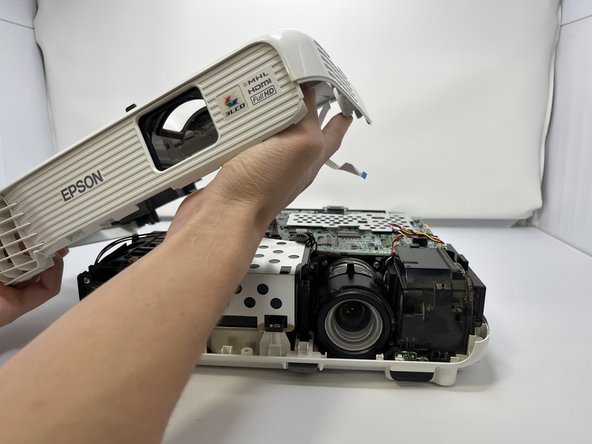
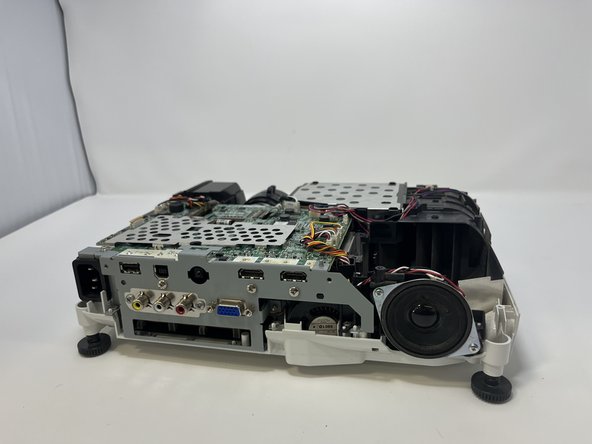
주요 콘텐츠로 건너뛰기

Epson PowerLite Home Cinema 1040 Removing Housing

필요한 것

  1. Epson PowerLite Home Cinema 1040 Removing Housing, Removing Housing: 1 단계, 이미지 1/1
    • Turn off the projector and unplug the power cord.

    • Allow the projector lamp to cool down for an hour or more to prevent injury.

  2. Epson PowerLite Home Cinema 1040 Removing Housing: 2 단계, 이미지 1/3 Epson PowerLite Home Cinema 1040 Removing Housing: 2 단계, 이미지 2/3 Epson PowerLite Home Cinema 1040 Removing Housing: 2 단계, 이미지 3/3
    • Use the Phillips #2 screwdriver to remove the 9 mm screw that secures the lamp cover.

    • Slide off the lamp cover and remove it from the projector.

    • If the lamp is broken, glass fragments may be found when removing the lamp cover. Be careful when removing the lamp cover and when removing the glass.

  3. Epson PowerLite Home Cinema 1040 Removing Housing: 3 단계, 이미지 1/3 Epson PowerLite Home Cinema 1040 Removing Housing: 3 단계, 이미지 2/3 Epson PowerLite Home Cinema 1040 Removing Housing: 3 단계, 이미지 3/3
    • Use the Phillips #1 (PH1) screwdriver to remove the three 7 mm screws around the perimeter of the lens cover.

  4. Epson PowerLite Home Cinema 1040 Removing Housing: 4 단계, 이미지 1/3 Epson PowerLite Home Cinema 1040 Removing Housing: 4 단계, 이미지 2/3 Epson PowerLite Home Cinema 1040 Removing Housing: 4 단계, 이미지 3/3
    • Remove the air filter cover.

    • Remove the two PH1 7mm screws from under the air filter cover.

  5. Epson PowerLite Home Cinema 1040 Removing Housing: 5 단계, 이미지 1/3 Epson PowerLite Home Cinema 1040 Removing Housing: 5 단계, 이미지 2/3 Epson PowerLite Home Cinema 1040 Removing Housing: 5 단계, 이미지 3/3
    • Remove the two black, PH1, 6mm screws.

  6. Epson PowerLite Home Cinema 1040 Removing Housing: 6 단계, 이미지 1/3 Epson PowerLite Home Cinema 1040 Removing Housing: 6 단계, 이미지 2/3 Epson PowerLite Home Cinema 1040 Removing Housing: 6 단계, 이미지 3/3
    • Flip the projector so the bottom is exposed.

    • Remove seven PH1 7mm screws on the outer rim of the projector.

    • Some screws are located deeper in the housing and a bit extension or longer screwdriver may be required.

  7. Epson PowerLite Home Cinema 1040 Removing Housing: 7 단계, 이미지 1/2 Epson PowerLite Home Cinema 1040 Removing Housing: 7 단계, 이미지 2/2
    • Continuing on the bottom, remove the two black, PH1, 6mm screws.

  8. Epson PowerLite Home Cinema 1040 Removing Housing: 8 단계, 이미지 1/2 Epson PowerLite Home Cinema 1040 Removing Housing: 8 단계, 이미지 2/2
    • Remove the cover on the backside of the projector where the inputs are located.

  9. Epson PowerLite Home Cinema 1040 Removing Housing: 9 단계, 이미지 1/3 Epson PowerLite Home Cinema 1040 Removing Housing: 9 단계, 이미지 2/3 Epson PowerLite Home Cinema 1040 Removing Housing: 9 단계, 이미지 3/3
    • Pull the top half of the housing upwards and rest it on the side.

    • Be careful to not pull upwards too hard. The top is still connected by a thin electric strip.

  10. Epson PowerLite Home Cinema 1040 Removing Housing: 10 단계, 이미지 1/3 Epson PowerLite Home Cinema 1040 Removing Housing: 10 단계, 이미지 2/3 Epson PowerLite Home Cinema 1040 Removing Housing: 10 단계, 이미지 3/3
    • Using your fingernail or another thin wedging tool, disconnect the electronic strip from the motherboard.

    • Remove the top half of the projector housing completely and set it to the side.

결론

To reassemble your device, follow these instructions in reverse order.

Connor Didericksen

회원 가입일: 02/09/23

721 평판

안내서 6개 작성하였습니다

Utah Tech University, Team 1-6, McMurrin Spring 2023 Utah Tech University, Team 1-6, McMurrin Spring 2023 회원

UTAHTECH-MCMURRIN-S23S1G6

3 회원들

안내서 6개 작성하였습니다

댓글 0개

댓글 쓰기

조회 통계:

24 시간 전: 0

7일 전: 1

30일 전: 15

전체 시간: 180